For security reasons, avoid saving your password on shared devices.
If you encounter any login issues, contact your organization’s technical support
# Dashboard [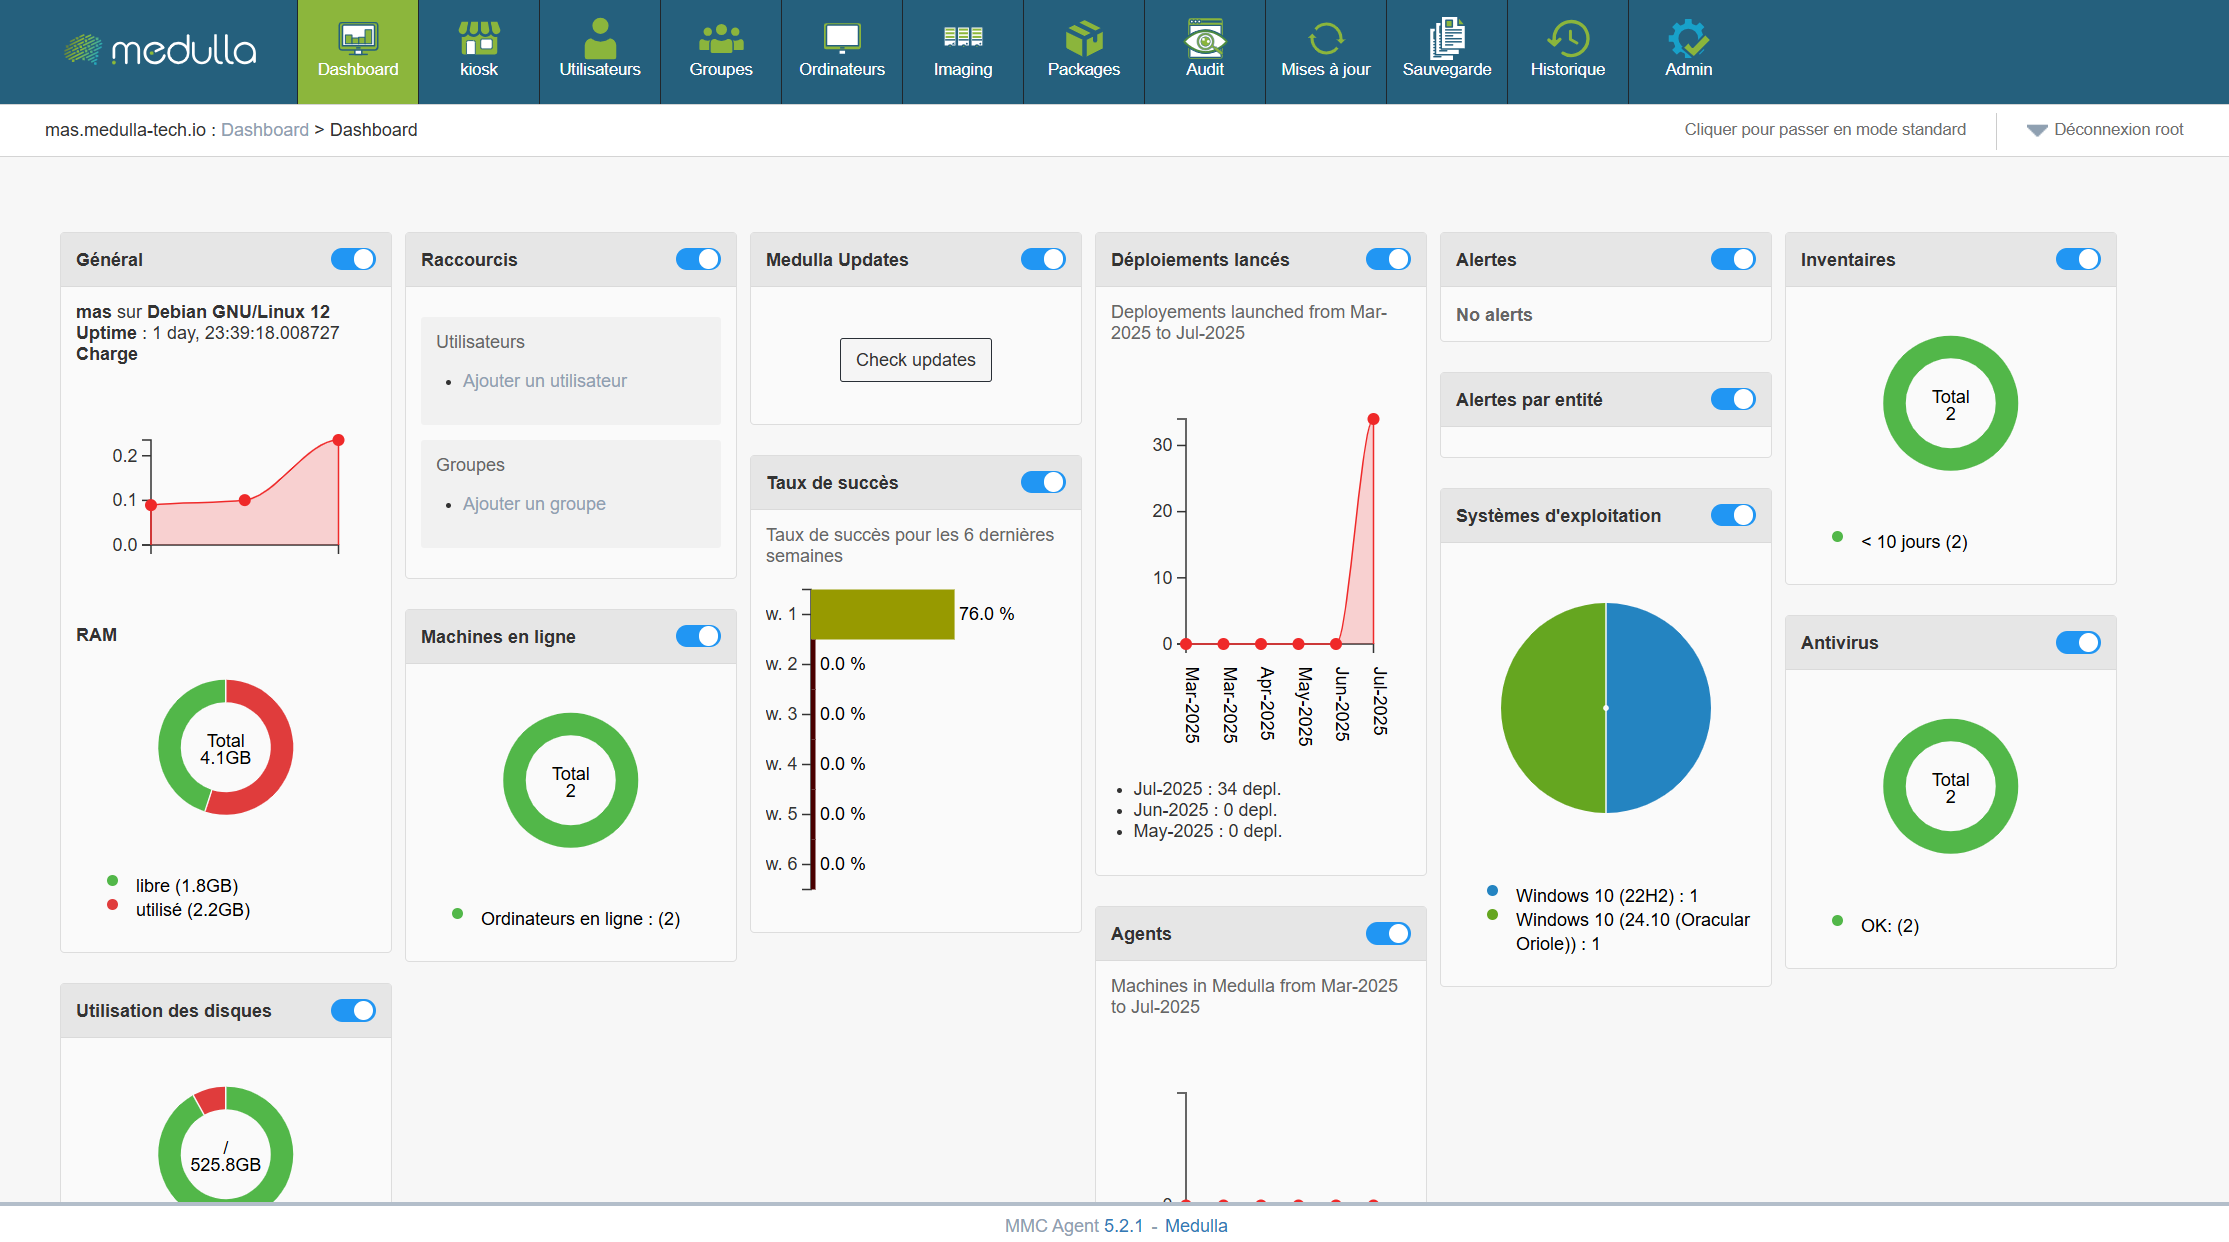](https://docs.medulla-tech.io/uploads/images/gallery/2025-07/abmVy8L9cdCszgid-image.png) The Medulla dashboard allows you to monitor the real-time status of your infrastructure using customizable widgets. You can move, resize, and arrange the widgets as you wish. Each widget also has a button to show or hide it, depending on your needs. Some widgets include dynamic charts for a better understanding of the data, updating in real time. The following widgets allow you to create static groups directly so you can perform actions on them by clicking: Inventory Widget, Operating System, Online Machines, AntivirusIn summary, the **Dashboard** is your centralized hub for managing and monitoring the status of your IT infrastructure. It is designed to be **flexible and responsive**, providing an overview of your machines’ and resources’ performance while allowing you to react quickly to any alerts or necessary updates.
With this set of tools and **graphical visualizations**, the dashboard gives you optimal control to **manage your systems efficiently**, while providing a clear and detailed view of your entire IT environment.
# Adding a computer in Medulla Once logged in to your interface, go to the **"Admin" > "Entity Management"** view. You can download your agent directly by clicking the [](https://docs.medulla-tech.io/uploads/images/gallery/2025-09/zIcdC5dKmKRD7hpE-download.png) **"Download"** button in the **"Actions"** section on the right side of your entity. `Note: Each entity has its own agent, which helps maintain separation between entities.` [](https://docs.medulla-tech.io/uploads/images/gallery/2025-09/Bqfp5l3fGgDdkaHN-image.png) > **Important Information** > > When you install an agent on a Windows machine, it must be **restarted**; the agent **will prompt** you to restart the computer. > > Once restarted, **it**may take up to **5 minutes** for your computer **to appear**in the "Computers" section of your interface **.** > > It may take up to 20 minutes for the machine to **fully initialize** for the first time and appear as**"Online"** on your interface. [](https://docs.medulla-tech.io/uploads/images/gallery/2025-09/jmR3H7NQBA64PsRu-image.png) # Creating your first package Link to the complete package module: [https://docs.medulla-tech.io/books/medulla-guide-dutilisation-pas-a-pas/chapter/chapitre-8-packages](https://docs.medulla-tech.io/books/medulla-guide-dutilisation-pas-a-pas/chapter/chapitre-8-packages) - Creating a package involves defining an action (installation, uninstallation, script, etc.) that will be deployed on one or more workstations. The creation form allows you to precisely configure the package’s behavior and its execution options. **Here we will create a simple package, without adding a workflow, solely to install a simple application such as Notepad++.** From the main menu, go to the "Package" view, click**"Add a package"**to open the creation wizard. Next, select the source of the files to be used in the package. Four options are available: Get a Notepad++ installer, for example, then click: - **Upload from this page** Import the installation files directly from your computer. - Don’t forget to click “Submit pending files.” #### General information to provide ##### Share Select*Global Packages* to make the package visible across the entire platform, for all Entities. ##### Name Give the package a descriptive name, for example: InstallNotepad *Special characters (except: \_ and -) and accented characters are not allowed.* ##### Version Specify a version number, e.g., 1.0.0 or the Notepad++ version. ##### Description Briefly summarize the purpose of the package. ##### Operating System Select the target OS, for example:*Windows*. #### Define the technical deployment details ##### Transfer method Generally, use pushrsync (recommended): Server -> Rsync -> Machine. ##### Link to inventory Enable this option to allow tracking of the package after installation via the GLPI inventory, if desired. As you type the first three letters, autocomplete will activate. ##### You can add custom actions to the package, depending on your needs: Here, our wizard will automatically determine, based on rules, the correct command to run the installation file to install the application in silent mode. - Run a command or script (When adding a file to the "Package Source" package, our wizard automatically adds the correct command to run the setup file and install the application silently) ##### Once all sections have been configured and verified Click**Add**to save the package. It will then be accessible from the "Packages > Package List" library for use in a deployment. # Package deployment [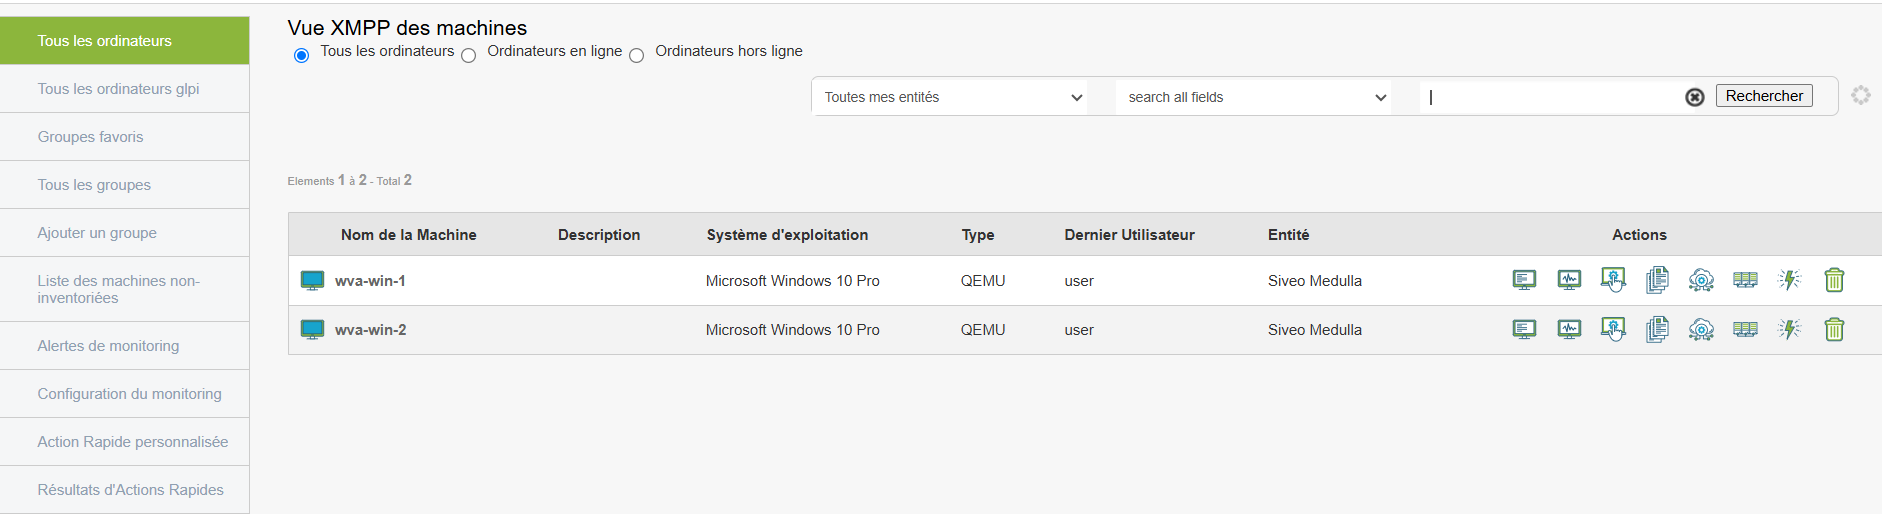](https://docs.medulla-tech.io/uploads/images/gallery/2025-09/Rb8P7M9VgW5mgR2v-image.png) Here we will deploy the package created earlier. Go to the **Computer** view **and** select a workstation. Click the deployment button:  **Software Deployment -** Remote software installation or update. Find the new package you created earlier in the package list and click the instant deployment icon: [](https://docs.medulla-tech.io/uploads/images/gallery/2025-09/8oOVX6fV55Lcy1L9-image.png)  **Run Action** - Deploys the package to the previously selected workstation. Go to the **"Audit"** view; a new row will appear. A new row appears, allowing you to track the progress of the deployment you just performed. # Track the audit of a deployment Go to the **"Audit"** view; a new line will appear. A new row appears, allowing you to track the progress of the deployment you just performed. # Create my first entity  An initial entity named after your organization will be created. To create your first sub-entity, go to the **"Admin"** module. Once in the **"Admin"** module, navigate to the "**Entity Management"** submenu on the left. [](https://docs.medulla-tech.io/uploads/images/gallery/2025-09/NSKkYlwmcMdLRReo-image.png) Click the "  " button on your entity's row to add a sub-entity. 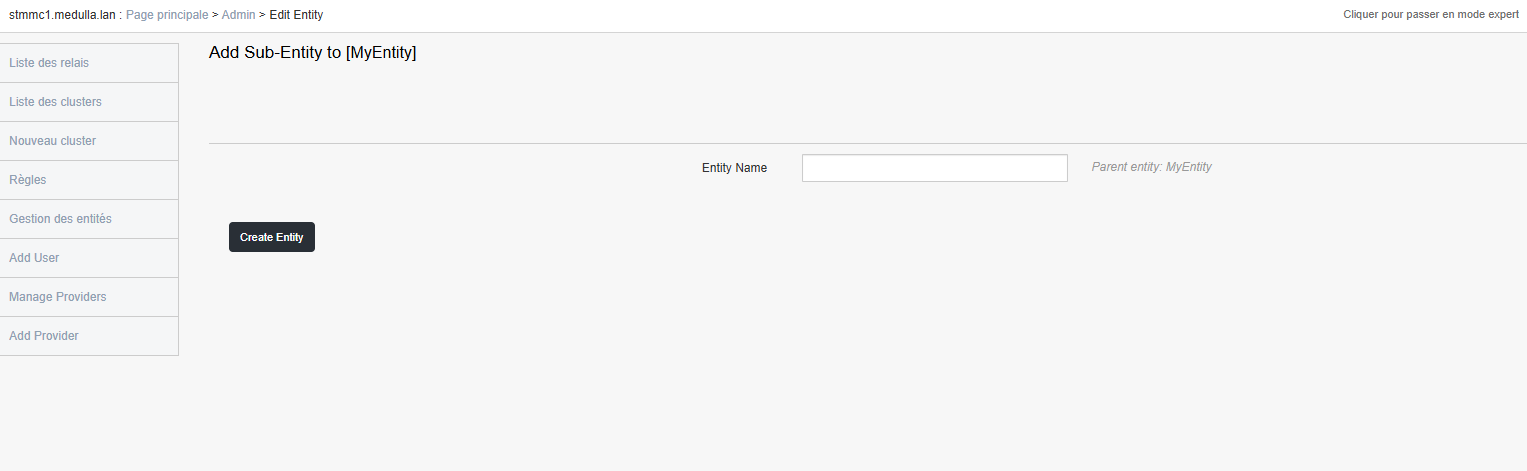 You can enter the name of your first entity belonging to your organization here; once the name is entered, click the **"Create Entity"** button **.**  You are now able to create entities and sub-entities. There is no limit to the number of entities you can create. A user who is part of the highest entity in the hierarchy can manage lower-level entities; however, the reverse is not possible, even for the entity’s Super-Admin. Two entities at the same hierarchical level remain isolated: they have access only to their own information and cannot under any circumstances view that of others, even if they are at the same level. # Add your first user  Now that you have created your first entity, it is time to define a user for it. Go to **"Add a User"** in the left-hand menu. 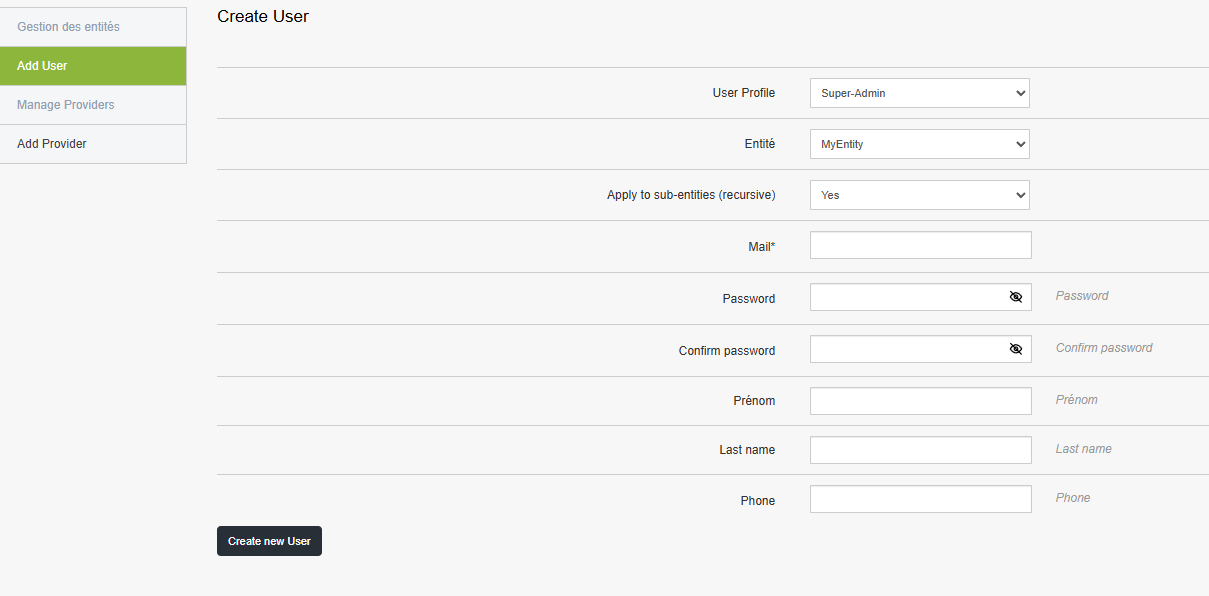 Here you have the choice between several profiles: - Super-Admin - Admin - Technician Manage them as you see fit. You can then choose: This user's entity Their recursion, whether they can see entities subordinate to them. (default: Yes) Then enter their login and personal information (authentication will be via email/password). - Email - Password - First Name - Last Name - Phone number Finally, click the **"Create a new user"** button. # Set up your first OIDC provider [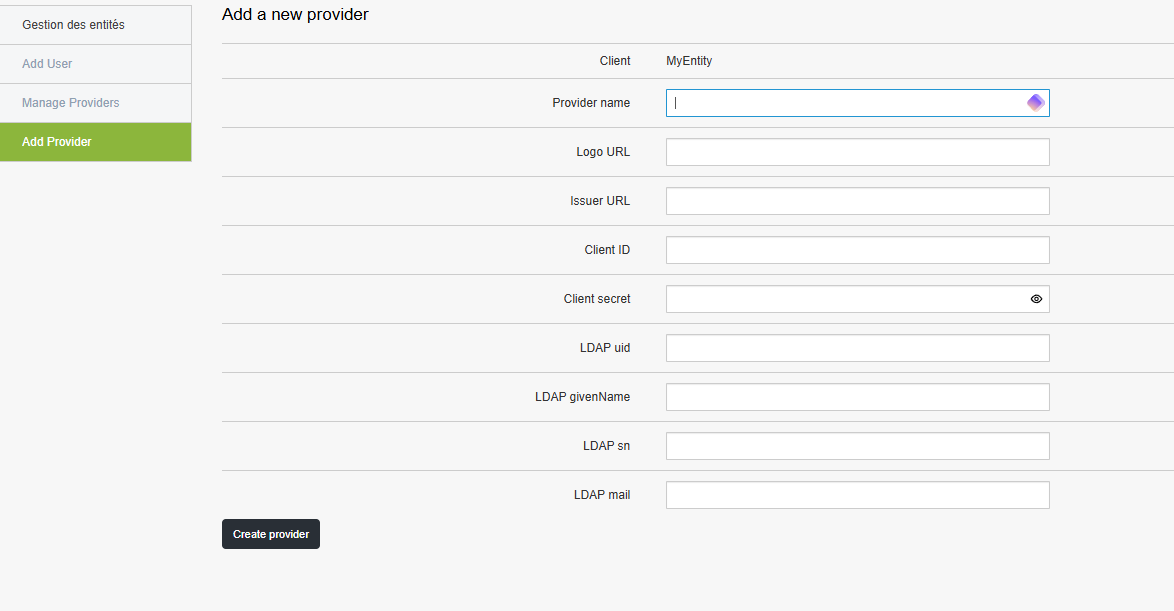](https://docs.medulla-tech.io/uploads/images/gallery/2025-09/JqUvMkgIHIhvu1Os-image.png) If you do not wish to authenticate using standard users, you can configure one or more providers (OIDC, SSO). The "provider name" field is for display purposes only; the logo is optional. Then enter the provider configuration: - URL - ID - Secret You can then configure the LDAP attributes. - uid - givenName - sn - mail