Case Studies
- Dynamic group with multiple criteria
- Application convergence (Positive convergence)
- Application convergence (Negative convergence)
- Software deployment
- Create a package
- Mastering via PXE
- Getting Started with Remote Access
- XMPP Console
- Agent inventory
- Imaging menus
Dynamic group with multiple criteria
To update applications, we can create a dynamic group using a combination of criteria:
For example, I want to create a dynamic group that contains Windows 11 Pro machines, a specific software, and a specific software version.
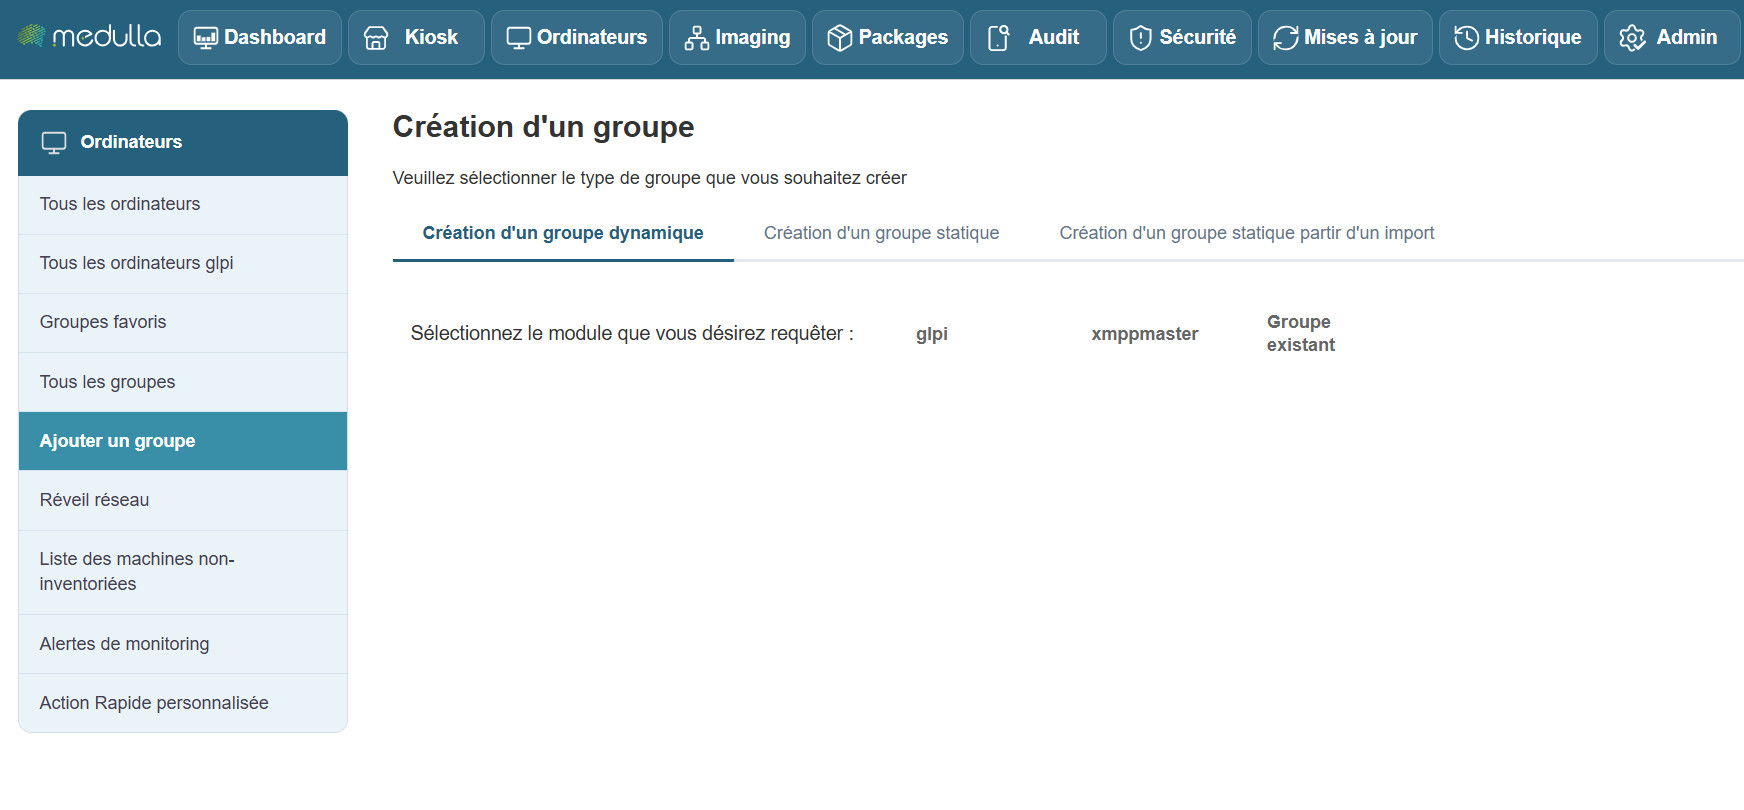
We add a section, "Installed Software," to our group:

Then another section, "Software Version":
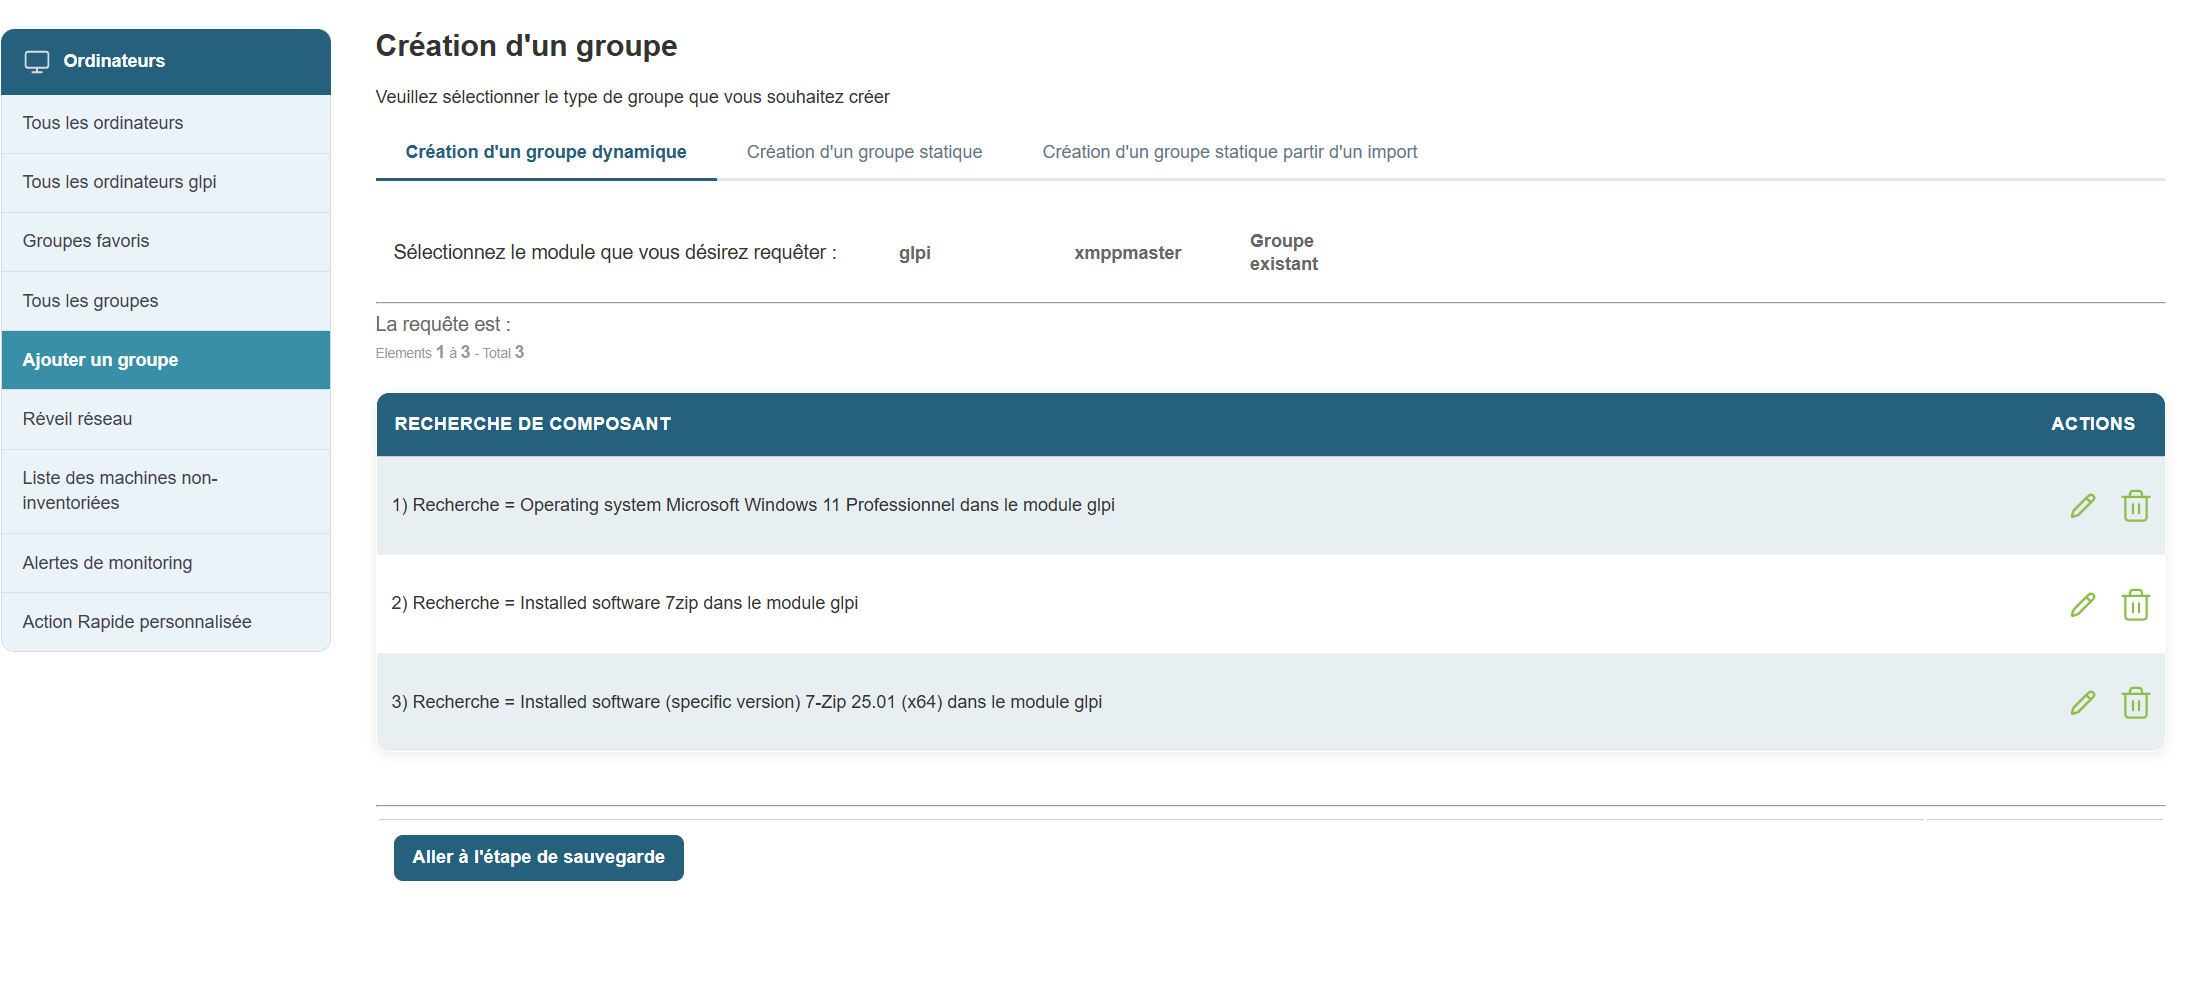
Next, we’ll save our group and orchestrate it by clicking “Go to Save Step.”
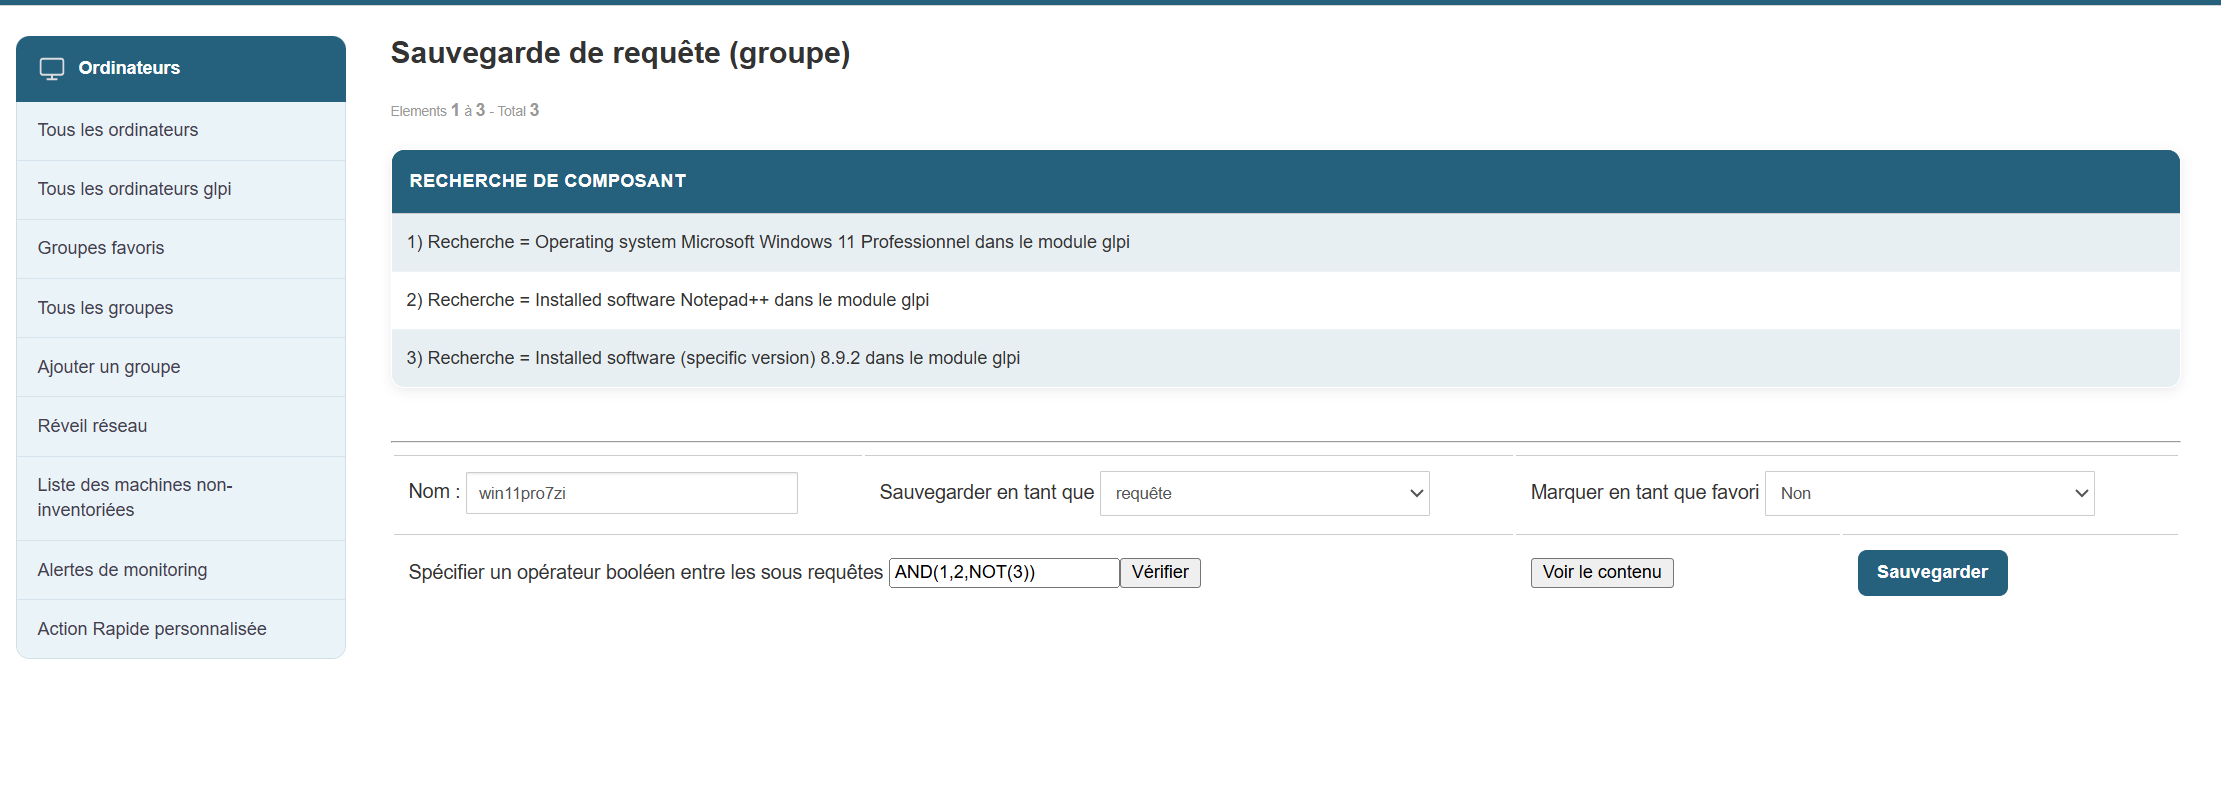
We’ll specify a Boolean operator in the sub-queries and then click “Save.”
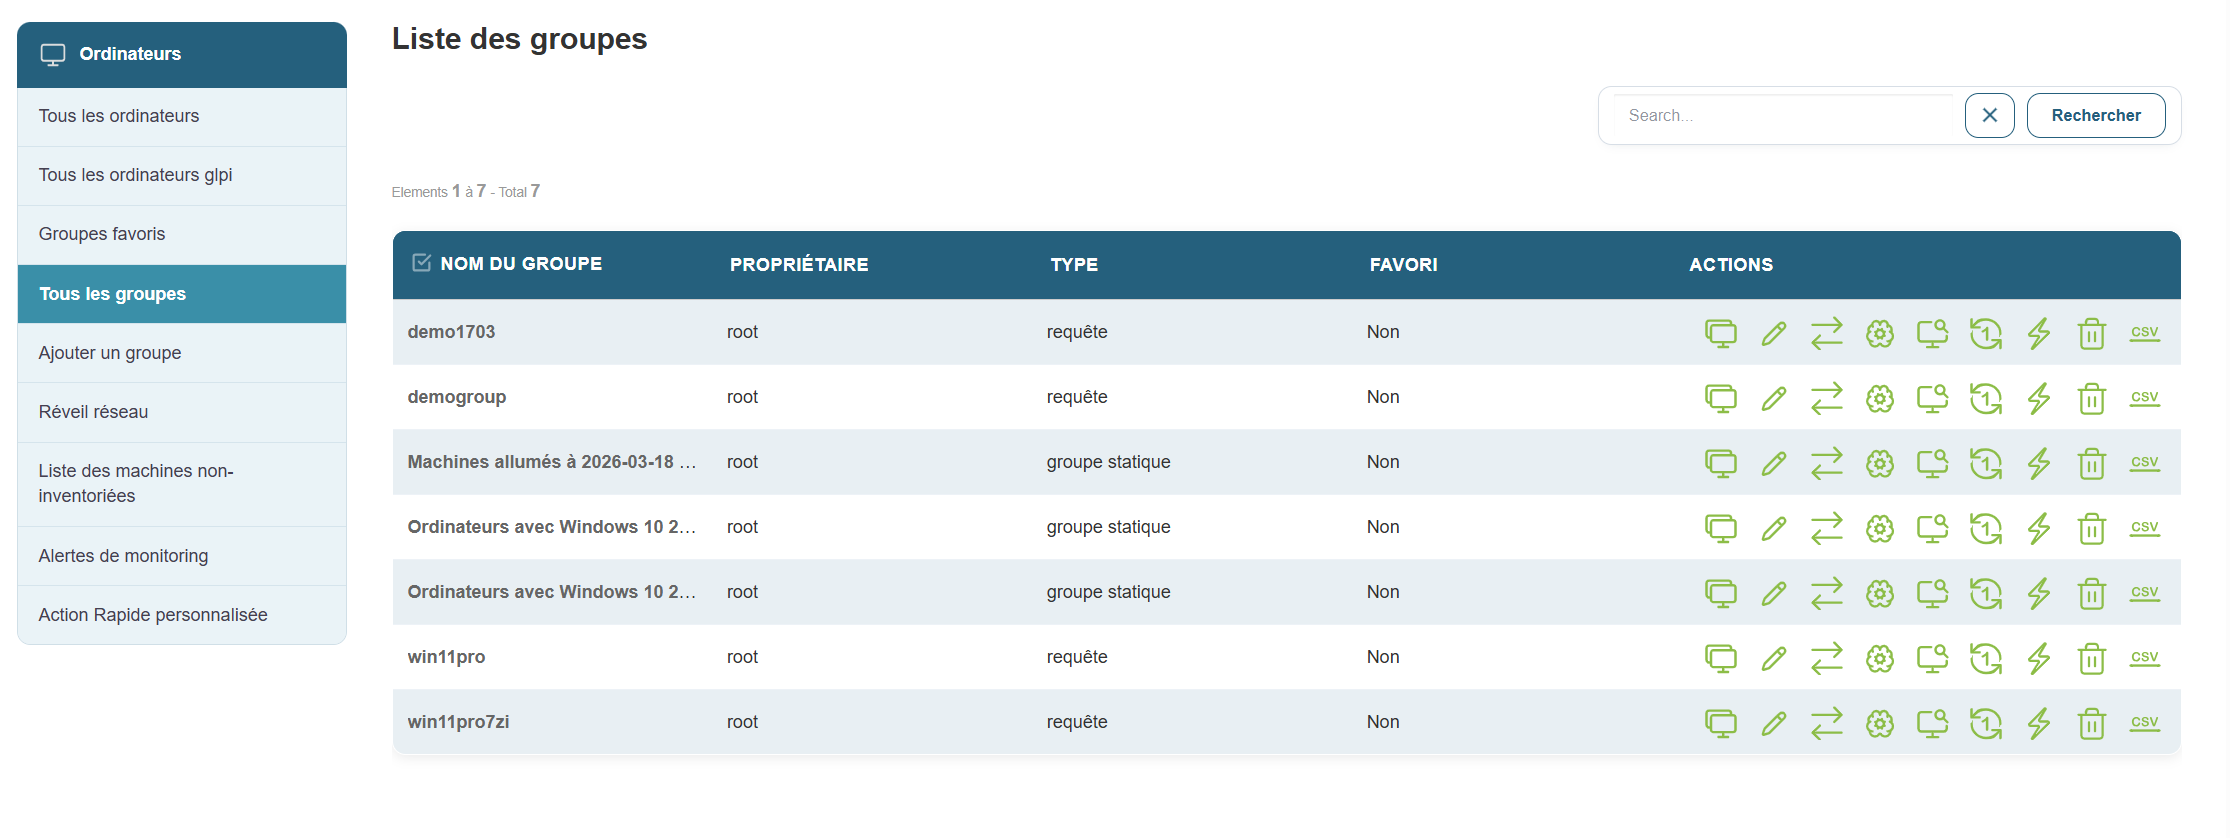
Once my group is created, I can interact with it and initiate a deployment of a new version of Notepad++.
Application convergence (Positive convergence)
From the Medulla interface, you can deploy packages to a group, whether static or dynamic.
In the case of a dynamic group, you can enable application convergence.
What is application convergence? :
Application convergence is a deployment task that repeats every 24 hours to verify that the package(s) you have defined for convergence are properly deployed; if a new workstation or an existing workstation in the group does not have the package installed, it will deploy that package.
In summary, application convergence allows you to maintain application compliance across your fleet.
How does it work? :
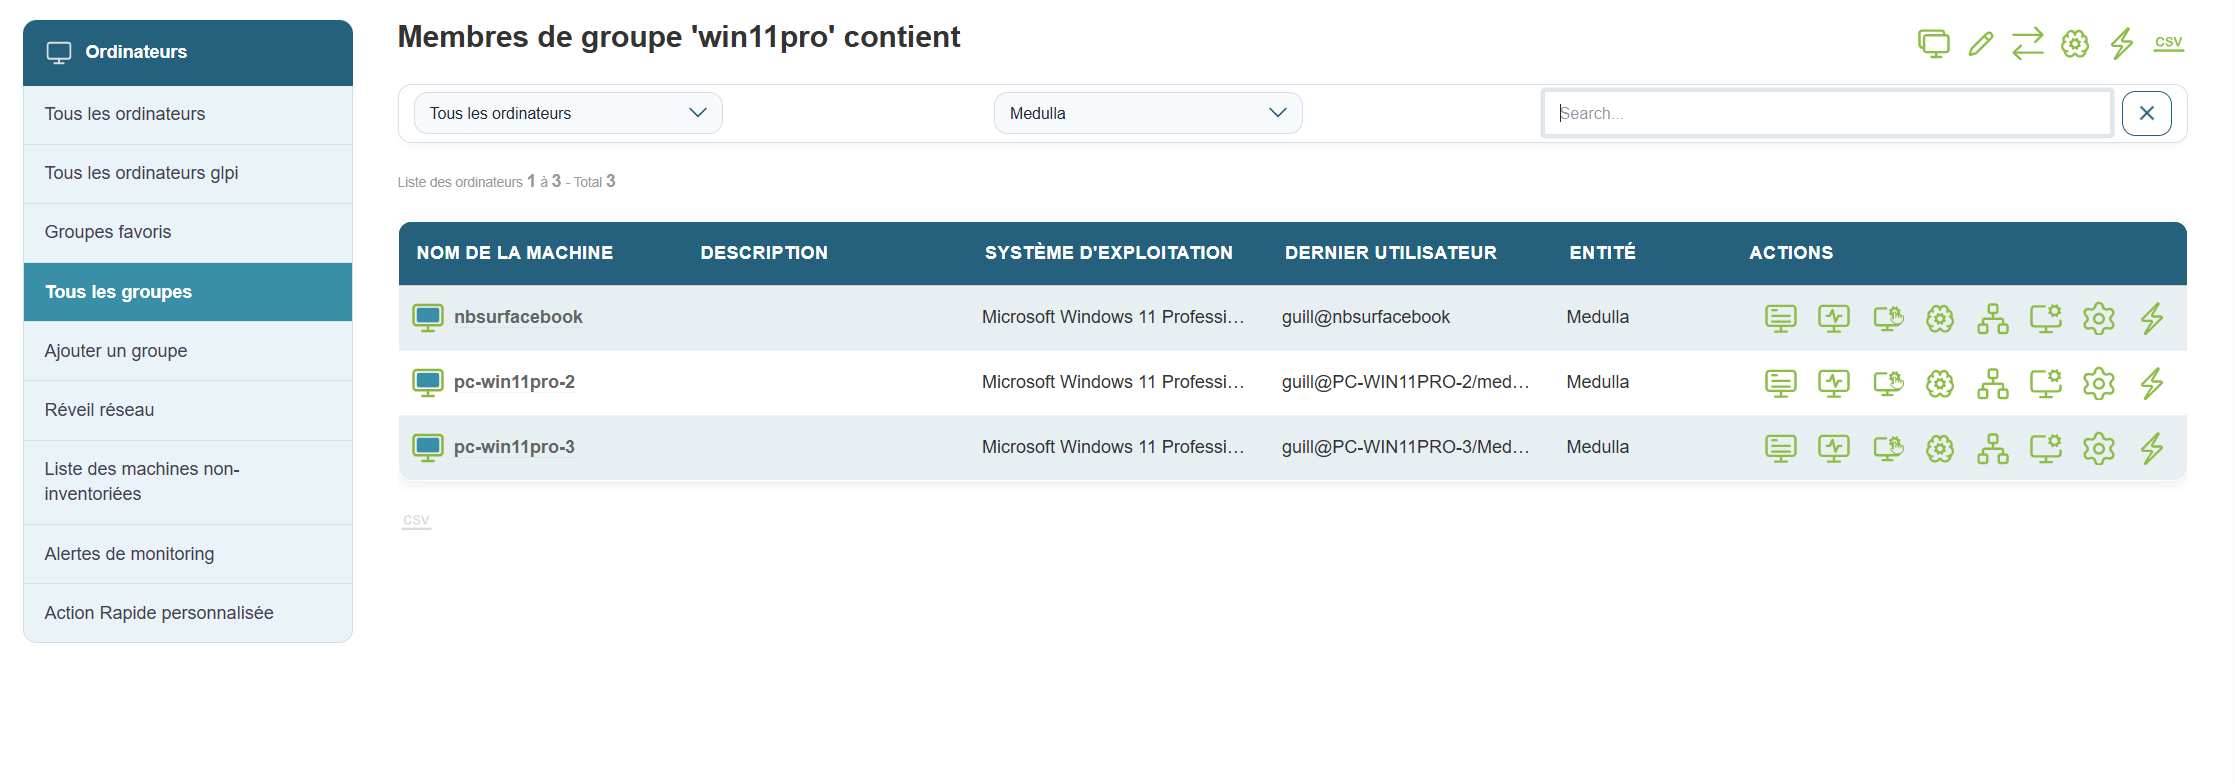
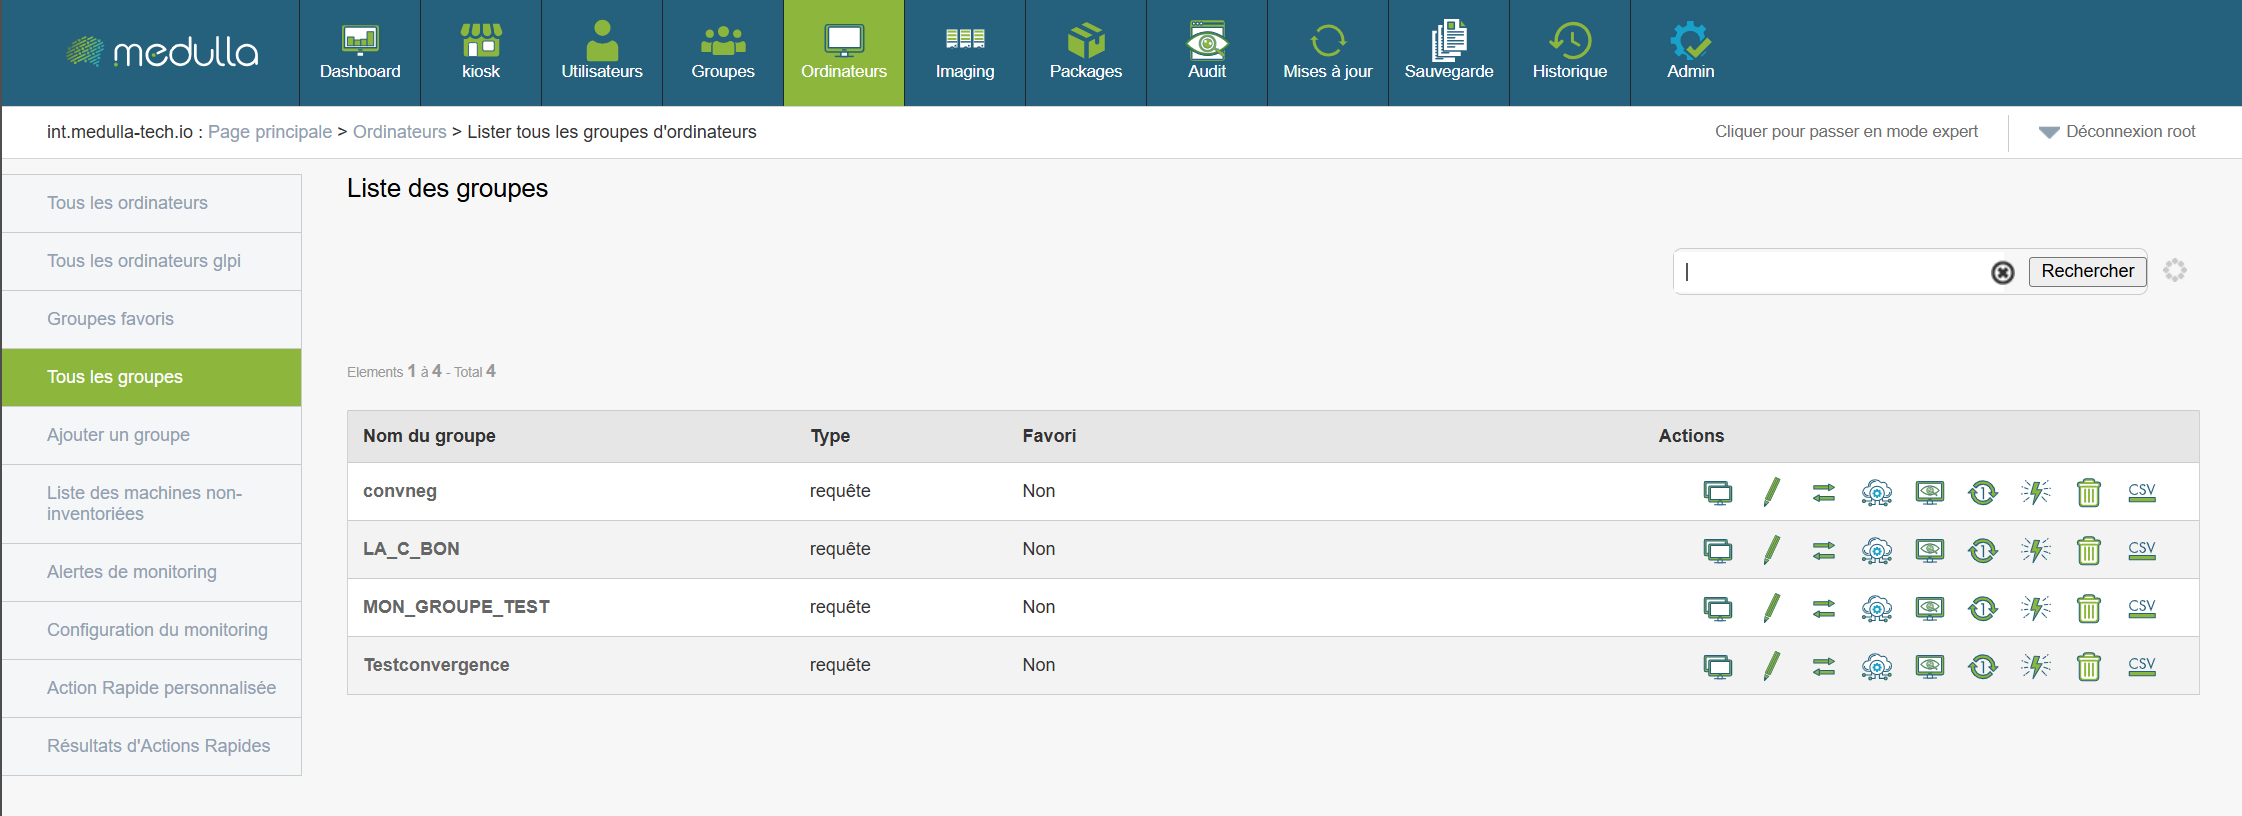
First, once in the Médulla interface, go to the Computers tab. In the left-hand menu, select the group for which you want to enable application convergence.
Click the Deployment button: ![]()
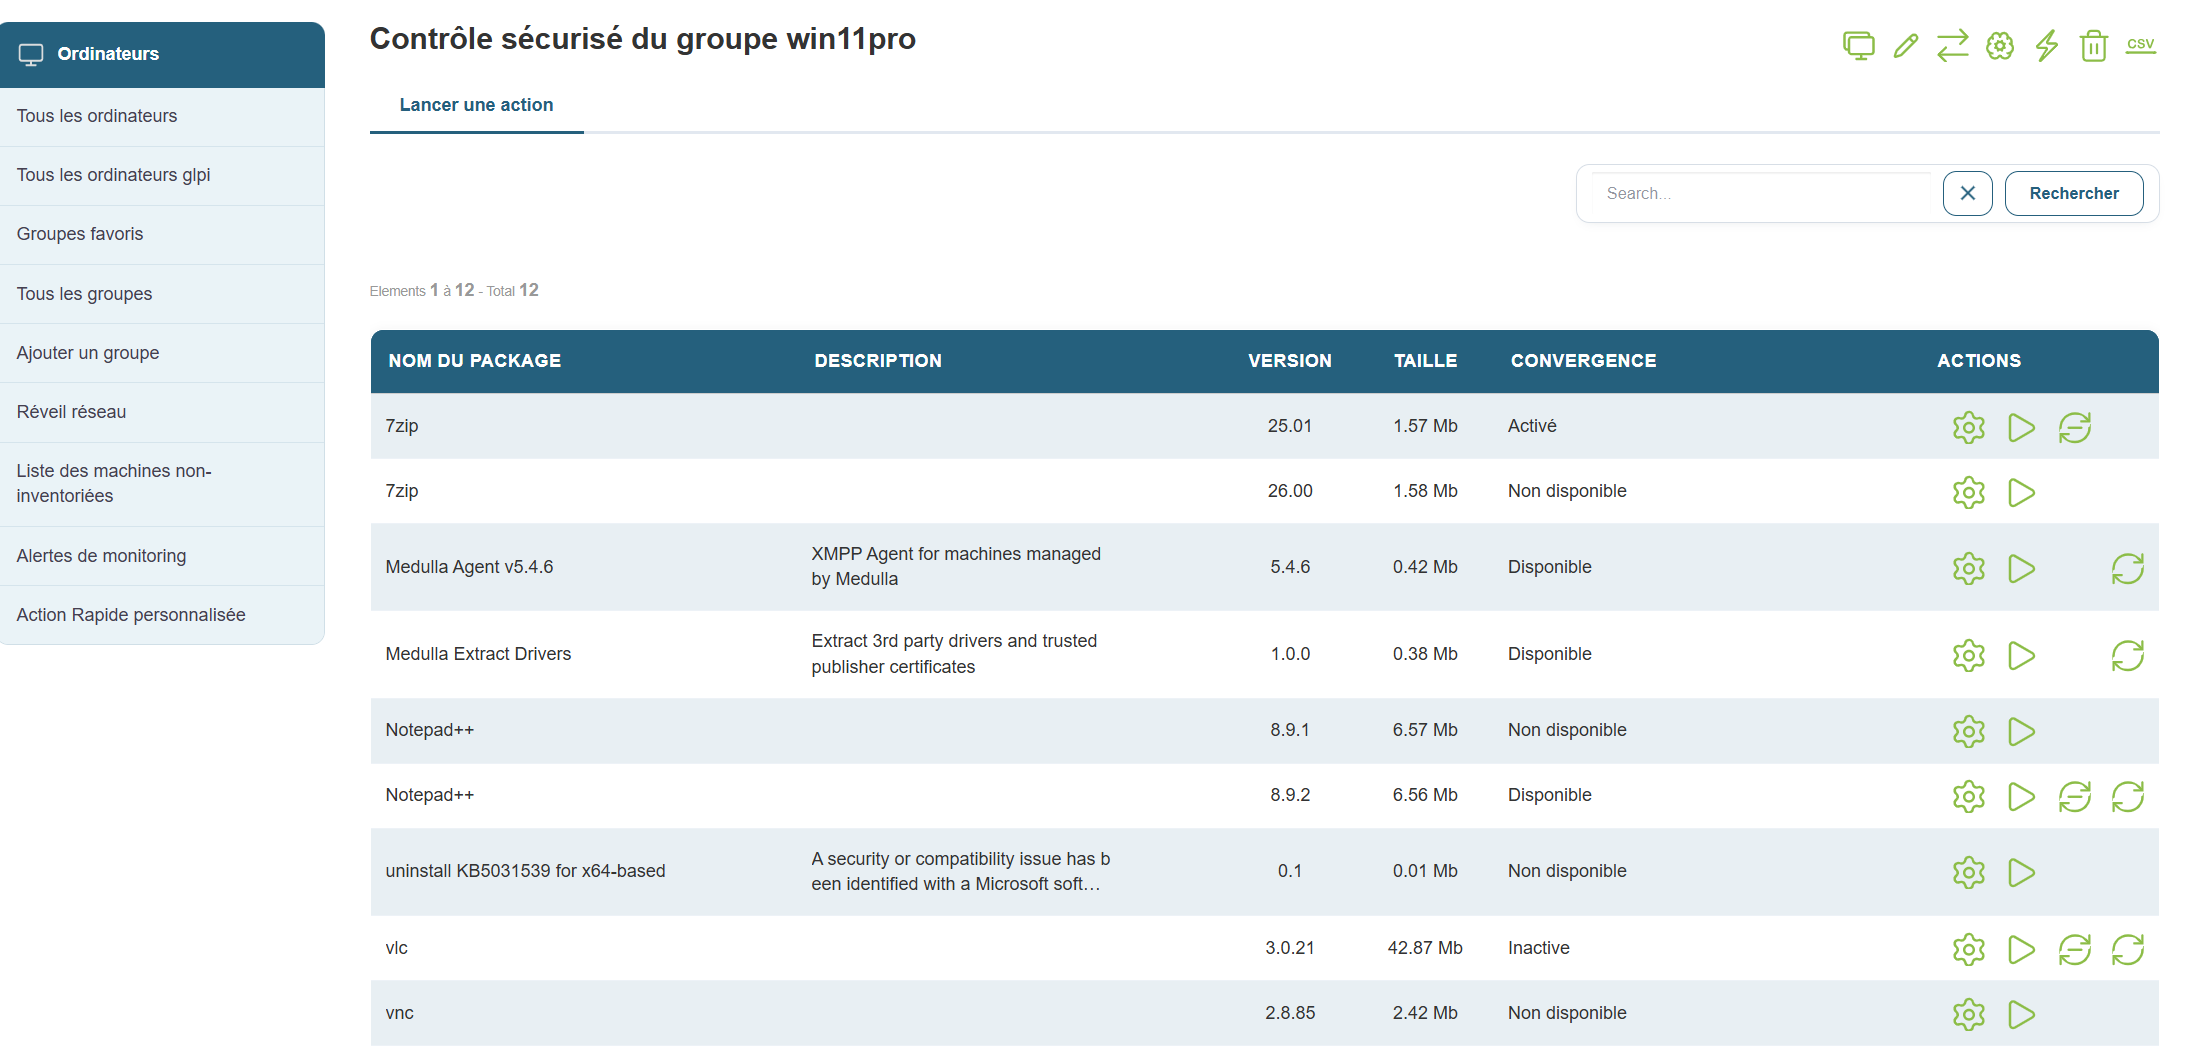
You will then enter the menu that allows you to select the package you want to converge:
Click the Application Convergence button ![]()
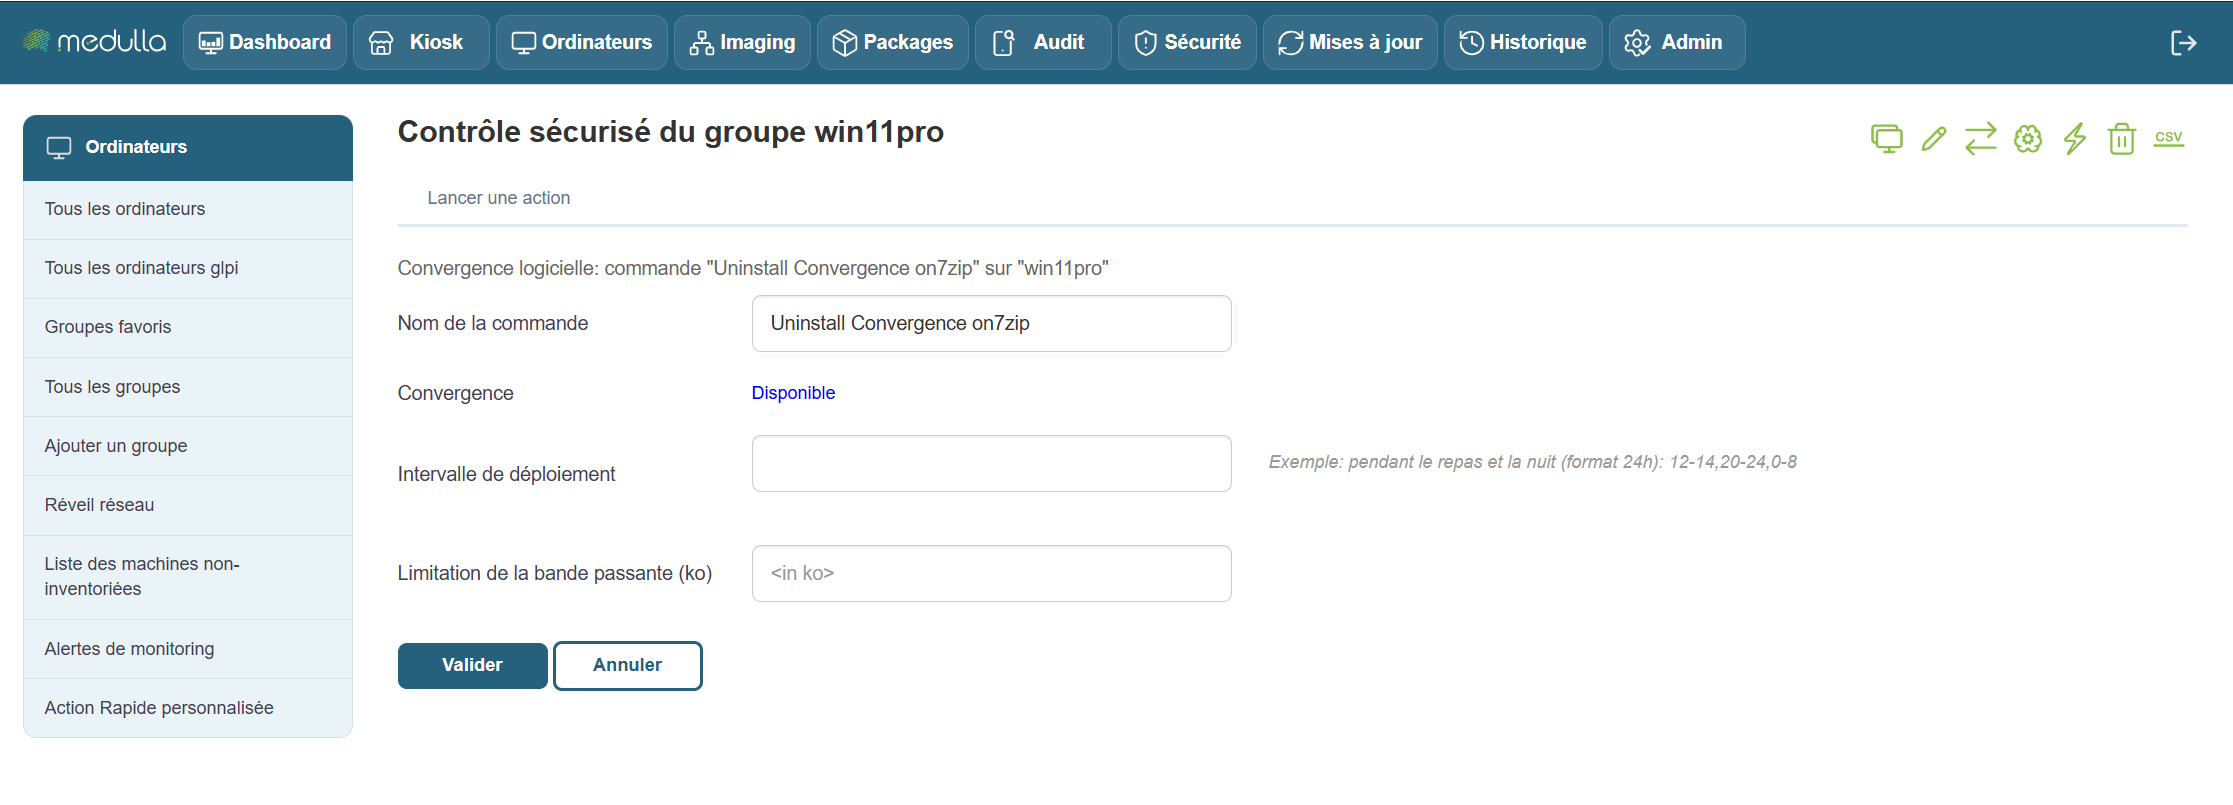
You will then enter the convergence scheduling menu:
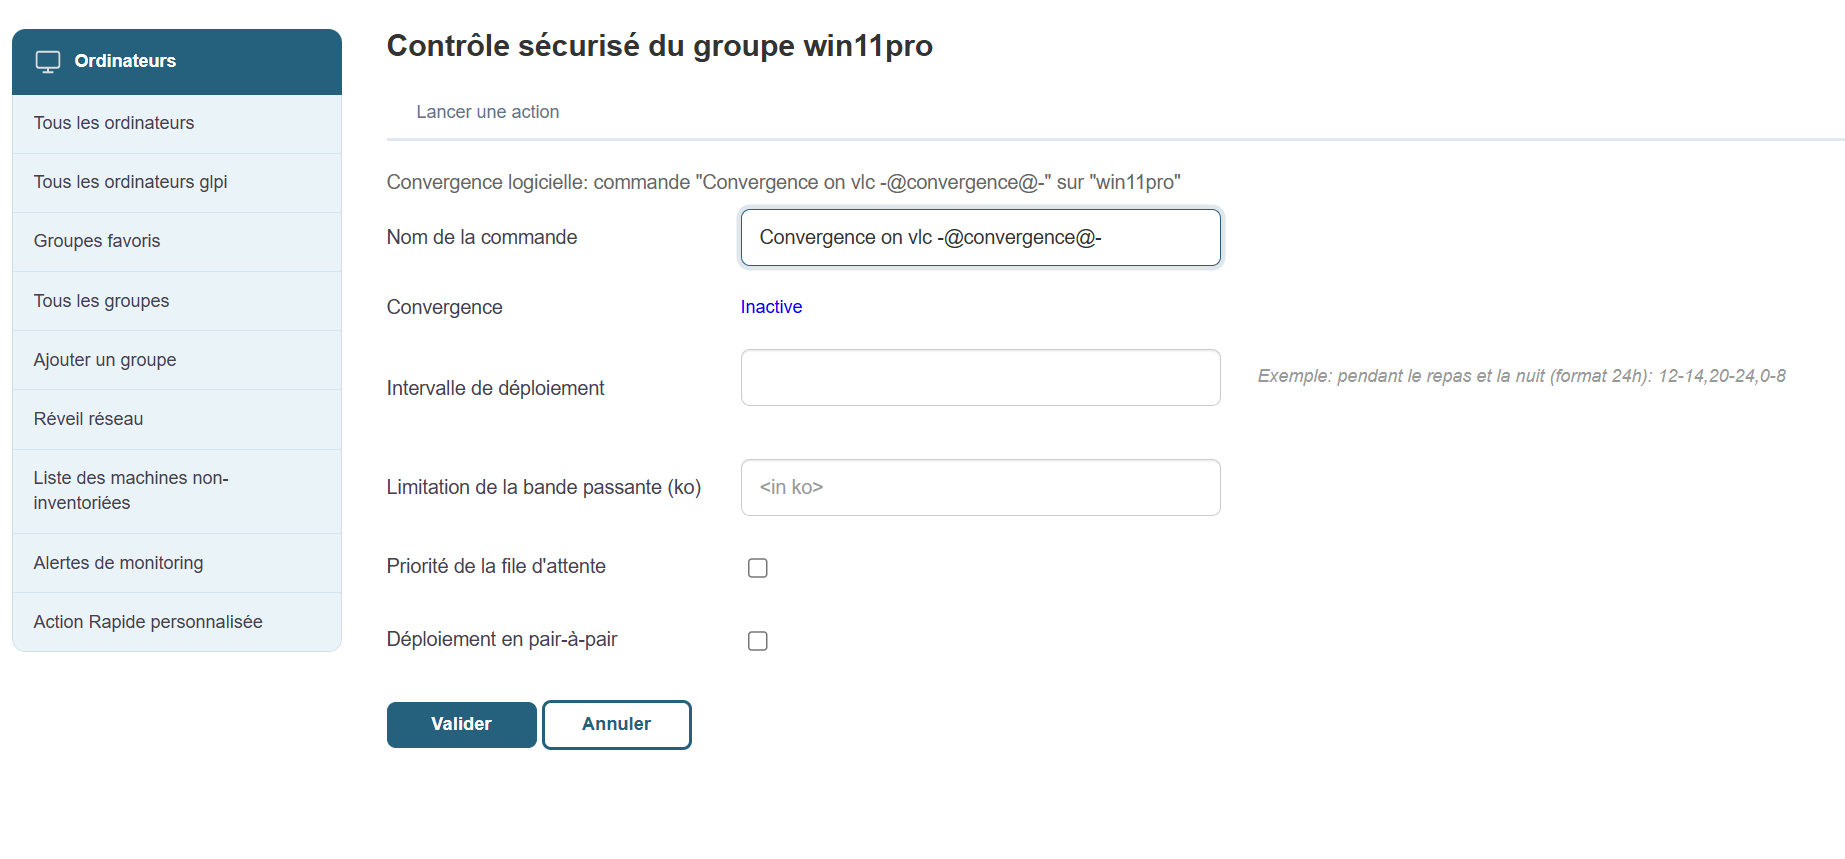
You can use the following available options:
Command name:
Deployment interval:
Queue priority:
Peer-to-peer deployment:
Then click "Confirm" and convergence will be activated.
Once enabled, convergence will begin.
You can find information about the execution of your convergences in the Audit tab:
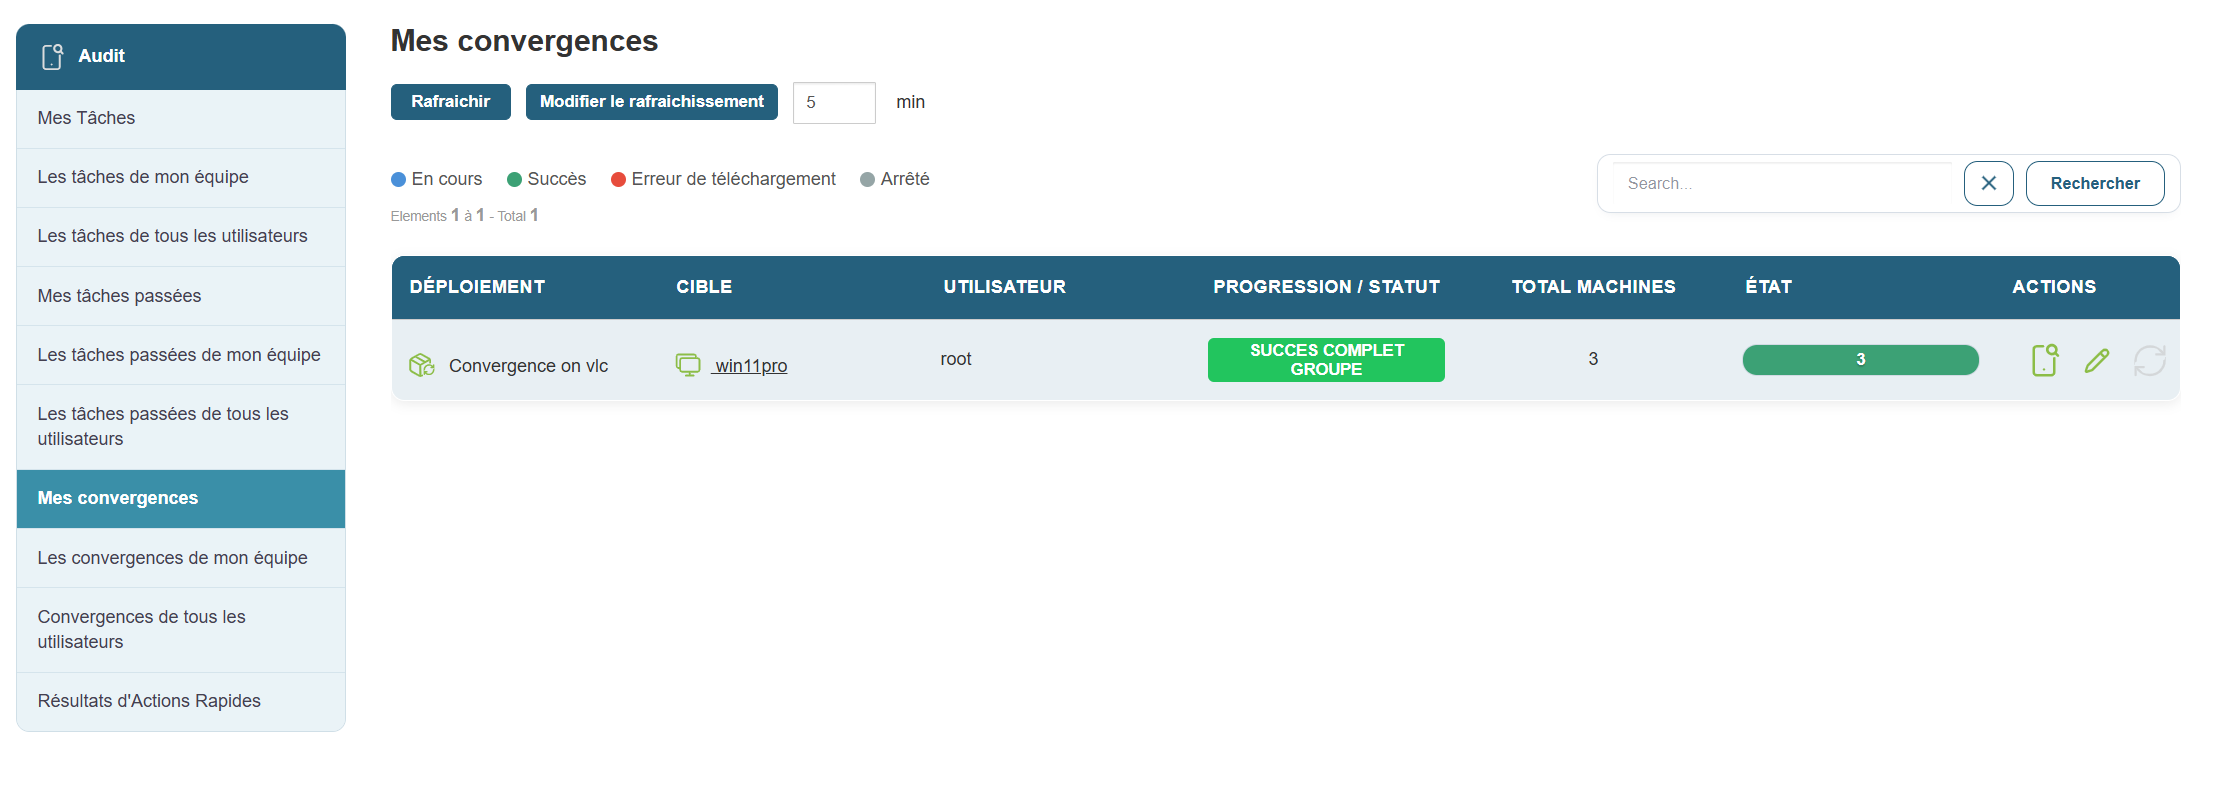
Three entries in the left-hand menu allow you to track your convergences:
My Convergences:
Allows you to view the convergences scheduled by the current user of the session.
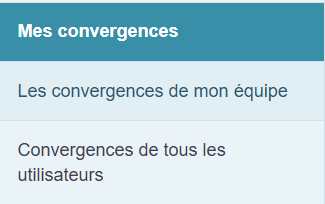
Convergences for All Users:
If you have administrator rights, you can view all convergences that have been scheduled by Medulla users.
My Team's Convergences:
Allows you to view the appointments scheduled by users who are in the same group as you.
Application convergence (Negative convergence)
Negative convergence allows you to uninstall packages that have been installed in dynamic groups.
In the case of a dynamic group, you can enable negative convergence
What is negative convergence? :
Negative convergence is an uninstallation task that repeats every 24 hours to verify that the package(s) you have defined for negative convergence are not deployed; if a new workstation or an existing workstation in the group has the package installed, it will uninstall that package.
In summary, negative convergence allows you to maintain application compliance across your fleet.
How does it work? :
First, once in the Médulla interface, go to the Computers tab. In the left-hand menu, select the group on which you want to enable negative convergence.
Click the Deployment button: ![]()
You will then enter the menu that allows you to select the package you want to apply negative convergence to:
Click the Negative Convergence button ![]()
You will then enter the convergence configuration menu:
You can use the following available options:
Command name:
Deployment interval:
Then confirm, and negative convergence will be activated.
Once activated, negative convergence begins.

Three entries in the left-hand menu allow you to track your convergences:
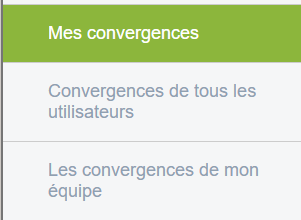
My Convergences:
Allows you to view the convergences scheduled by the current user of the session.
All Users' Convergences:
If you have administrator rights, you can view all the convergences that have been scheduled by Medulla users.
My Team's Convergences:
Allows you to view the appointments scheduled by users who are in the same group as you.
Software deployment
Once you have created a package in Medulla (doc: Create a package), you can deploy it to any computer.
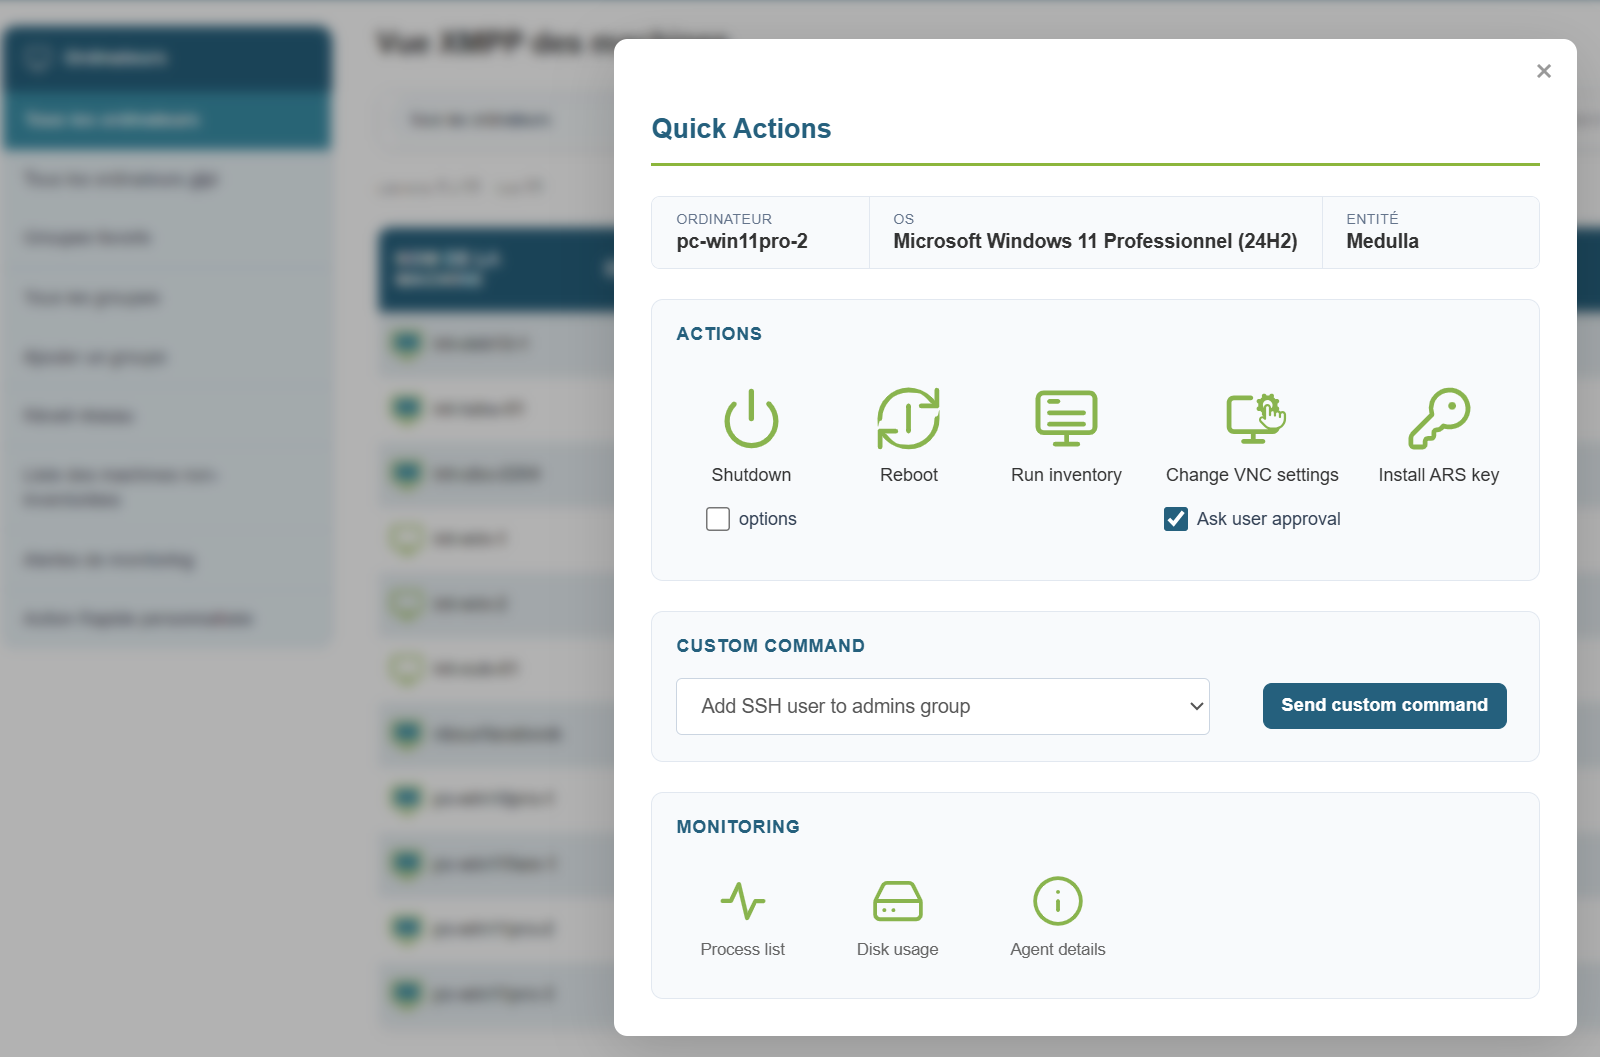
Go to the Computer > Deployment view (quick action) ![]() OR, on a computer group, Deployment (quick action).
OR, on a computer group, Deployment (quick action).
The list of packages available for deployment is displayed, along with a " ![]() " button to start deploying the package:
" button to start deploying the package:

The deployment will start immediately and be available in the Audit view: Audit
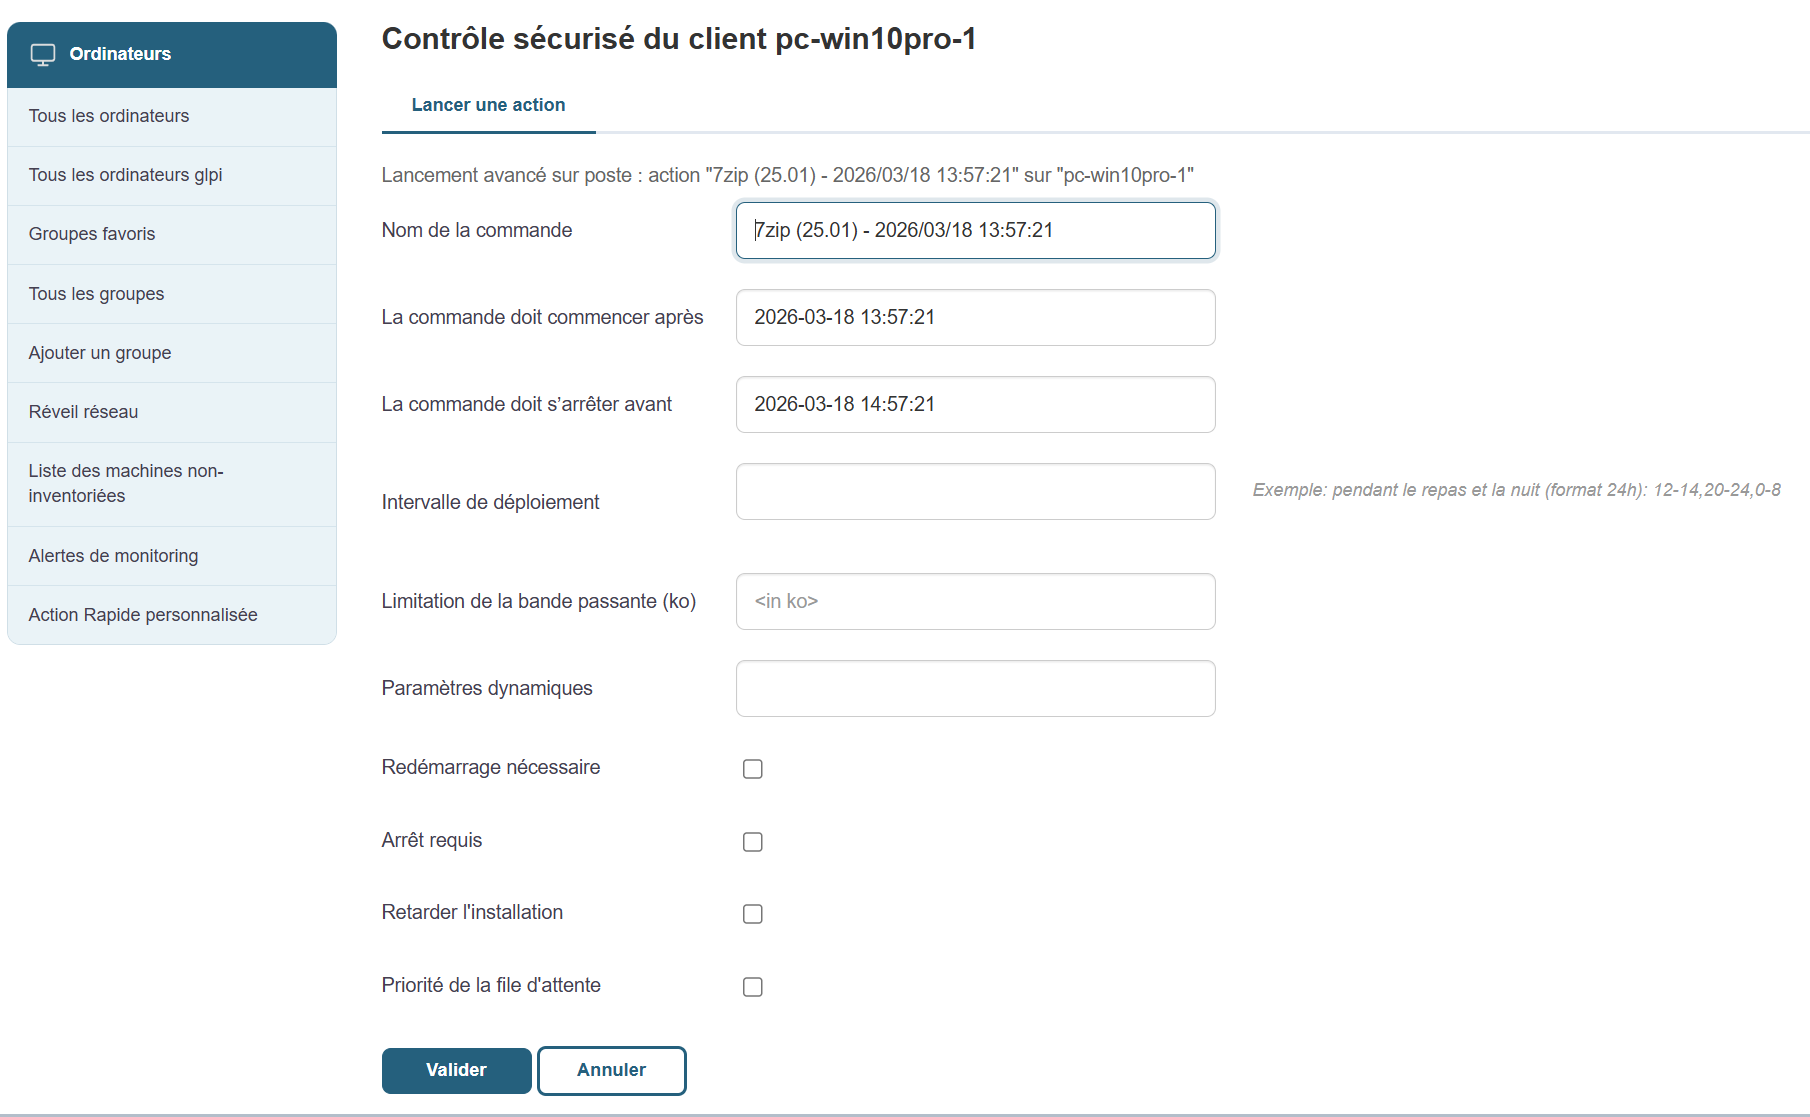
The " ![]() " button allows you to customize the deployment launch:
" button allows you to customize the deployment launch:
To launch a positive convergence, go here: Positive Convergence
To launch a negative convergence, go here: Negative convergence
Create a package
In the Packages view, click Add Package in the left-hand menu.
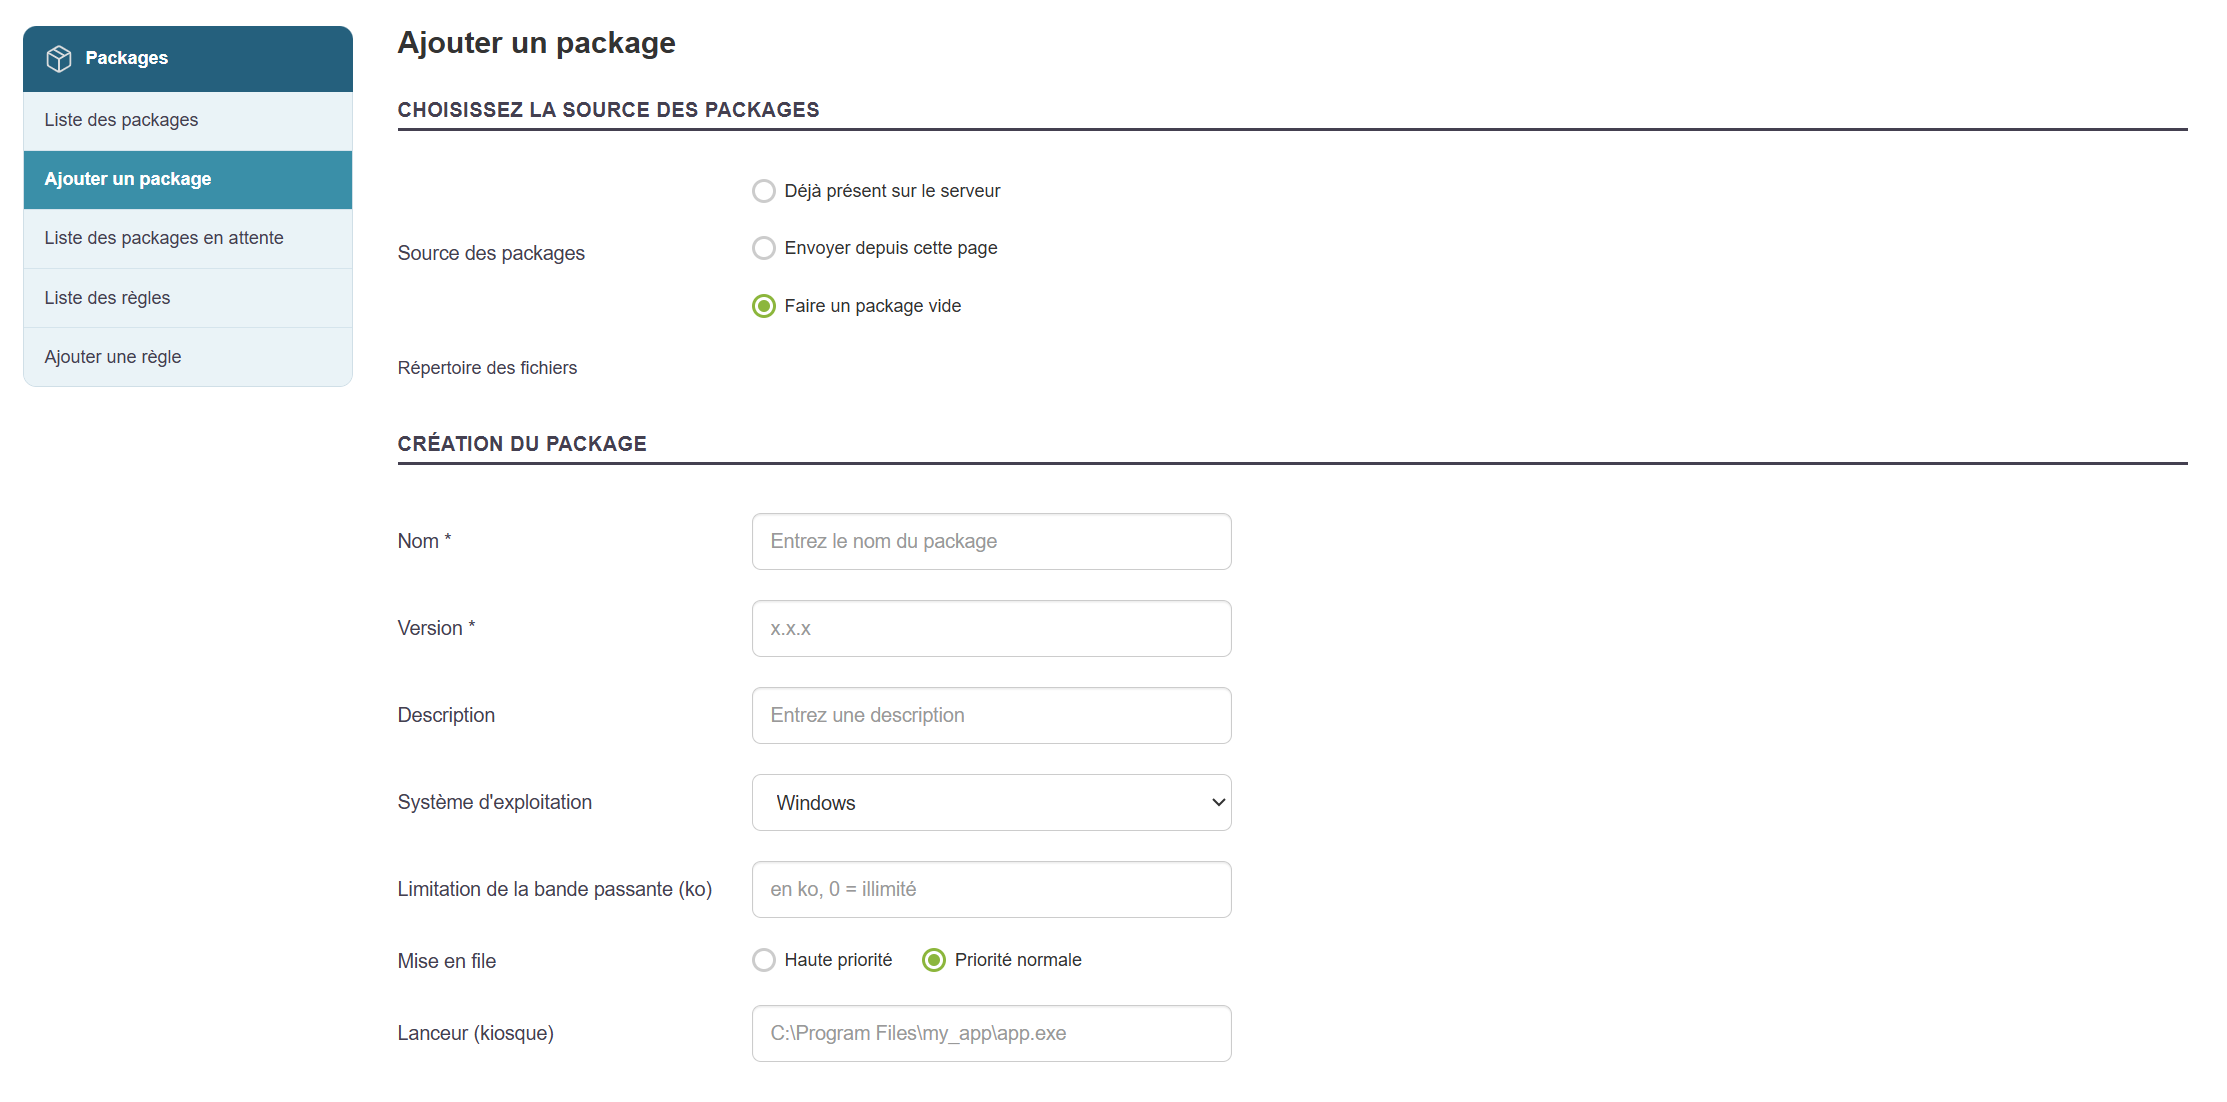
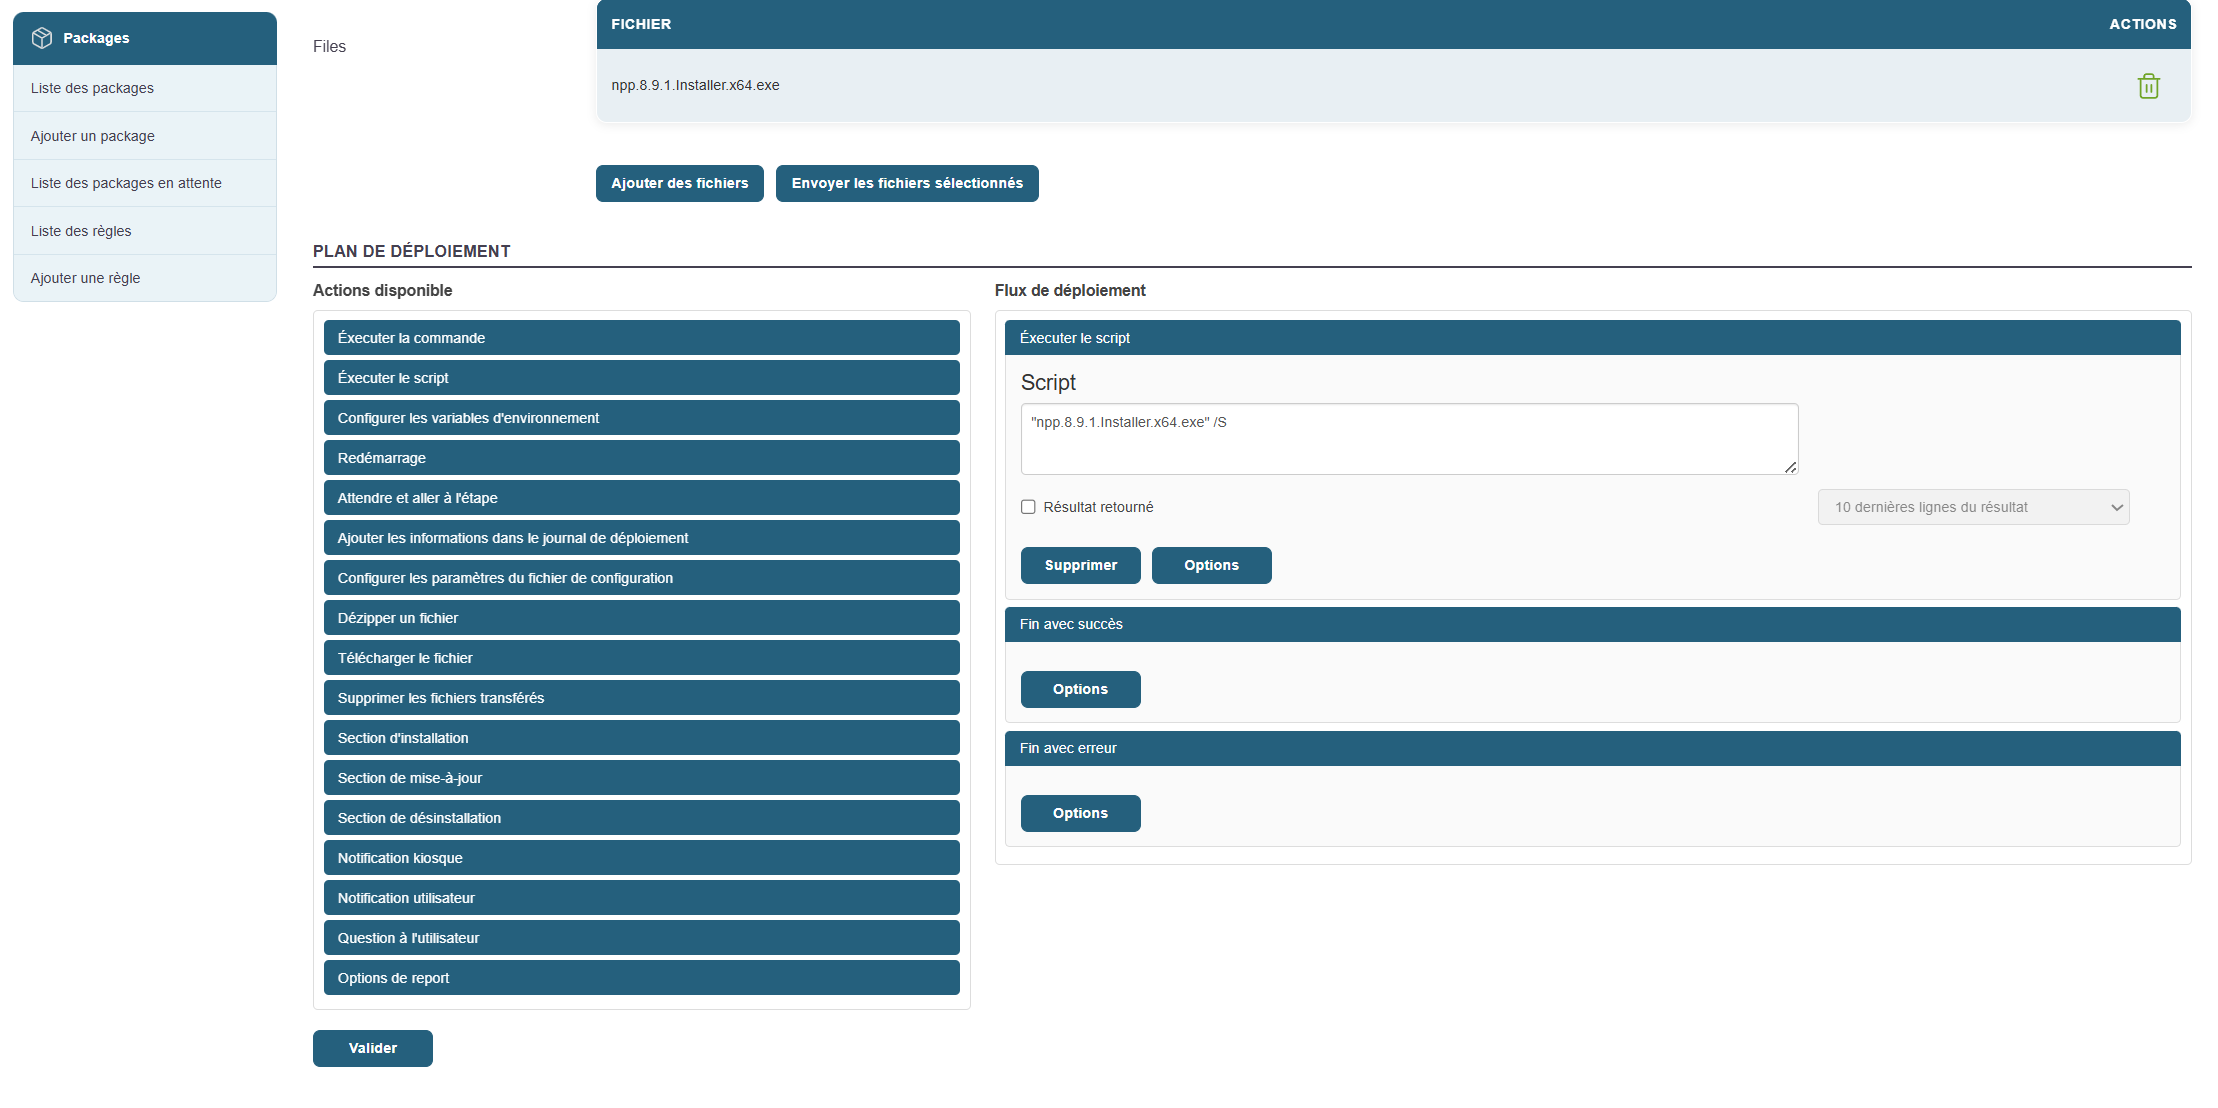
You may or may not assign an installation (setup) file, and click "Upload pending files" if necessary.
Fill out the various sections.
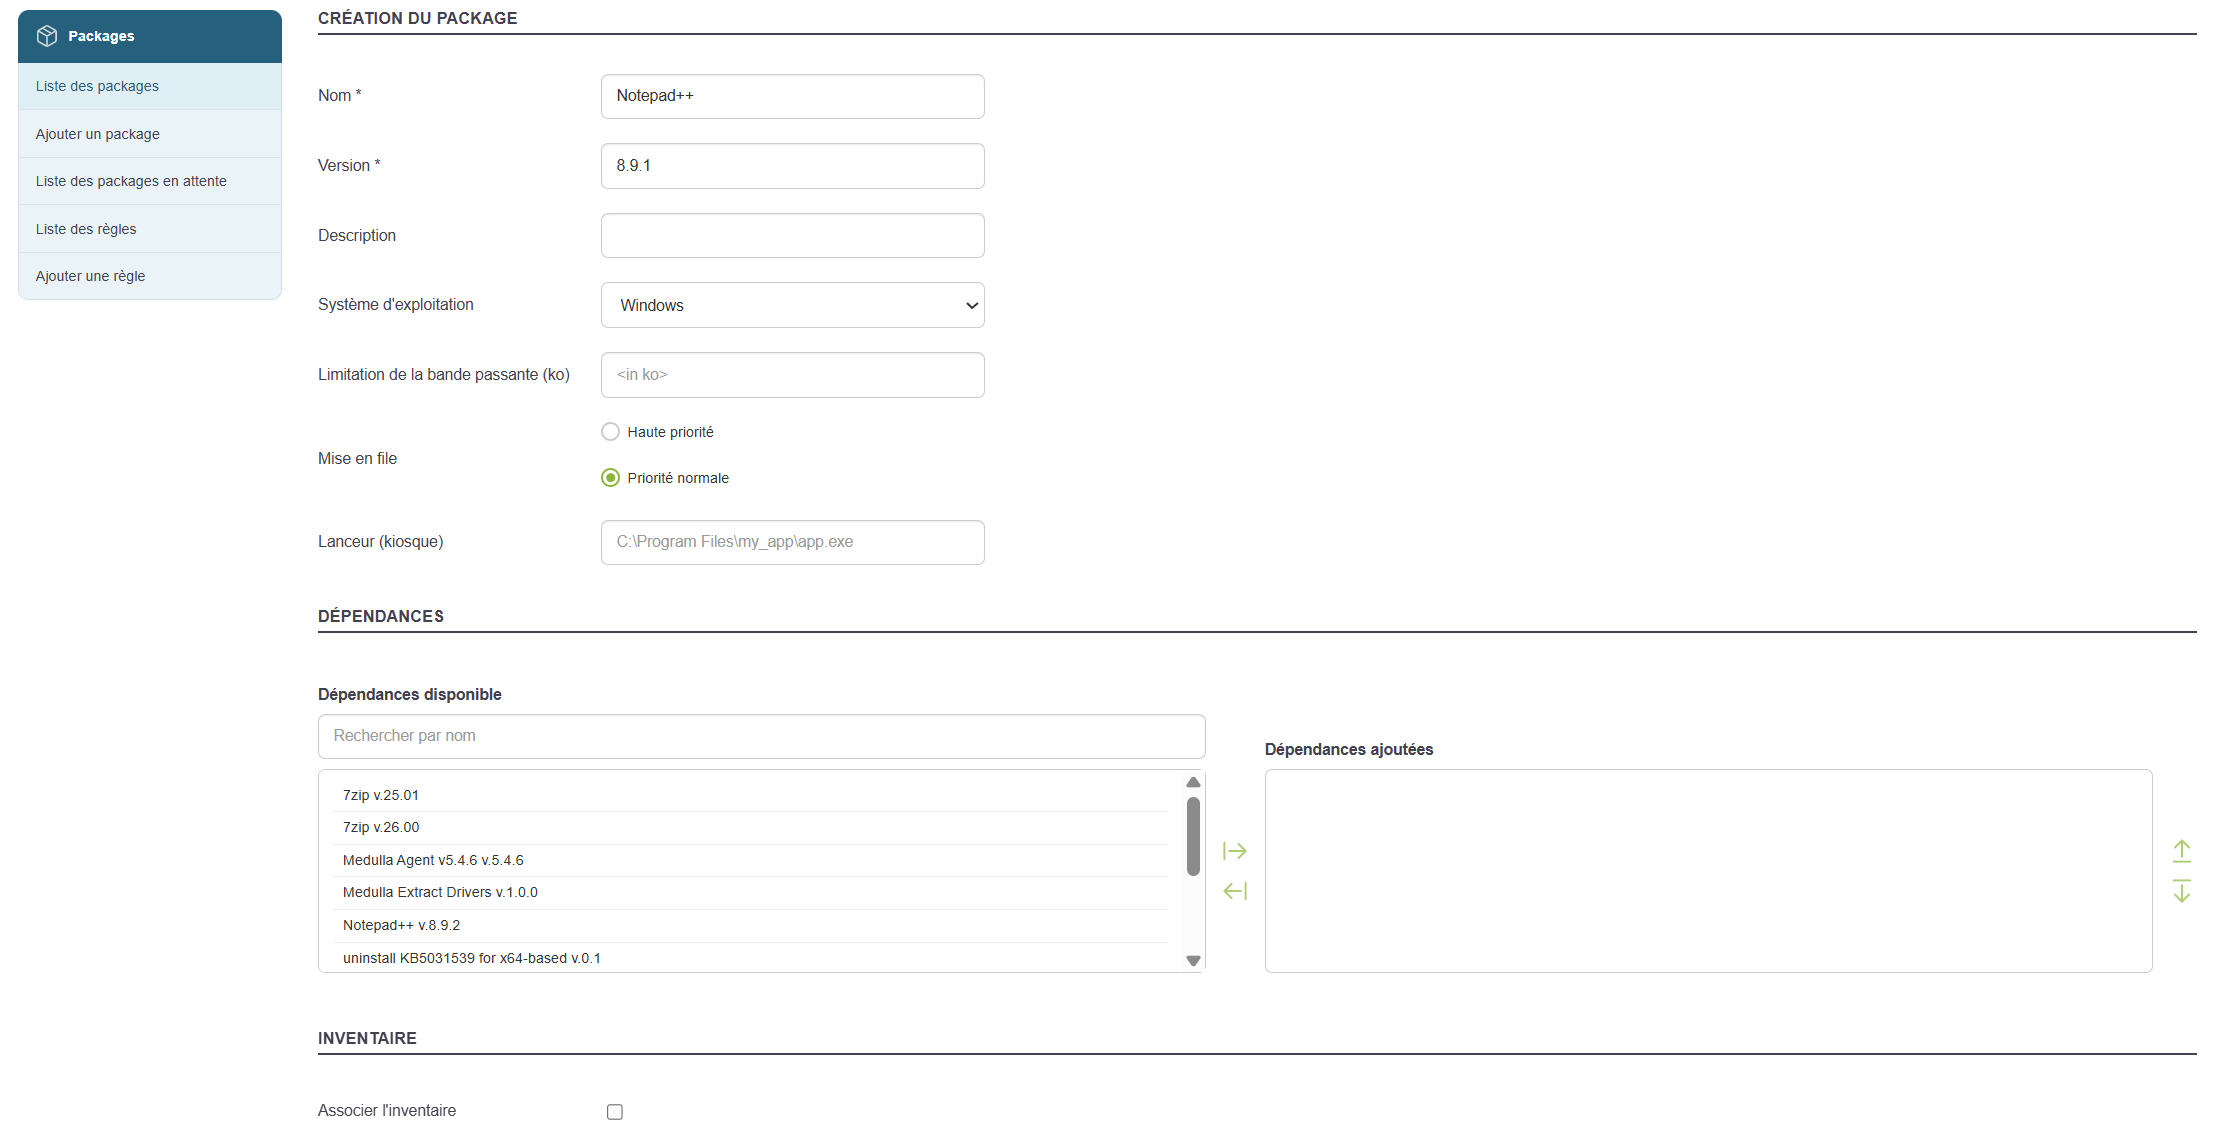
You can add other packages as dependencies.
In the example above, I will enter the value for Launcher (Kiosk): "C:\Program Files\Notepad++\Notepad++.exe", if my package is intended for the Kiosk and to be installed in the default location "C:\Program Files\Notepad++\".
An auto-generated script allows you to silently run the installer file added earlier.
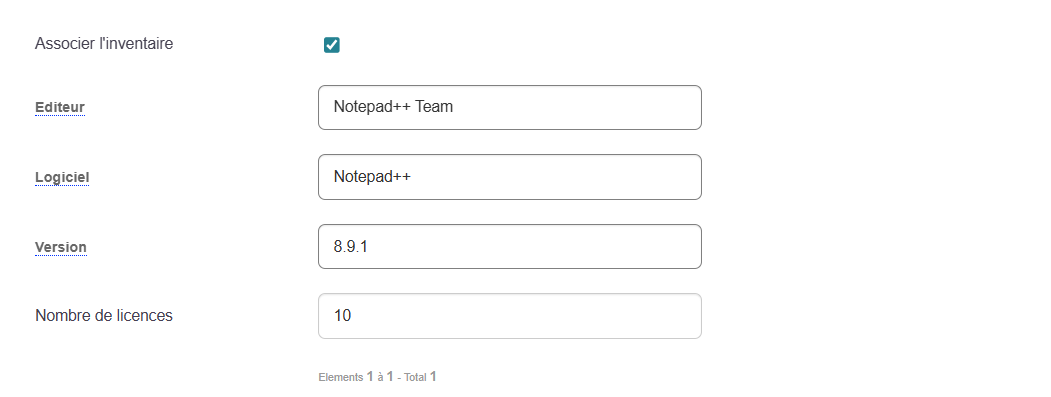
You can associate an inventory with the package using the "Associate Inventory" button, which will make it available in both Kiosk and Convergence.
Fill out the relevant section as follows (auto-completion will appear if other machines in your IT infrastructure have reported this software in their inventory):
To perform a negative convergence with this package, or to make the package uninstall available via the Kiosk, you must perform the following actions:
- You can add uninstallation sections as follows if you want to be able to uninstall the application in the solution from the Kiosk.
- Add an uninstallation section in the left-hand menu.
- Then add a command and set the uninstall command.
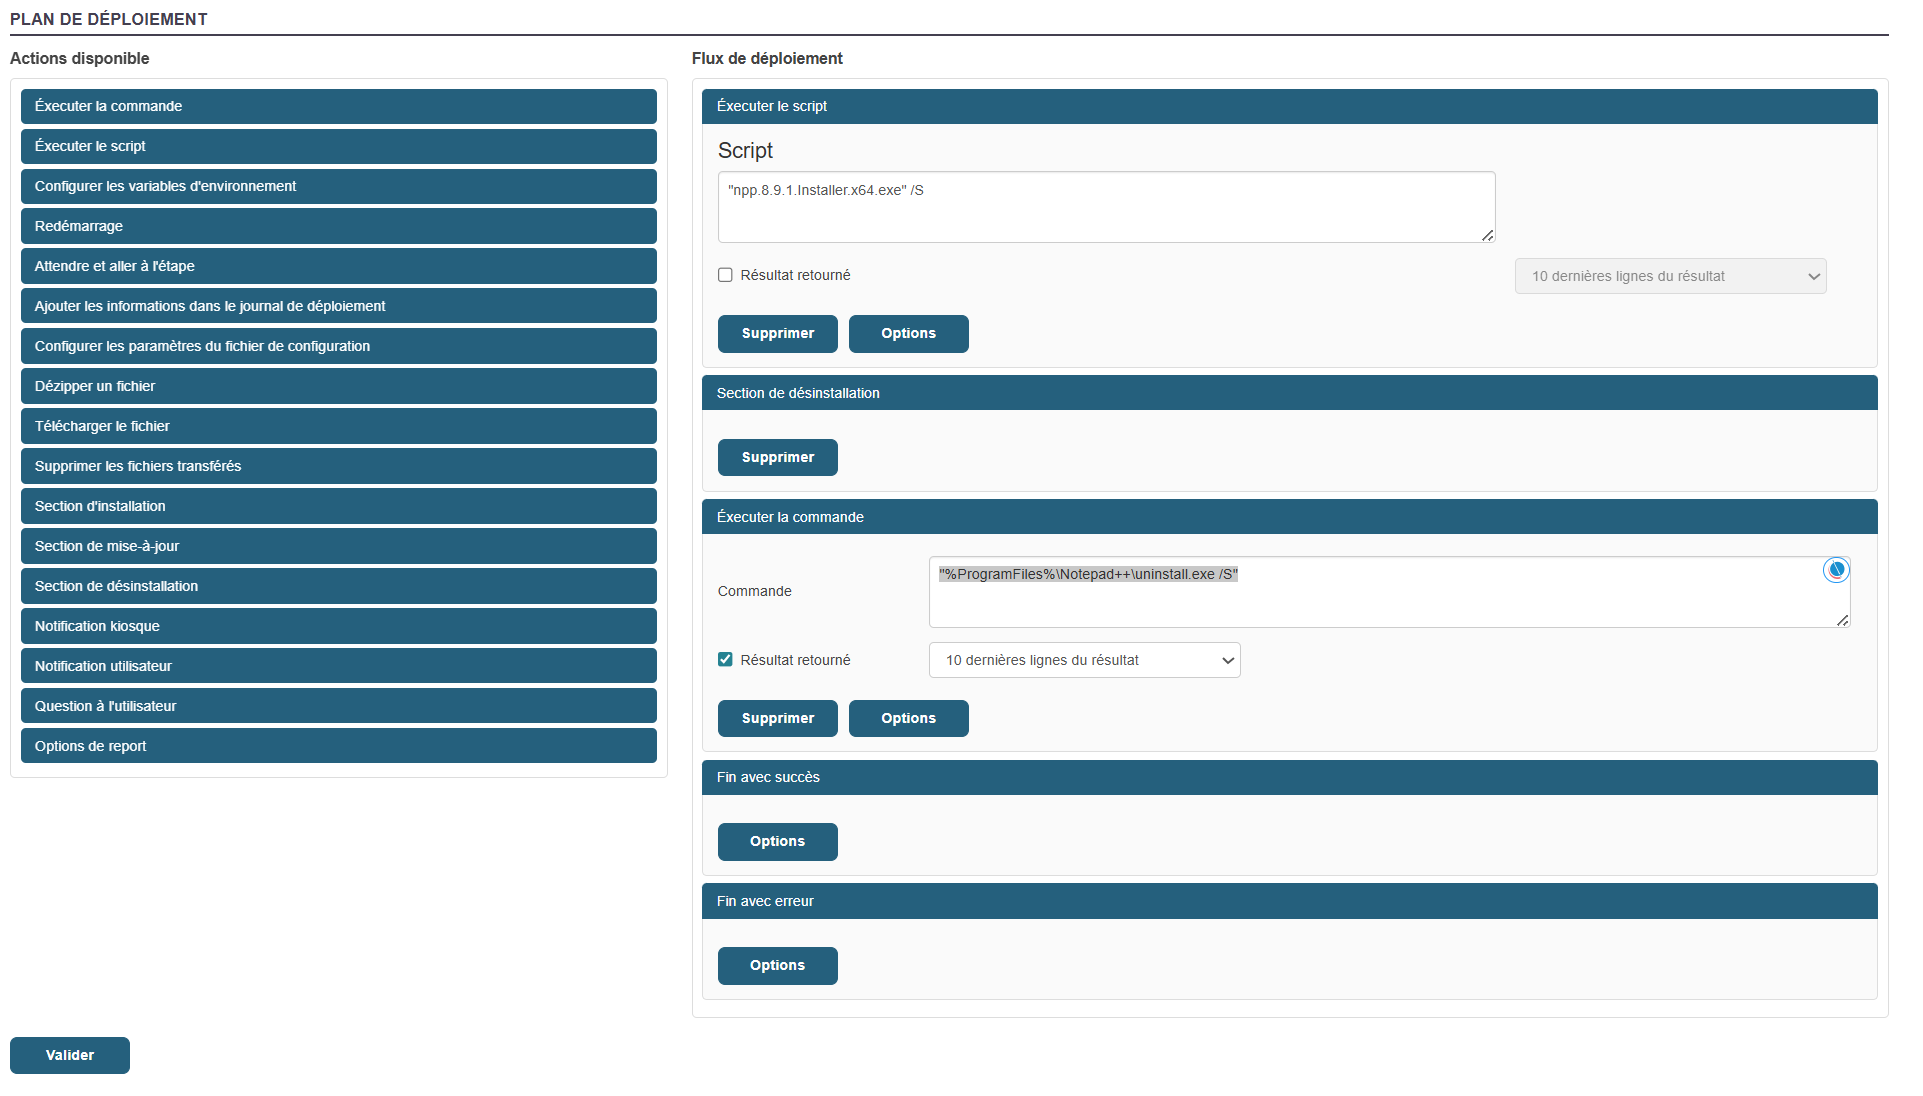
Many actions are possible within a package’s workflow.
Click "Validate".
The package is ready
Kiosk:
To add my application to the kiosk profiles and create a profile, click on this section of the documentation: Chapter 3: Kiosk
Convergence:
To deploy my package via Convergence, here is the Convergence deployment section: Convergence
Mastering via PXE
To master an image, follow the steps below:
- Boot the machine via PXE and register it:
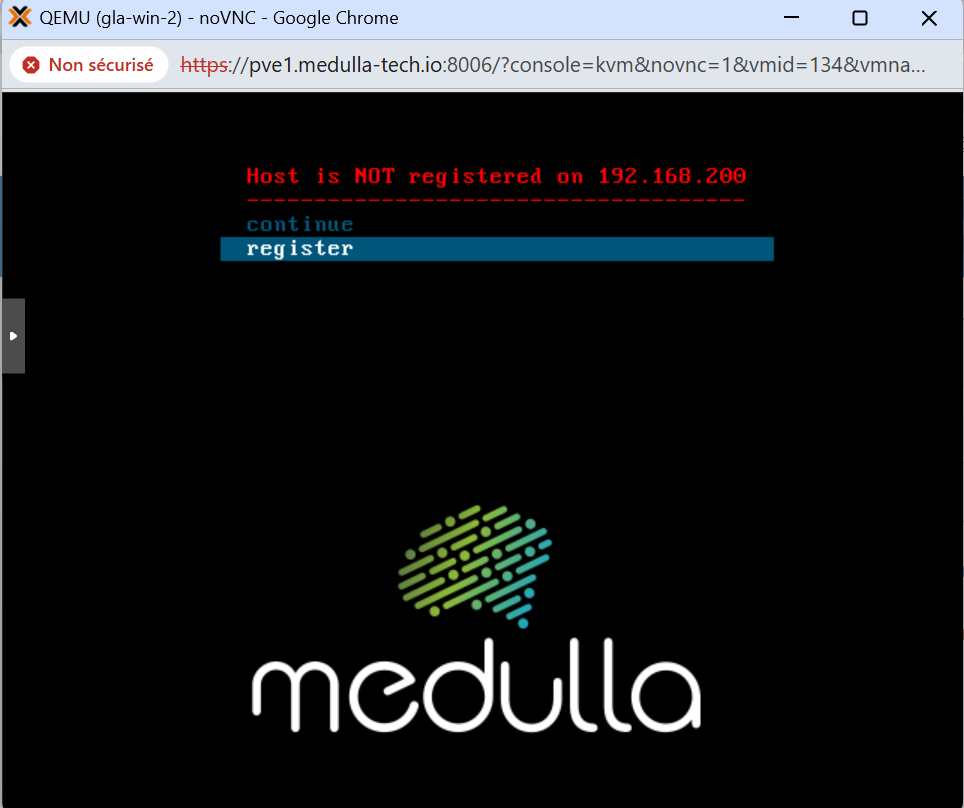
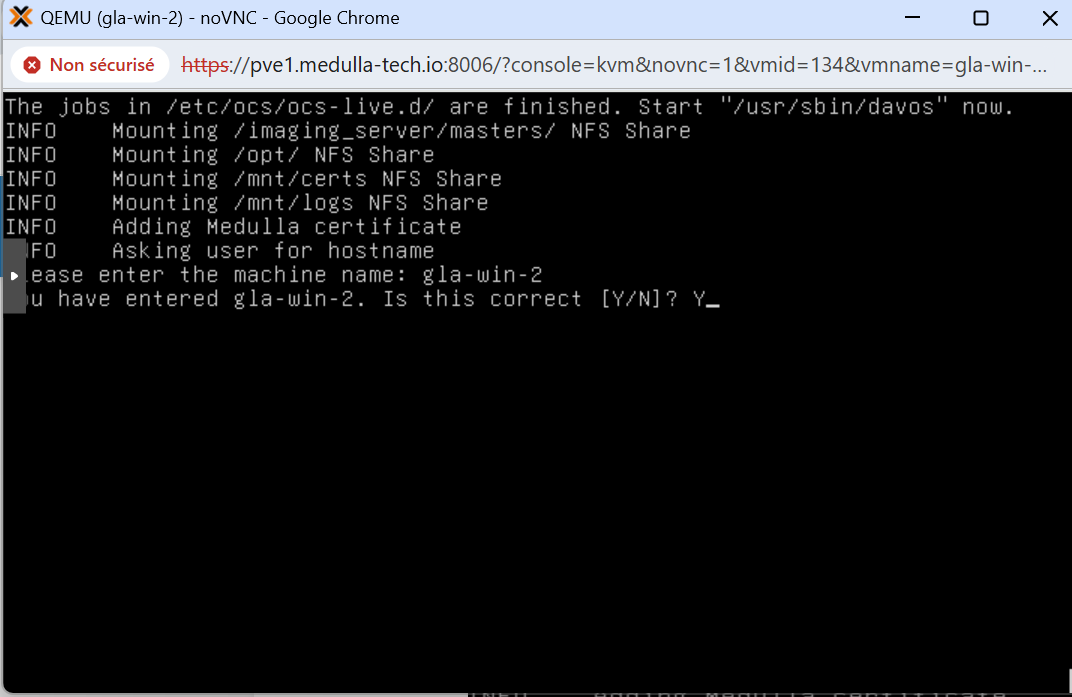
Type the machine name at the prompt:
In our example, I used the machine gla-win-2. Press Enter, then answer the question with Y if the name is correct or N if it is incorrect and you need to make changes.
When the machine reboots, if you followed the steps in Imaging Profiles, simply select the master associated with the profile; or if you are using a standard post-install, you will see the master’s name along with the associated post-install.
Below, after the machine has been registered, you’ll see the menu with an additional line:
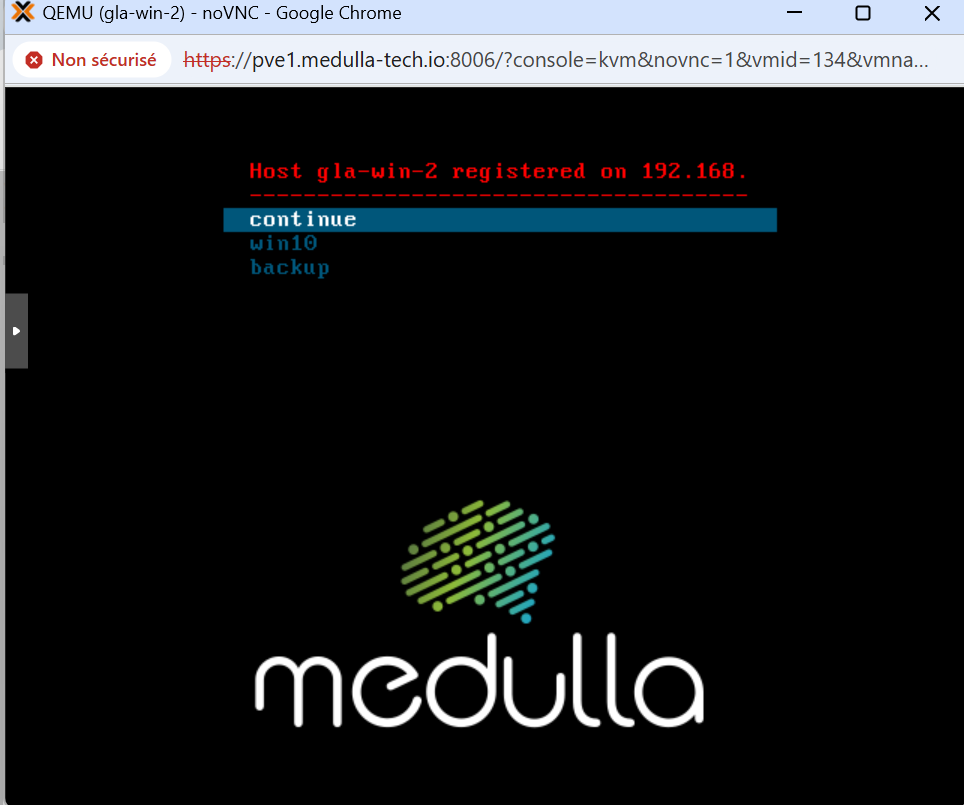
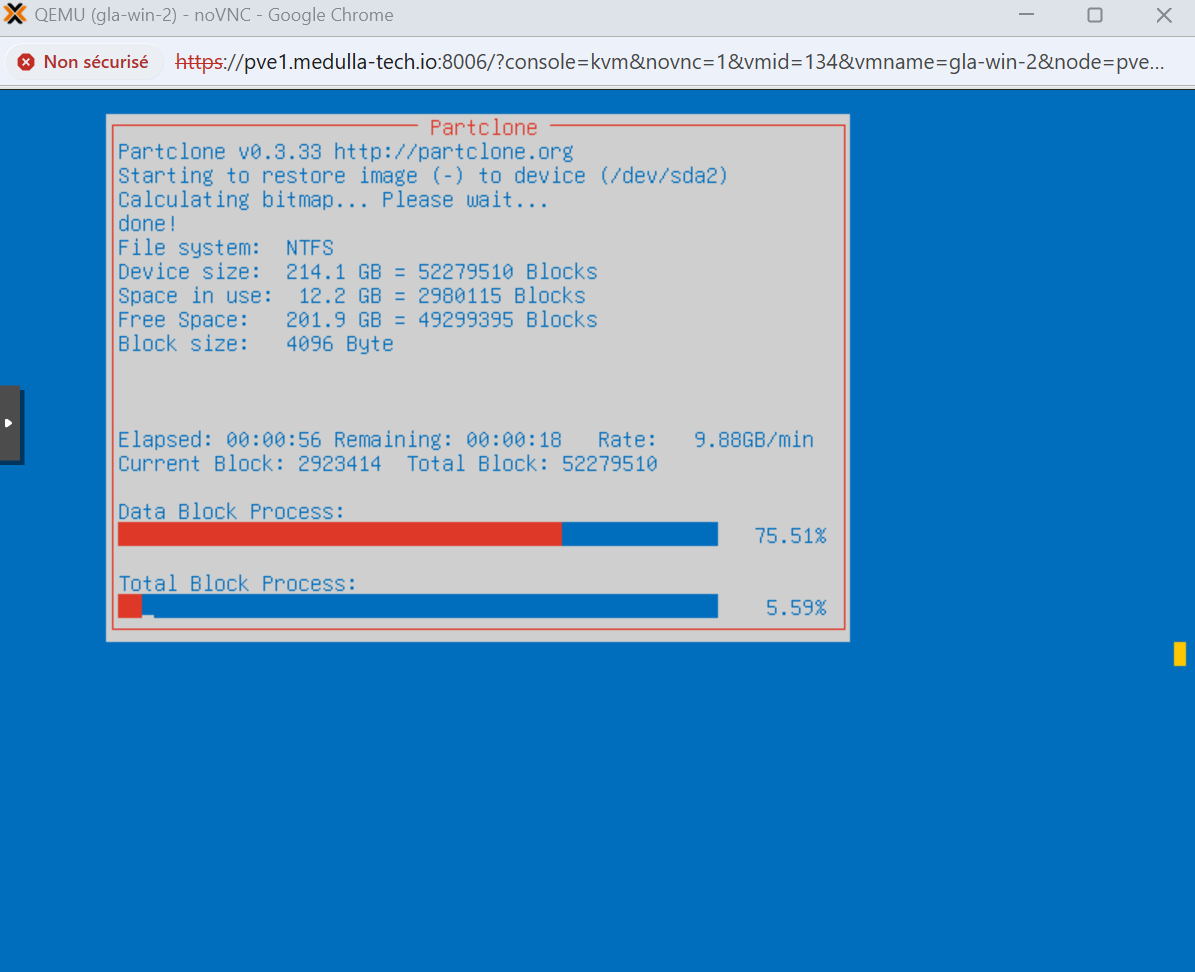
Click on your master and wait a few minutes; your machine will reboot and come back up in the Medulla console.
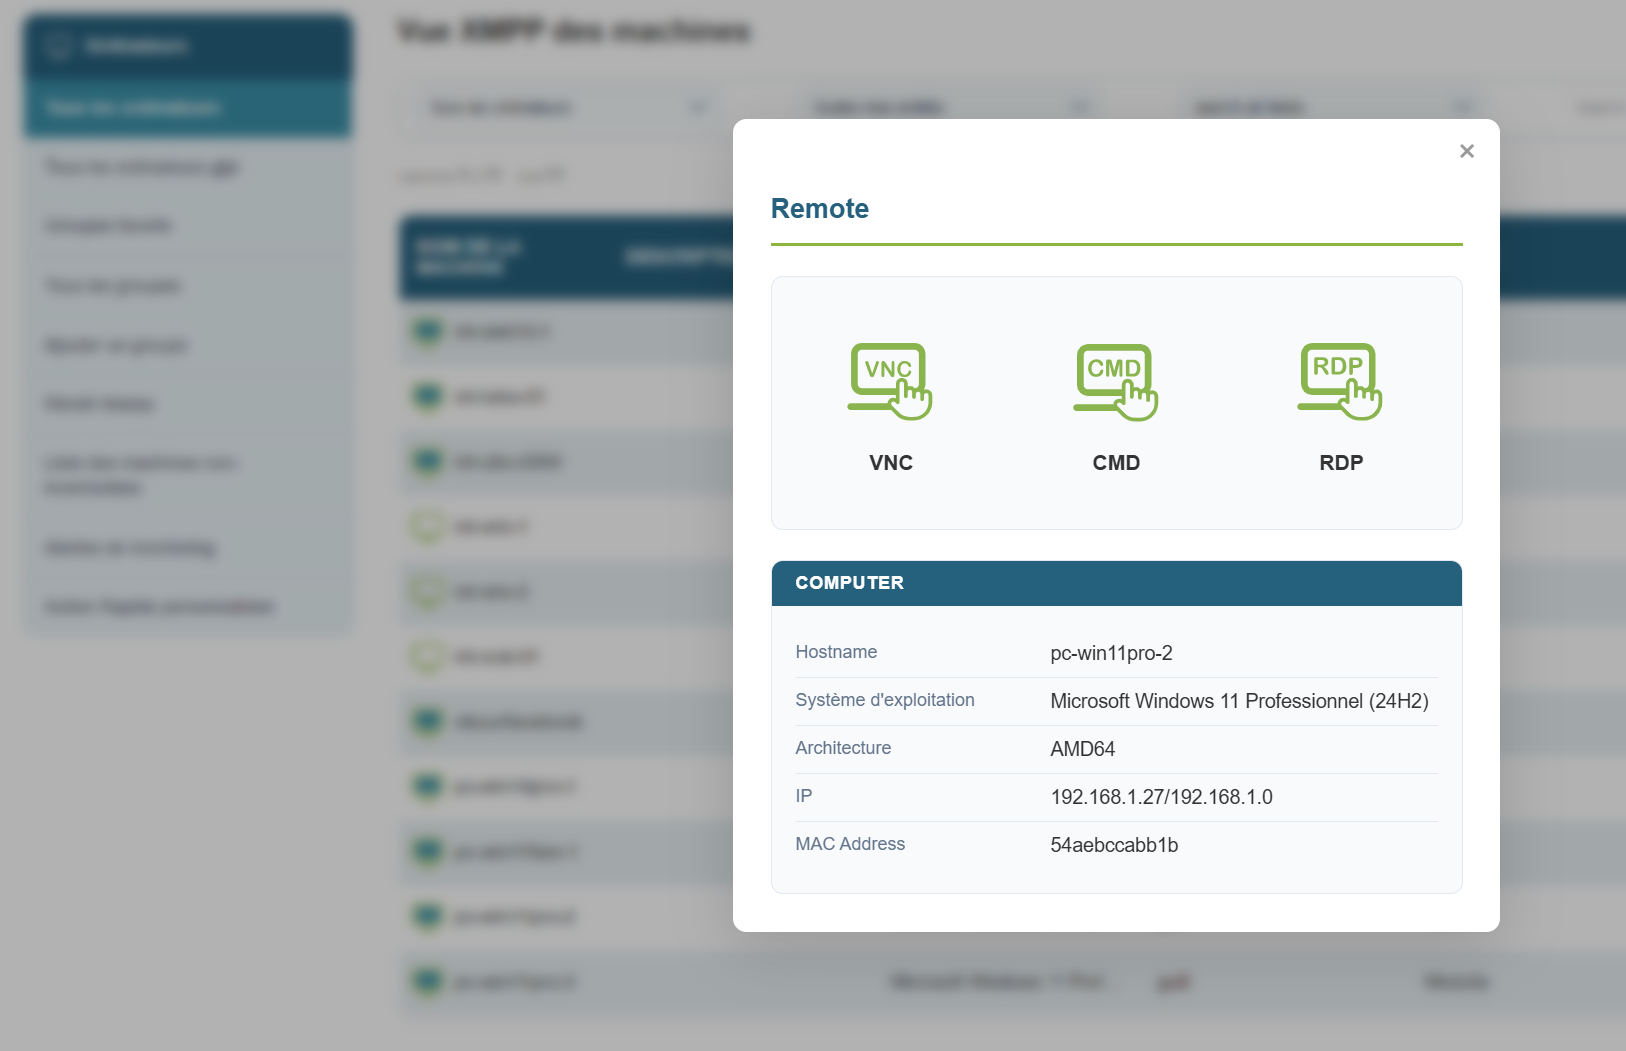
Getting Started with Remote Access
 Remote Access Direct access to machines to perform troubleshooting or maintenance tasks:
This allows you to take control of the remote machine in three possible ways:
Windows:
- CMD
- VNC
- RDP
When you click the button, a pop-up appears allowing you to choose which protocol you want to use:
For VNC, by default, an authorization request is sent to the user, and the user must grant you permission.
If you need to temporarily disable the authorization request for a maintenance operation while the user is away from their workstation, you can do so for the duration of the session:
Click the quick action button, uncheck the " Ask user approval " box, then click the take control button.
Remote access via CMD:
Remote access via VNC:
Remote access via RDP:
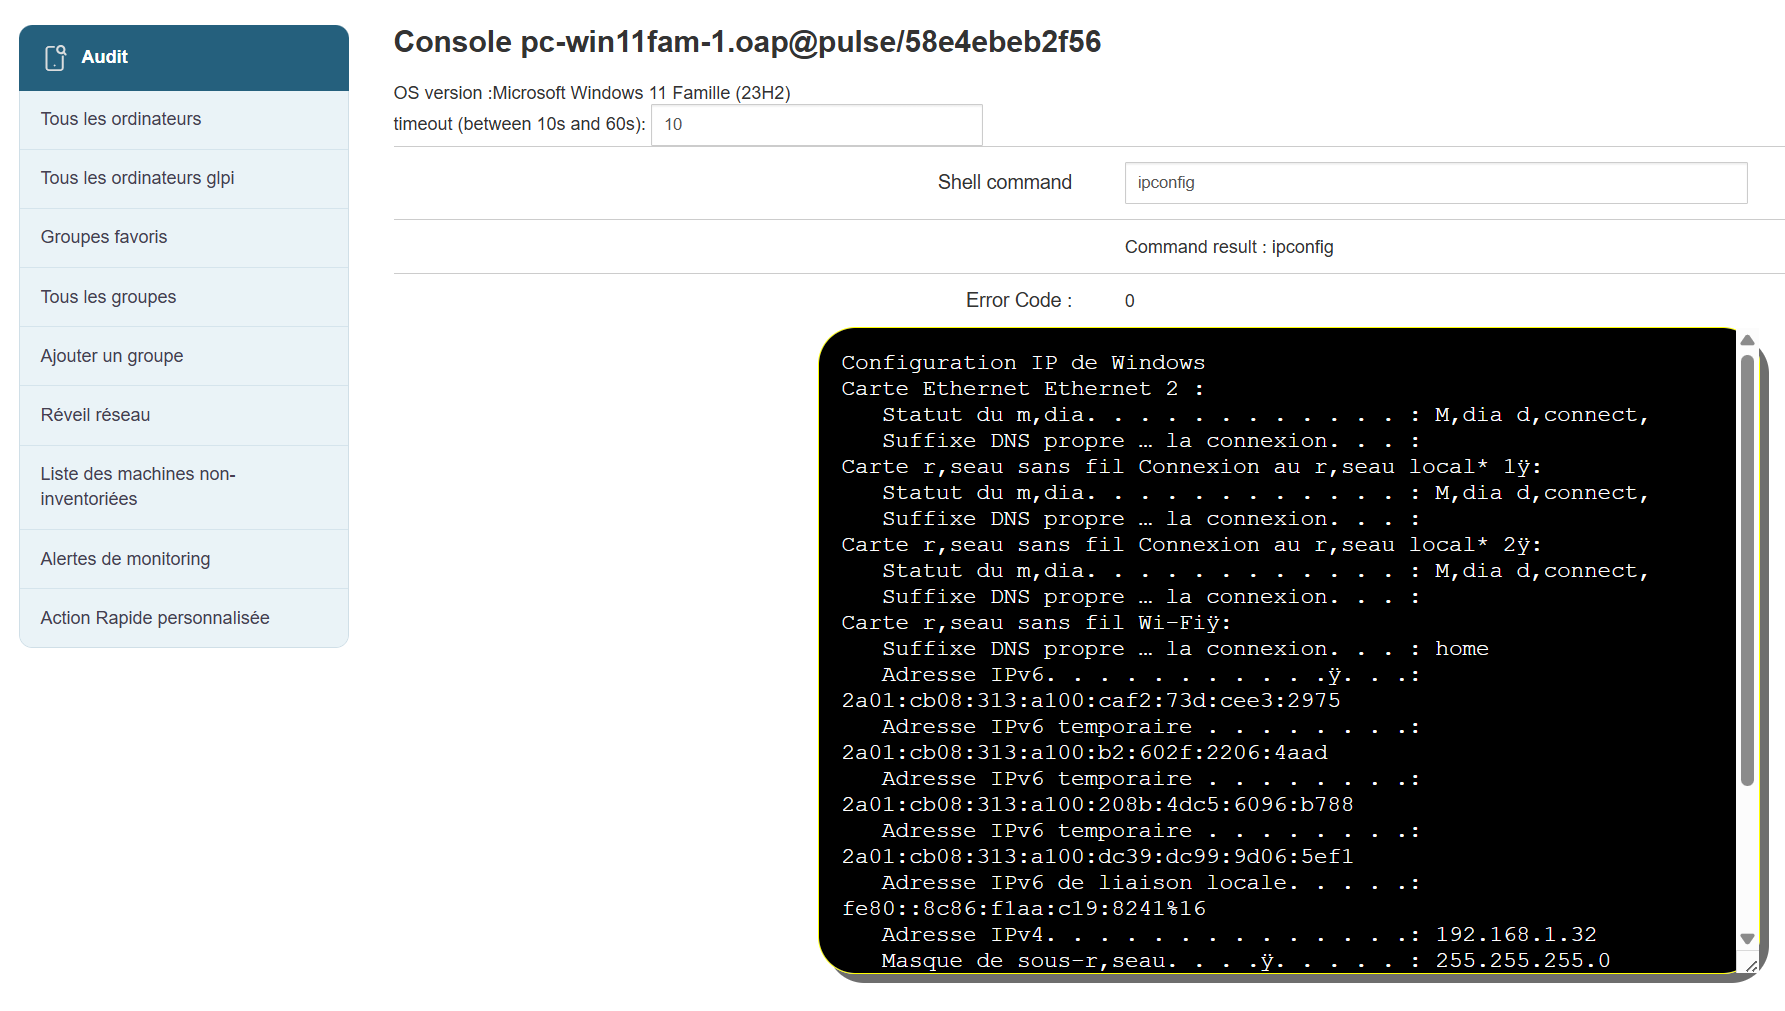
XMPP Console
The Medulla solution is a client/server solution based on the XMPP protocol.
This protocol allows Medulla to provide users with an XMPP console, enabling them to execute non-interactive commands directly on workstations.
This console allows for initial diagnostics or retrieving information about the workstations from the server.
How to do it:
Click on the console icon: ![]()
The following screen appears:

Type your command and get the result instantly:
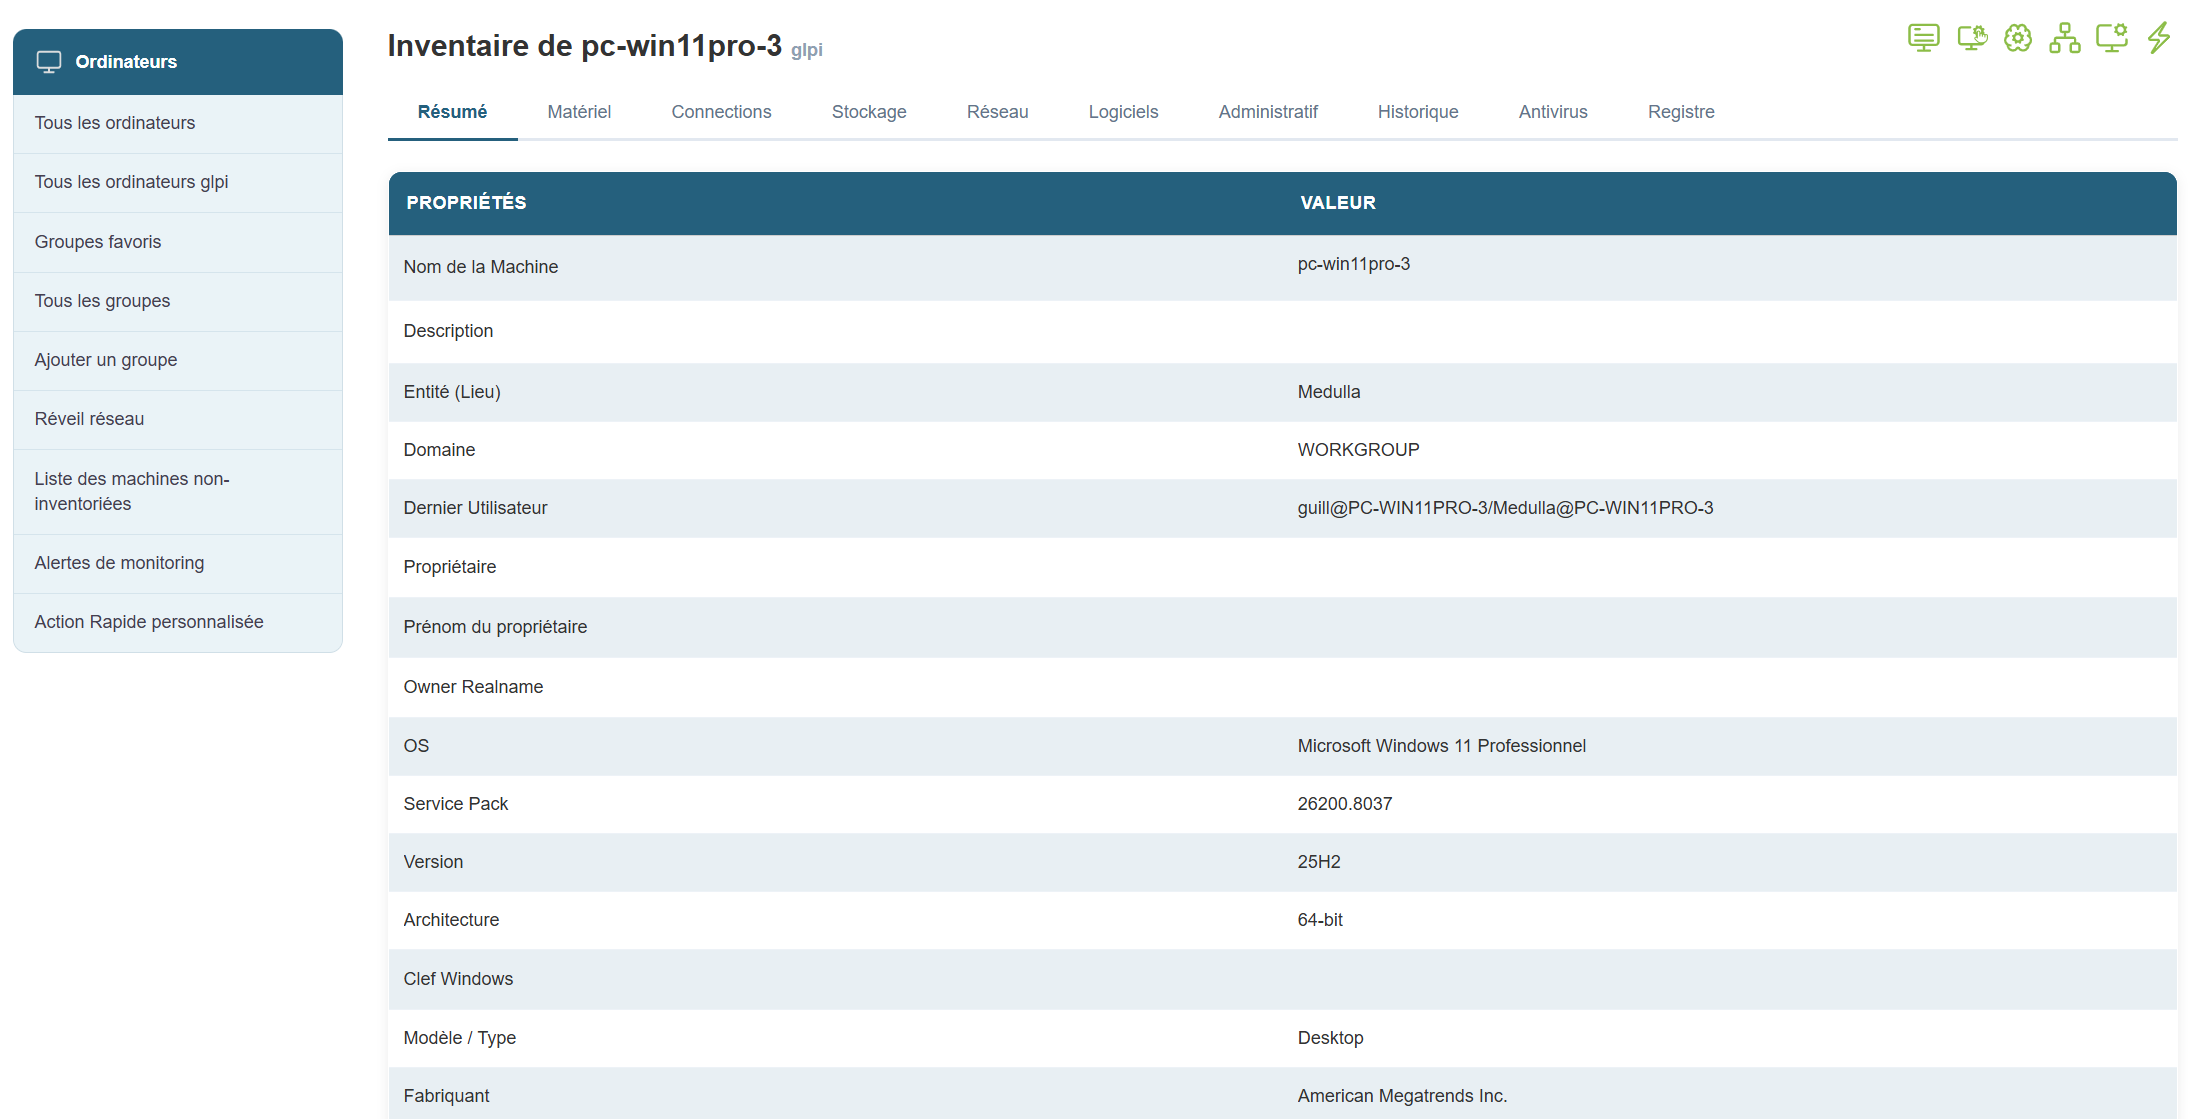
Agent inventory
To view a machine's inventory, go to the Computer view.
Select the computer whose inventory you wish to view, then in the Actions menu to the right of the row, click the button: ![]()
You will then see a tabbed panel displaying the complete inventory of a machine:
Imaging menus
Applies to: Medulla – Imaging
Version:5.4.3 or later
Environment: On-Premise / Private SaaS with imaging relay.
Category: Usage
This document focuses on the management and generation of imaging menus.
What is an imaging menu?
- The machine has no associated menu: the server assigns it a default menu
- The machine is part of a group of machines: the server sends it the menu associated with that group.
- The machine is not part of a group and has an associated menu: the server sends it that menu.
The rest of the imaging process depends on the contents of this menu.
There are different levels of menus:
The imaging server menus:
Each imaging server receives a default menu. This menu consists of the following services:
- `continue`: This service allows you to boot the machine normally.
- `backup`: creates a copy of the machine's disk in the imaging system.
- Modifications
Changes to the default menu do not affect the menus of machines or groups. For machines to benefit from changes to the default menu, it is necessary to perform a "reset" of the entity's menus.
- Add / Remove a Service
Several services that can be added to the menu are available.
The page defining the services available in a menu is as follows:
MMC > Imaging > Manage Menu Services.
On this page, services are associated with the selected entity. Changing the entity modifies the list of services associated with that entity.
- Add / Remove a Master
This section does not cover how to convert an image into a master.
Masters present on the imaging server can be associated with the default menu.
The page for associating masters with the default menu is as follows:
MMC > Imaging > Manage Masters.
- Change the order of services and masters
The various services and masters associated with the default menu can be viewed on the following page:
MMC > Imaging > Default Startup Menu.
On this page, you can change the order of menu items. You can also modify settings specific to the associated items.
- Minimum services for a menu
Currently, a menu must contain at least one service (or one image). Generally, the `continue` service is required for the menu to function.
The minimum service must have the following options enabled:
- Default enabled so that this service is selected by default
- Visible enabled so that this service is visible in the startup menu
- Default WOL enabled to prevent a traceback, even though I don’t know what this option is for.
A fix is being considered to prevent the removal of the last service from a menu.
This page is organized into three tabs:
- Startup Menu: This tab allows you to view and edit the menu.
- Menu Services: This tab allows you to associate services with the machine menu.
- Images and Masters: This tab allows you to associate masters with the machine menu.
To access it, go to the following page:
MMC > Imaging > All Imaging Groups > action:Imaging Management.
In this case, the machine displays its own custom menu, not the group’s menu. This can cause confusion for the administrator.