Chapter 6: Imaging I
- Imaging
- Manage masters
- Manage startup services
- Default startup menu
- Post-imaging scripts
- How Imaging Works
Imaging

This section is dedicated toverifying the status of the imaging server, an essential step before deploying a system or creating a reference image.
The imaging server is a central component of Medulla: it allows a system image (a sort of complete "copy" of a computer) to be sent to one or more workstations. If this server is unavailable or malfunctioning, no imaging-related operation can be completed.
This is why it is recommended to systematically check its status before performing any such action.
Accessing the Imaging Server Status
When you click on the Imaging Server Status tab, you are immediately taken to the page where the pre-selected entity is neither private nor public; we will therefore refer to it as "General."
"General" Entity with Server Offline
This means that the imaging server linked to the "General" entity is inactive. You will not be able to deploy images to the machines in this entity
Understanding the Displayed Information
Selected Entity
At the top of the page, you must selectthe relevantentity.
Entities correspond to logical groupings, often used to separate environments (e.g., services, departments, locations).
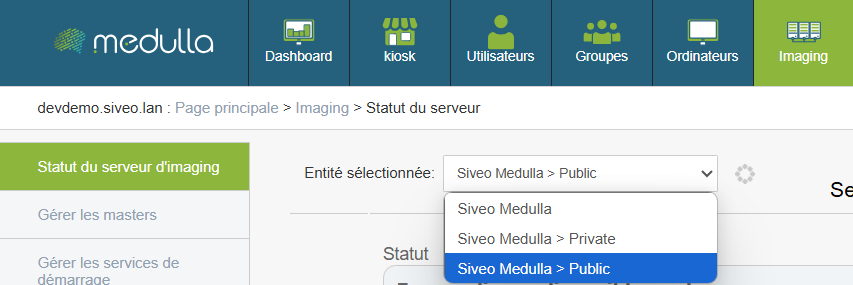
Examples of entities:
- Public
- Private
- General
Why it matters:
Each entity can be linked to a separate imaging server. It is therefore crucial to verify the status of the server for the entity you wish to use.
Server Status
For the selected entity, a visual indicator shows the current status of the server.
Three statuses may appear:
- Available
The server is operational. You can proceed with image creation or deployment. - Offline
The server is not responding.
No imaging operations can be performed.
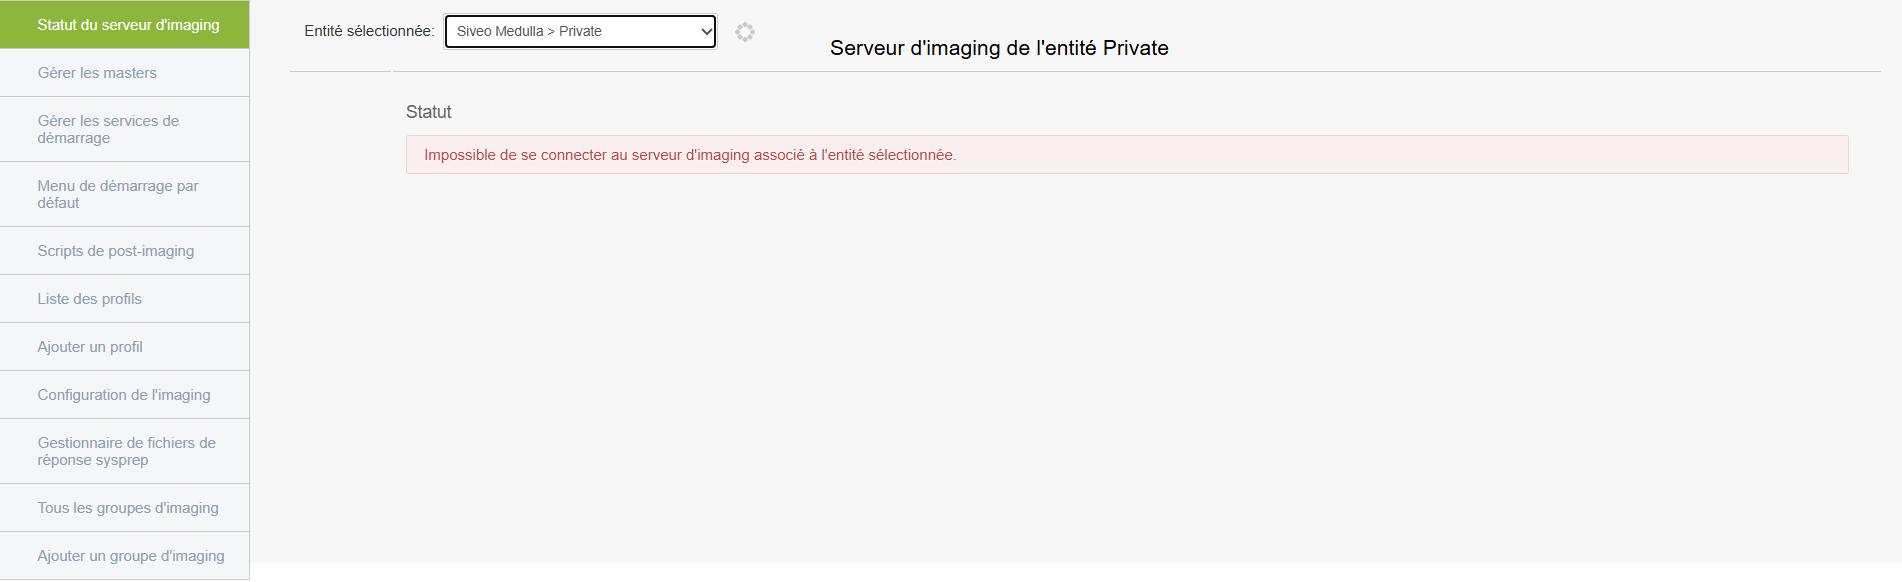
Recommended action: contact the administrator or technical support. - Connection error
The server is reachable, but the connection fails (often due to a configuration or network communication issue).
Operations are blocked.
Recommended action: report the issue to the technical team.
"Private" entity with connection error
Even if the server appears to be accessible, communication is not working.
The deployment will fail upon launch because the connection between Medulla and the server is broken.
"Public" entity with successful connection

If there are no errors and the server is online, this means the server is active and ready for use; it will therefore display various statistics as shown with the "Public" entity above.
In this case, it will display various information:
- Available disk space on the server: This section shows the server’s storage capacity, i.e., the space available to host system images. This space is divided into two parts called “partitions”; the first (dev/vda3) is the main partition, and the remaining free space indicates that there is room left to store images. The second is a small partition used for server boot but has no impact on deployments.
- Server load: This data provides a general overview of the server’s status, such as the duration of operation without a reboot and RAM usage
- Public entity statistics: This is information about imaging usage within the entity. Clients correspond to the machines associated with the entity; the "client has x backup images" field indicates which machines required a restore, and the number of available masters tells us how many system images are ready for deployment.
Before performing any imaging operation, verify that you are on the correct entity and that the server status is listed as “Available.”
If the status is "Offline" or "Connection Error, " do not proceed and notify the administrator or support.
Manage masters
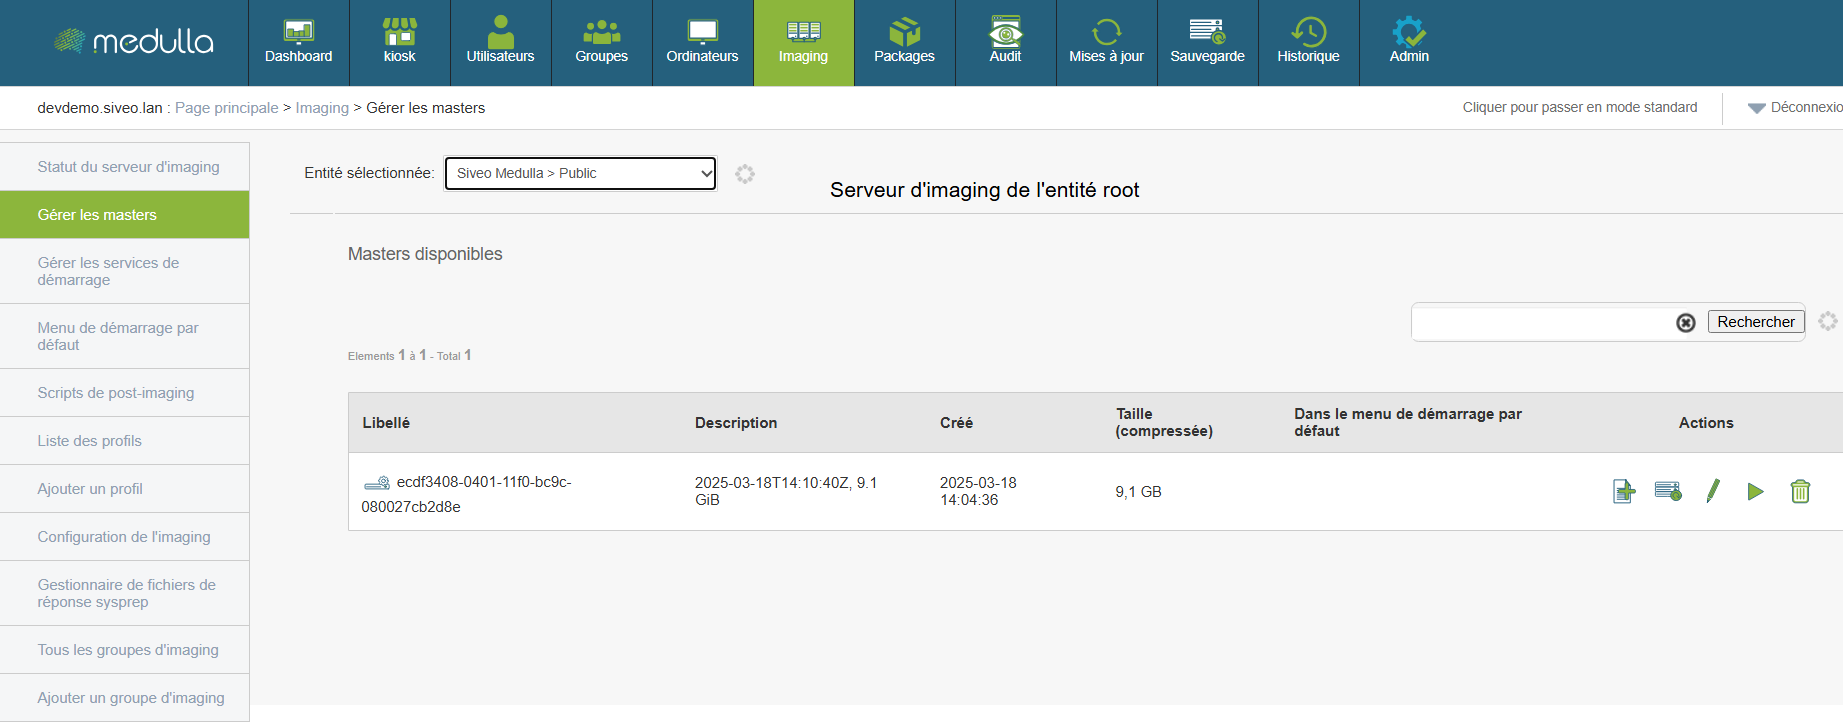
A master is a complete system image created from a configured workstation. It serves as a template for quickly and consistently deploying an environment to other machines.
Before any deployment, it is essential to know which masters are available and how to use them.
Reading the displayed information
Each master is presented as a line containing several elements:
-
Label: automatic identifier for the image.
-
Description: optional text describing the image’s content or purpose.
-
Creation date: indicates when the image was generated.
-
Compressed size: size of the image file (expressed in GB).
-
Default startup menu: specifies whether the image is used automatically during network startup.
-
Actions: set of options available for the image.
Use a master for deployment
-
Select a master from the list.
-
Check its date, description, and size to ensure it matches what you want to deploy.
-
Select the image as the basis for deploying one or more workstations via the dedicated interface.
The master system will be automatically installed on the target workstations, without requiring manual intervention on each machine.
Actions available for each image
For each master, you can perform several operations:
Before using a master, verify that it matches the desired configuration, including the operating system, version, and installed software. Only delete a master if you are certain it is no longer in use, as this action is irreversible. If you are unsure which image to choose or what action to take, it is recommended that you contact your technical support representative for guidance.
Manage startup services

Boot services allow machines to boot an image from the network (via PXE, for example).
To configure
You can
-
Enable or disable certain services
-
Customize the boot process to suit your environment
Default startup menu
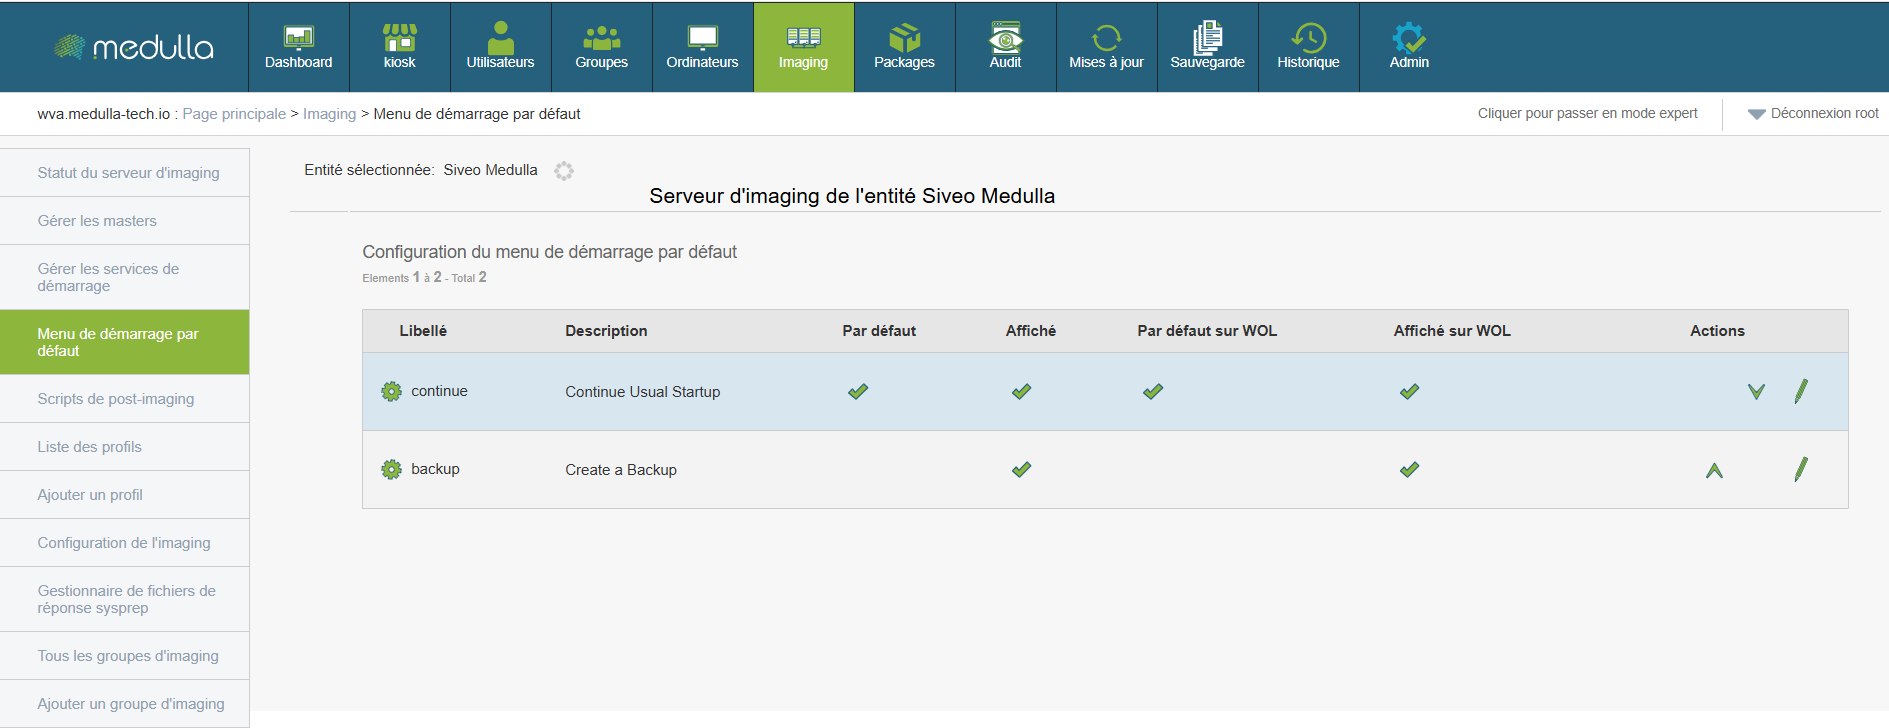
This section allows you to choose between automatic or manual behavior when machines start up.
Access
Available options
You can edit each option to adjust:
-
Default selection
-
Classic startup display or WOL (Wake On LAN)
Post-imaging scripts
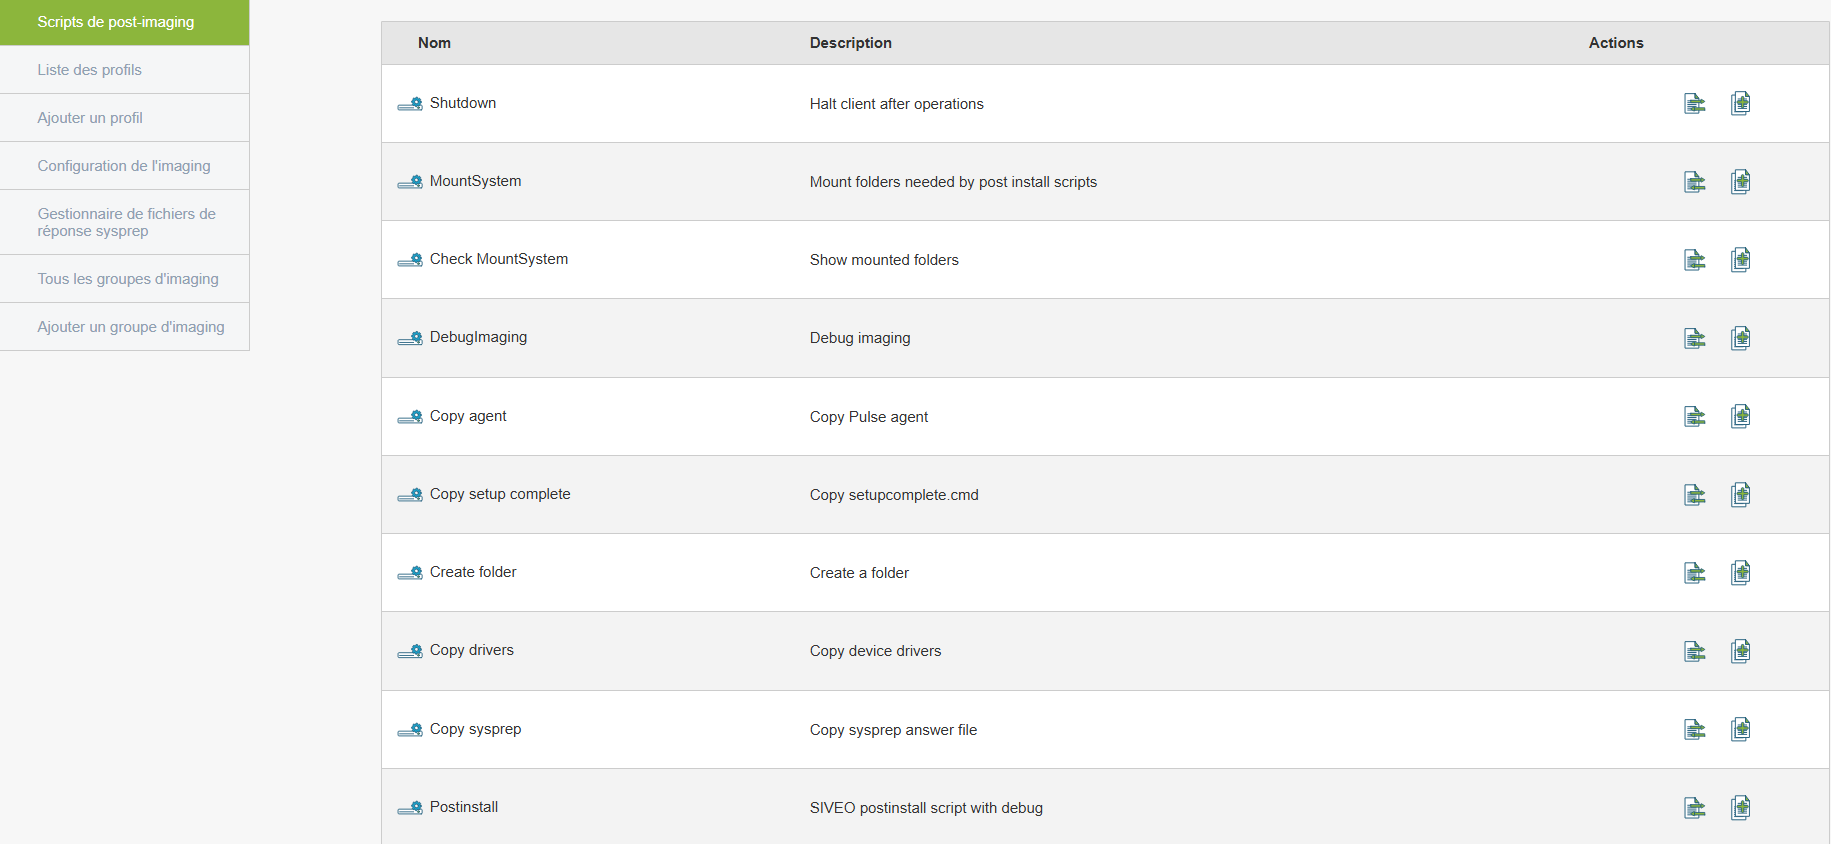
Allows you to automate actions after an image is deployed (such as installing software or configuring the network).
To create/edit a script
MountSystem
CopySysprep (the name of your sysprep without parentheses)
CopyRunAtOnce
CopyAgent
CopyDrivers
UseOEMBiosLicence (if you are using Windows OEM licenses)
-
Associate it with a deployment process
Here is what the post-install script options do:
MountSystem: copies the master image to the machine, mounts the partition(s), and detects the mount points for the various operations.
CopySysprep: retrieves the registered hostname from the PXE (the MAC/hostname association), adapts it in the answer file, and copies it to the Windows image under a generic name, unatended.xml.
CopyRunAtOnce: copies the setupcomplete.cmd file, which will be executed on the final Windows reboot. This file primarily serves to delete the unatended.xml file, which likely contains a user with domain join permissions.
CopyAgent: copies the Medulla-Agent-windows-FULL-latest.exe agent; it is also possible to pass a parameter to select the agent to deploy.
CopyDrivers: Copies the default drivers required by Windows 10.
UseOEMBiosLicence: Copies the license present in the BIOS and enters it into the post-installation sysprep file.
How Imaging Works
import_master.shOPTIONAL
Once the machine is properly registered, you will see the "backup" option in the menu to save the computer's image in order to create a master.
- First, you must back up a computer running a fresh copy of Windows straight out of the box. Then, when you boot it up, you must skip the OOBE (Out of Box Experience, the questions during Windows installation)
- Make sure there is no "pending reboot"; here is the command to check for one:
- You can then perform some basic Windows configurations if needed, such as creating a user account, etc.
- Run the prepare-master.ps1 script found here:
- Reboot the machine.
Creating a master