Installing Debian OS for a Medulla server
Technical Specifications
|
Prerequisites – Server Sizing |
||
|
Main Server |
OS |
Debian 12.x |
|
Architecture |
x86-64 |
|
|
CPU |
8 cores |
|
|
RAM |
8 GB |
|
|
Partition / |
20 GB in EXT4 |
|
|
/var partition |
At least 400 GB in XFS or a mount point on a storage array |
|
|
Multi-site relay servers (if applicable) |
OS |
Debian 12.x |
|
Architecture |
X86-64 |
|
|
CPU |
4 cores |
|
|
RAM |
8 GB |
|
|
Partition / |
20 GB in EXT4 |
|
|
/var partition |
At least 400 GB in XFS or a mount point on a storage array |
|
The disk space on the DMZ relay server can be reduced to 200 GB on the /var partition
Debian Server Installation
Summary:
- Separate only the /var partition from / and configure them as LVM volumes
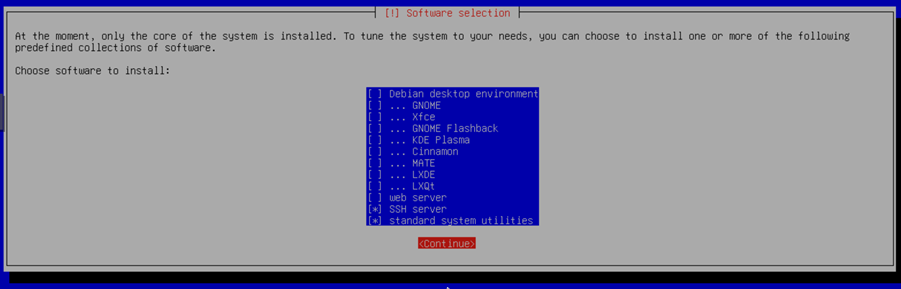
- Install the SSH server and standard system utilities
- Do not install antivirus software or a firewall
- Set up an account that
o can use sudo without a password
o can log in from the IP address 94.130.207.190
o can log in using the following key:
ssh-rsa AAAAB3NzaC1yc2EAAAADAQABAAABgQCScgwfwJKM5BtgzAYu6FEeJ5jW3onkzFp8D8piLR22kWbRcT/AJ1z0jhS5ZDtn6mumfidVPFbLkDf382u54pOU6JGwy9GhvEIXOSlzgxZMH5kcfeBE/8Ovr9zLtbRKsWQN9YUSt5y6lmcSxuQNVhkRy49/593oamVJACSitSVJ68716hj0gp4N8gUMVkvNgEBDZVSPe0DXz2h7JEzOKx2ejjRaw22ve+qARTw+60gMP0aCLGt/m0cyv+90AZigQwWIPcUk+bBRJn3Ku+Bkw+JuLYURlVc4xoTvT1JTWKXAzMln4nrlisIc9Ex5eEHSkvs/fgJCgU28Fza5n5mBj/pbQRY+/AWLjvBVuLiVReO7hq60fhrX9+j7MWMCYCZQiHbk/r7OprLyl2yGFX1DbgRGF1Sk2R9DtqRhwPzPxtQ7ZtKSjIhLjrZxJ/YJLHSoUsw+4CHprjzU0gXBt1RCQoyhYqEGcnuFyfd9dIBXCINkmp4jfz7CQjrC8uPqAtS1zQU= support@support
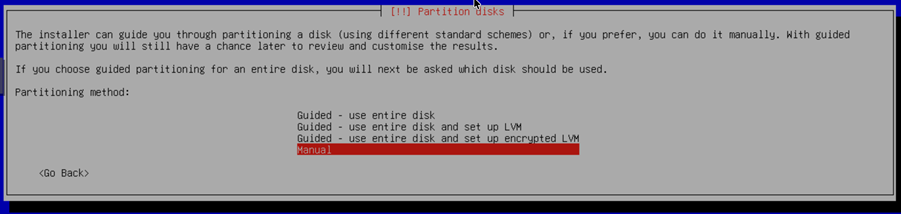
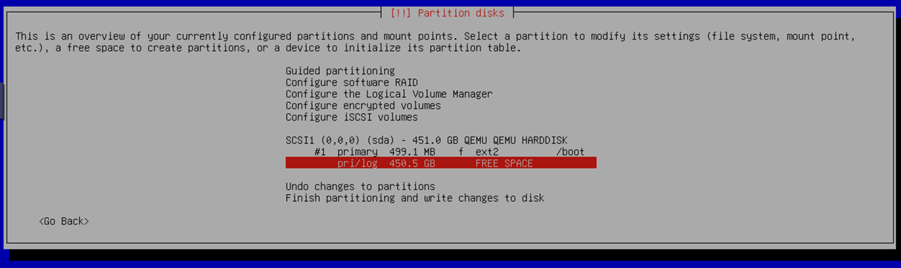
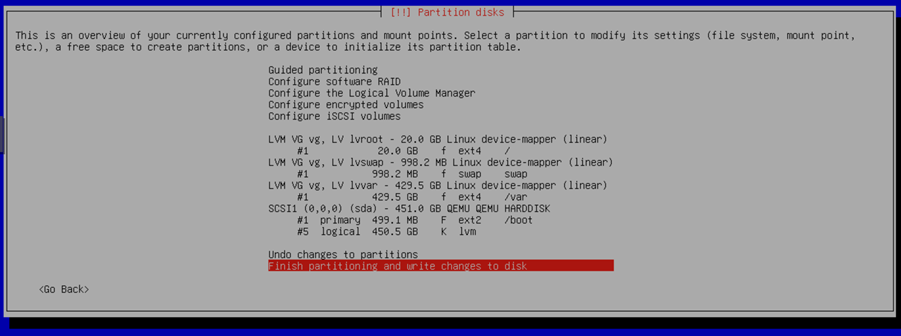
Disk Partitioning Configuration
Partition the disks according to the instructions below:
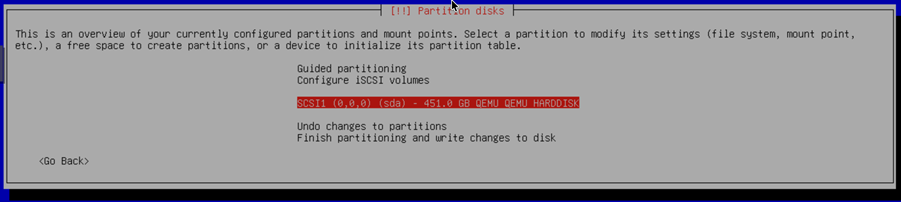
Perform manual partitioning

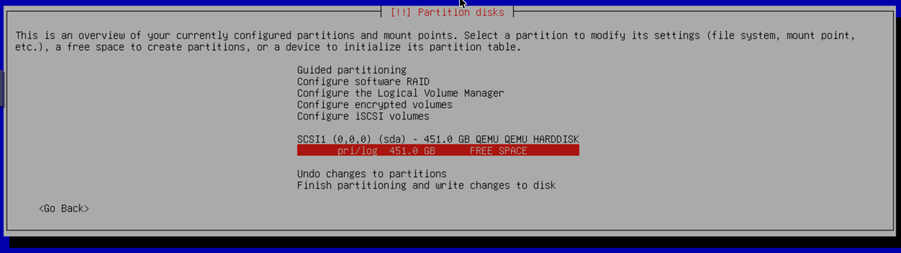
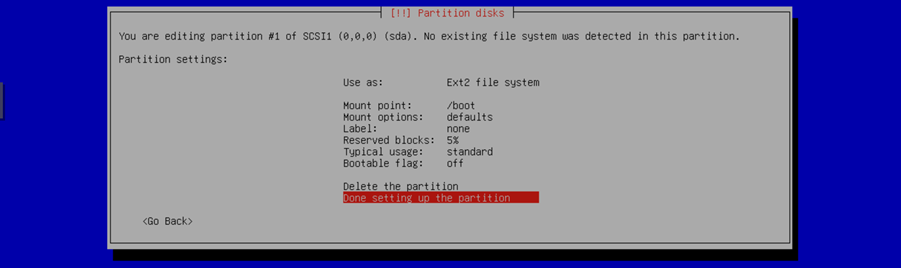
Creating the /boot Partition


Creating the LVM


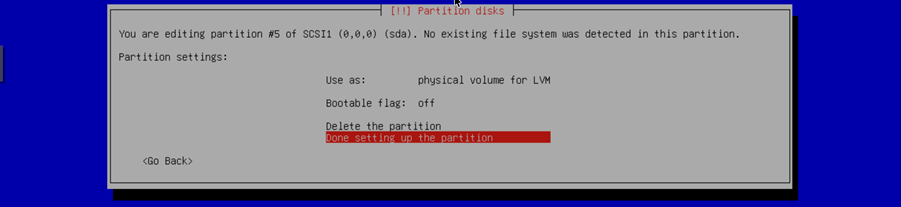
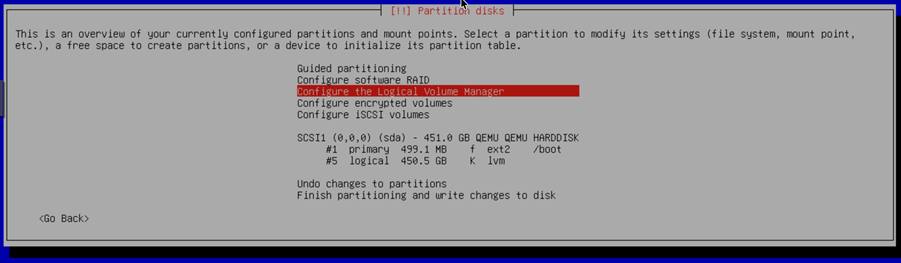
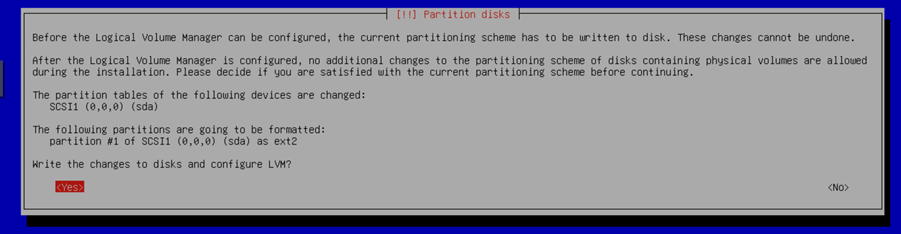
Creating the volume group vg


Create the logical volume lvroot


Repeat for the lvswap and lvvar volumes


To obtain the following LVM layout:


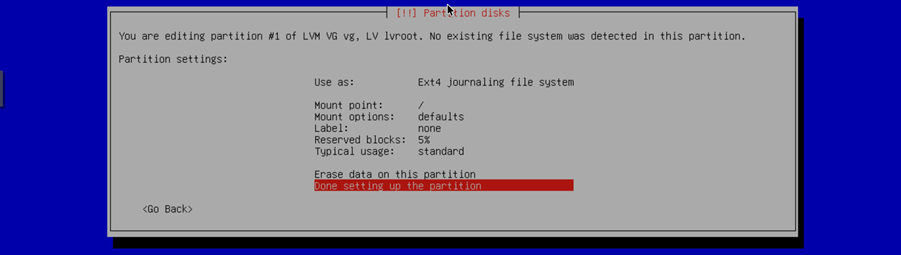
Configure the / partition
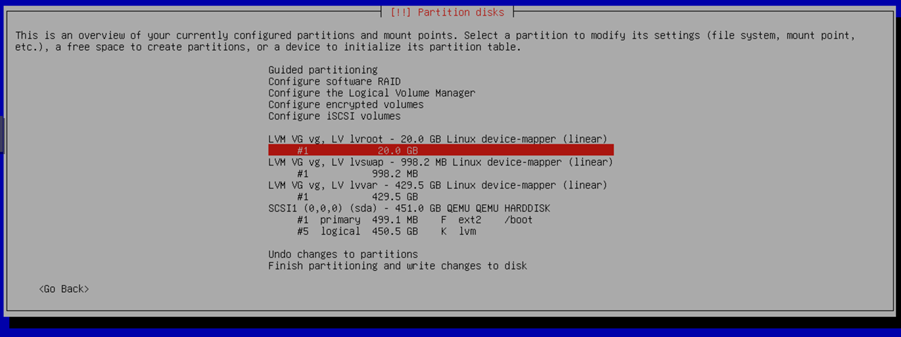
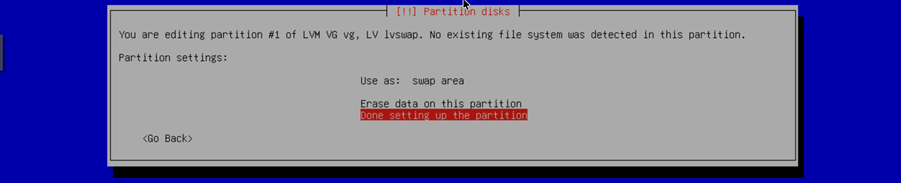
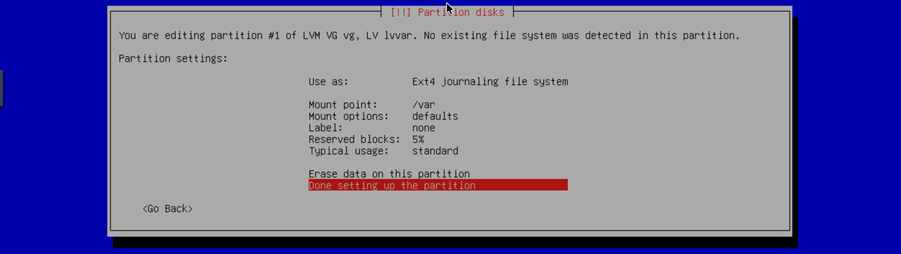
Repeat for each of the swap and /var partitions:
To obtain the following partitioning scheme:
Installing packages
Disabling IPv6
Before starting the Medulla installation, it is recommended that you check the IPv6 configuration of the Debian server.
In some environments, IPv6 can cause connectivity or network resolution issues.
If necessary, follow the dedicated FAQ:
Server Verification
1. Download the verification script from https://dl.medulla-tech.io/nc/check_server_before_install.sh
wget https://dl.medulla-tech.io/nc/check_server_before_install.sh2. Run the following commands:
chmod +x check_server_before_install.sh

./check_server_before_install.sh
3.
All the script's tests must pass. Once they do, you can request the installation script via the contact form:
https://github.com/Medulla-Tech/Medulla/blob/master/README.fr.md
If you have a support contract, please send the results to delivery@medulla-tech.io. If not, please contact the "Sales" department via our websiteat medulla-tech.io.
Here are the most common errors:
1. Core Dump Limits (limits)
Context: The file /etc/security/limits.d/10-coredump-debian.conf defines the maximum size of "core dump" files. Our script expects specific values that do not match the current configuration.
How to fix it: Edit the file mentioned above to match the expected settings.
-
Open the file:
sudo nano /etc/security/limits.d/10-coredump-debian.conf -
Adjust the lines so they look like this:
-
* hard core infinity -
root hard core infinity -
* soft core 0 -
root soft core 0
-
Suggested sources: Debian documentation on limits.conf and core dumps.
2. Number of open files (lsof)
Context: The lsof lines for users xxx and messagebus indicate that the number of currently open files deviates from the value expected by the verification script (often because services are already running or are misconfigured).
How to fix: This is often just for information, but if you need to reduce these numbers:
-
Identify what these users are doing:
ps -u user_id_with_error. -
Restart the associated services (e.g., `
sudo systemctl restart dbus` for `messagebus`). -
If the expected values are too strict for your use case, you may need to adjust the validation script itself or the global
ulimitsettings.
Suggested resources: lsof manual and file descriptor management in Linux.
3. systemd Settings (NPROC and SIGPENDING)
Context: The DefaultLimitNPROC (maximum number of processes) and DefaultLimitSIGPENDING (pending signals) values must be31541.
How to fix: You must force these values in the global systemd configuration so that they match the expected values exactly.
-
Edit the configuration file:
sudo nano /etc/systemd/system.conf -
Uncomment or add the following lines:
-
DefaultLimitNPROC=31541 -
DefaultLimitSIGPENDING=31541
-
-
Reload the configuration and restart (or use `
systemctl daemon-reexec`).
Suggested sources: systemd-system.conf documentation on freedesktop.org.
4. Kernel parameter (kernel.pid_max)
Background: The kernel.pid_max value defines the maximum number of process IDs (PIDs) that the Linux system can allocate simultaneously. It must be greater than or equal to 4194304 to allow the application to manage a large number of tasks in parallel without overloading the kernel.
How to fix it: You must permanently configure this limit in the kernel runtime parameters (sysctl).
-
Edit the configuration file:
sudo nano /etc/sysctl.d/99-app-limits.conf(or directly/etc/sysctl.conf) -
Add the following line to the end of the file:
Plaintextkernel.pid_max=4194304 -
Apply the change immediately without rebooting using the command:
sudo sysctl --system
Suggested sources: Official Linux kernel documentation (kernel.org - sysctl/kernel.txt) and the man pages for `man sysctl.conf`.