Add a new package
Creating a package consists of setting an action (installation, uninstallation, script...) that will be deployed on one or more posts. The creation form allows you to precisely configure the behavior of the package and its execution options.
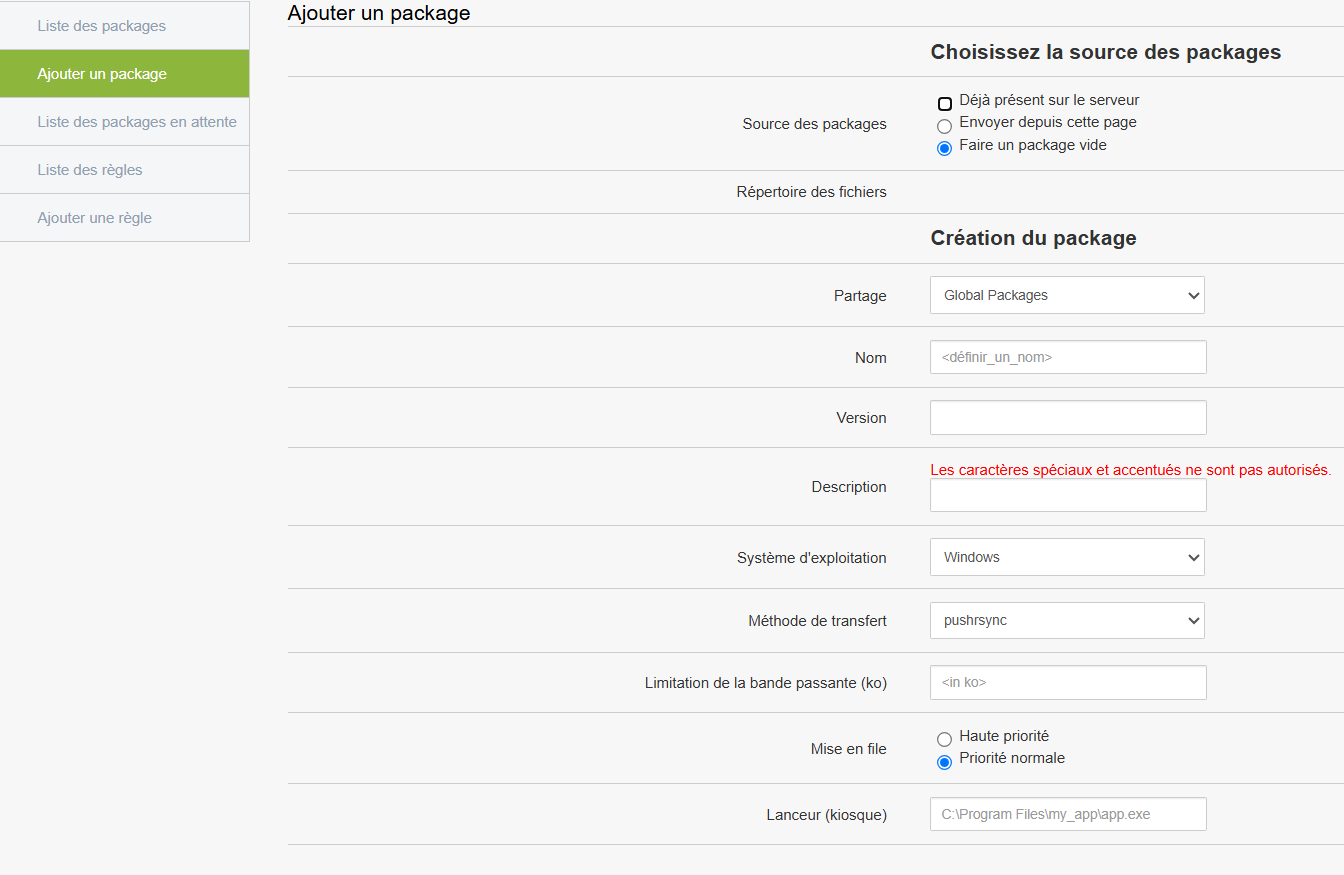
Then select the original files to use in the package. Four options are available:
Already on the server
Use files previously transferred to the server.Send from this page
Import installation files directly from your desktop.Make an empty package
Creates a package without initial content, to be completed later.File directory
Use a shared directory containing the files to deploy.
General information to be provided
Sharing
ChooseGlobal Packages to make the package visible throughout the platform.
Name
Give an explicit name to the sample package: Install_Chrome
Special and accented characters are not allowed.
Version
Indicate an example version number:1.0.0.
Description
Briefly summarize the objective of the package.
Operating system
Select the target OS, for example:Windows.
Define the technical modalities of deployment
Method of transfer
Generally use pushrsync (recommended).
Bandwidth limitation
Optional value to limit the speed of the transfer ex 500
Choose betweenHigh priority or Normal priority, depending on the urgency of deployment.
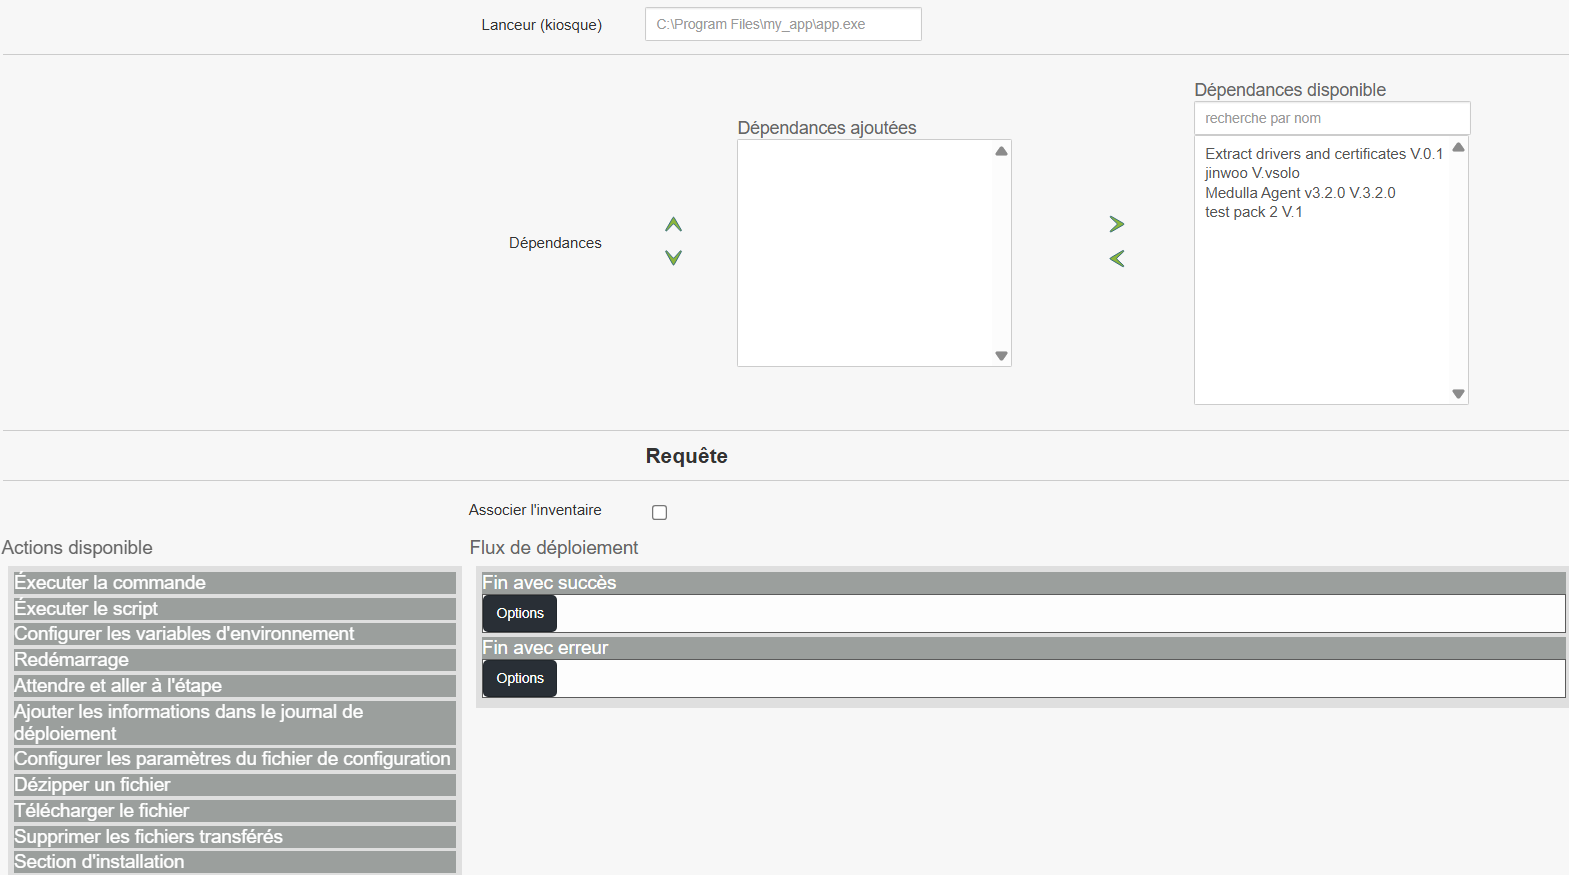
Launcher
Specify the path to the executable file that must be started after installation (e.g.:C:\Program Files\my_app\app.exe).
If your application requires other components to work
Find and add the necessary dependencies via the available list (examples:Extract drivers, Medulla Agent).
Added dependencies will appear in the corresponding section.
Associate with inventory
Enable this option to allow the package to be tracked after installation.
You can add custom actions to the package, depending on your needs:
Run a command or script
Configure environment variables
Restart post after installation
Wait and move on to the next step
Add information to deployment log
Edit or configure a parameter file
Uncompress, download or delete files
The package may consist of several stages depending on its life cycle
Installation Section : for the first installation
Update Section : when switching to a new version
Disinstallation Section : to delete the program
To interact with the end user
Notification booth : Display information in user space
User notification : Message displayed on the screen
Question to the user : Conditional interaction (e.g. timing)
Deferral options : Allows to delay installation
Define package behavior at the end of the process
Successful end
The step can be namedEND_SUCCESS. Allows to trigger a final action.End with error
The step can be namedEND_ERROR. To manage errors or failures in deployment.
Inventory
Option available if a change in the position is detected following deployment.Remove Package
Enable this option if the package should be deleted after execution (rarely used in standard deployments).
Once all sections are configured and verified
Click Add to save the package.
It will then be accessible from the library to be used in a deployment rule or triggered manually.