
Deploy a master to multiple computers using multicast
Applies to: Medulla – Imaging / Multicast
Version: All versions
Environment: On-Premise (with or without a relay server) / Dedicated SaaS with a relay server
Category: Imaging / Multicast / Master deployment
Multicast allows you to deploy the same master to multiple computers simultaneously, using a shared network transmission rather than an individual transfer to each workstation.
This feature is used from an imaging group in Medulla.
Before you begin, verify that the imaging server is operational, that a master is available, and that the target computers can boot via PXE and communicate with the imaging server.
Caution:
Deploying a master may overwrite the data on the destination computers’ disks. Verify the selected computers and the master being used before starting the operation.
Creating an imaging group
In the Imaging module, select the “Add an imaging group” menu, then choose the relevant server.
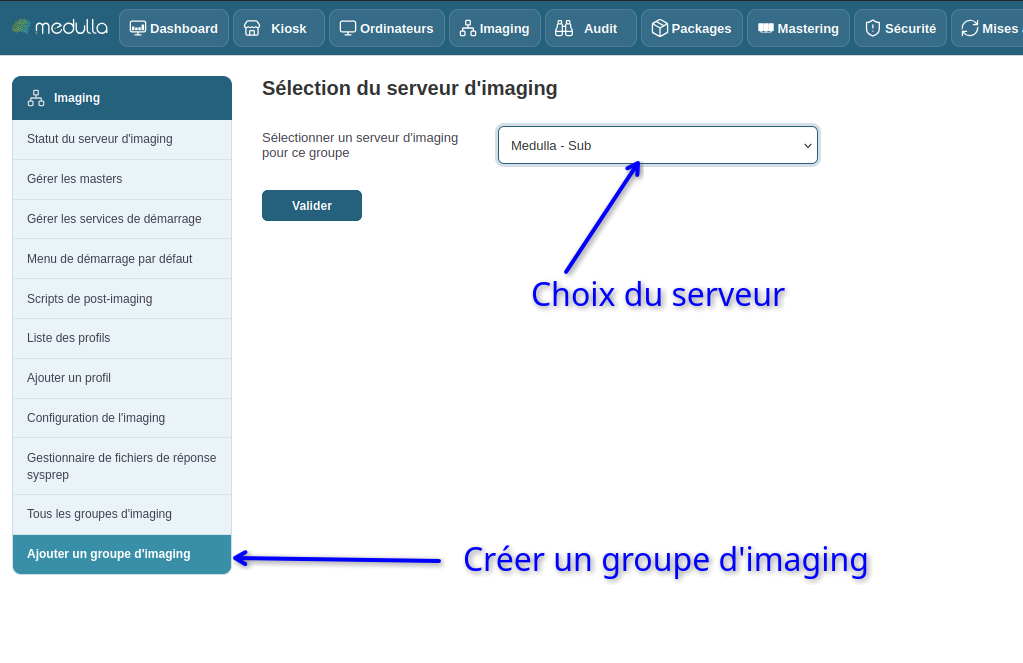
The next screen allows you to select the computers that will make up the imaging group.
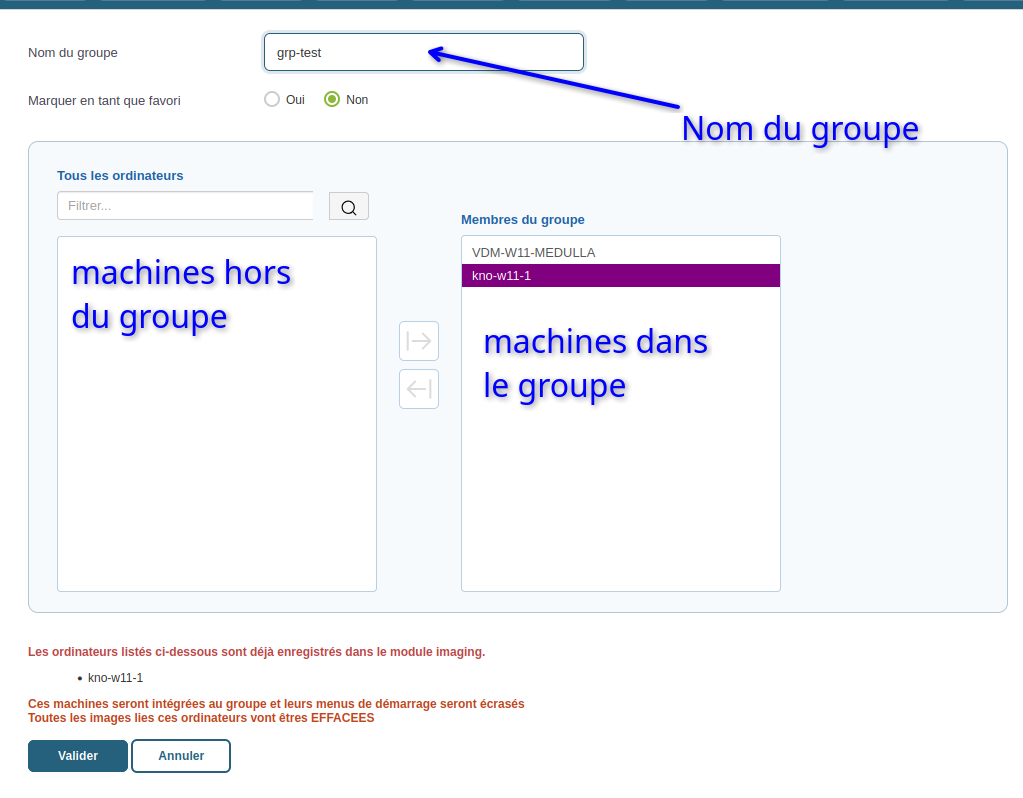
The message displayed in red indicates that a computer already has a custom imaging menu.
Caution:
If a computer already has a custom menu, it will be replaced by the imaging group’s menu. Verify the selected computers before continuing.
The next page allows you to set the group’s default settings. Review the suggested values, then confirm to complete the creation.
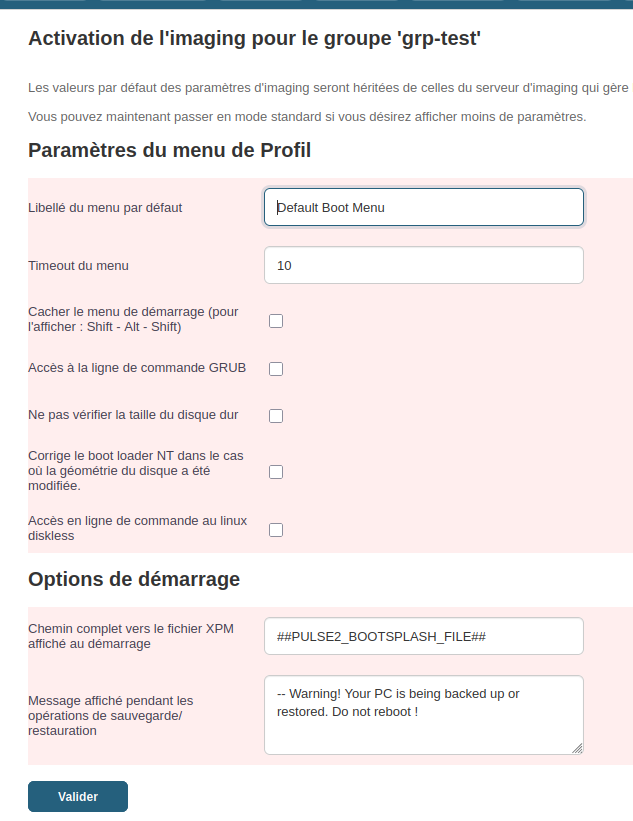
The imaging group has now been created.
Group management
After the group is created, Medulla displays its management page. The multicast options are accessible from this interface.
To return to this page later, follow this path:
Imaging > All imaging groups
Next to the relevant group, select “Imaging management” from the list of available actions.
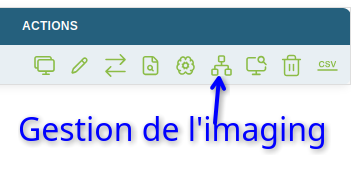
Configure multicast for the group
From the imaging management page associated with the group, open the “Master” tab, then select the “Multicast init” action.
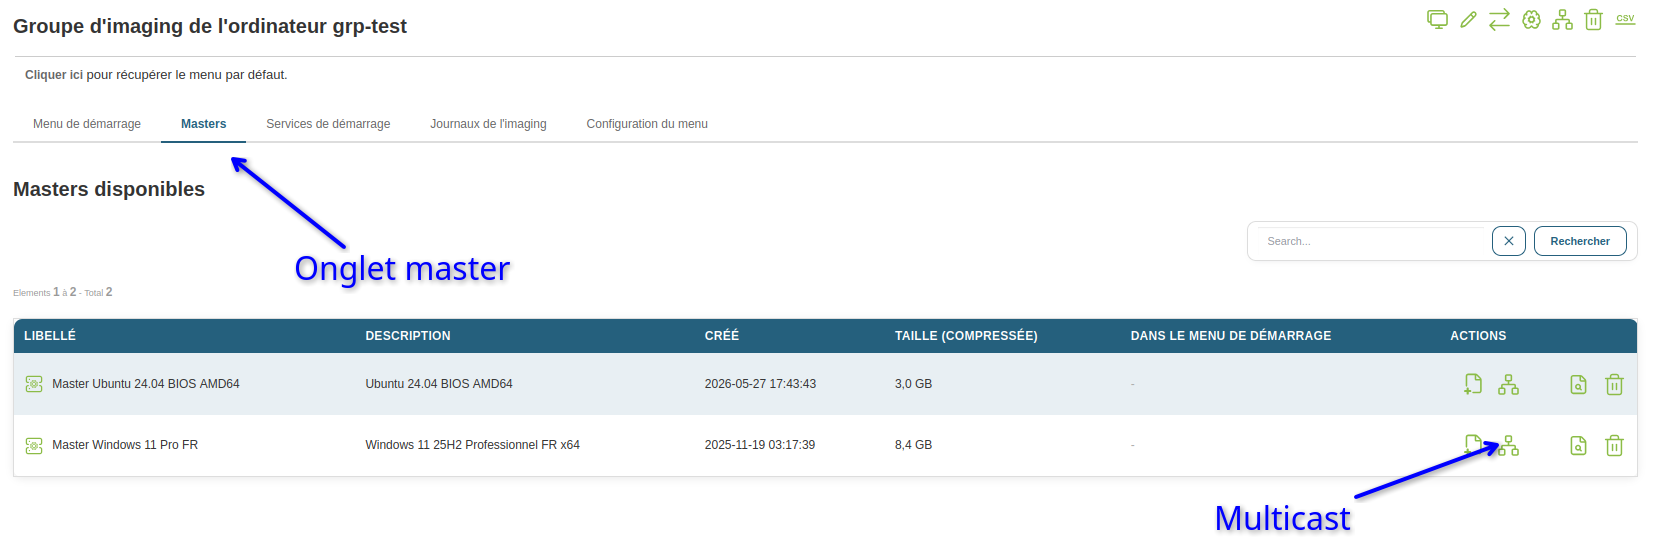
A configuration window opens, allowing you to define the multicast session parameters:
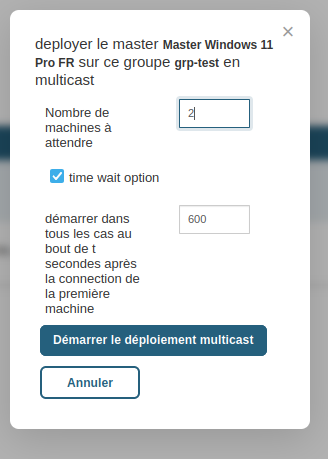
- Number of machines to wait for: the number of computers that must join the multicast session before the transfer begins.
- Timeout: The maximum amount of time to wait for computers before starting the transfer with the clients currently present, as per DRBL’s operation.
For example, for a session configured to wait for 2 computers with a timeout of 600 seconds, the server waits up to 10 minutes for the computers to join the session.
If both computers are present before the timeout expires, the transfer can begin without waiting for the timeout to elapse.
Note:
The number of computers and the timeout are used to synchronize the start of the transfer. They do not replace the action of initiating the multicast deployment described below.
Launch the multicast
Multicast is now configured, but the deployment has not yet been launched.
To start it, return to the imaging server status page (home page), then select the entity on which multicast has been configured.
Then click “Start multicast deploy.”
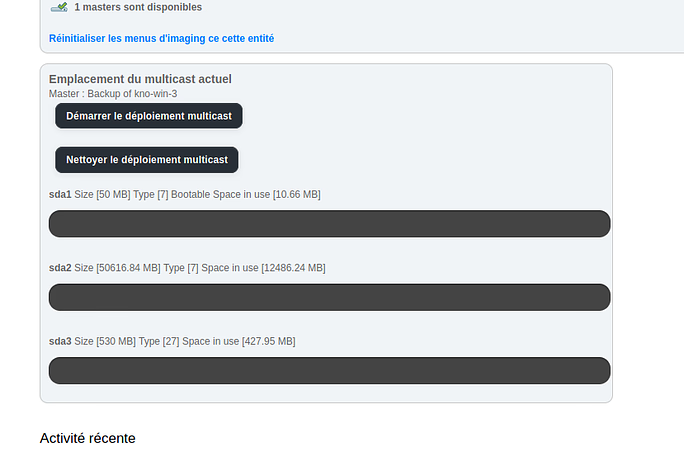
Caution:
Before starting the deployment, verify that the selected master matches the target computers. The restoration may overwrite the partitions and data on the target disk.
Boot the computers via PXE
The next step is to boot the computers in the group via PXE so that they join the multicast session.
The computers must be able to access the imaging server on the network. If they are on different VLANs, the network configuration must allow for the communications required for multicast.
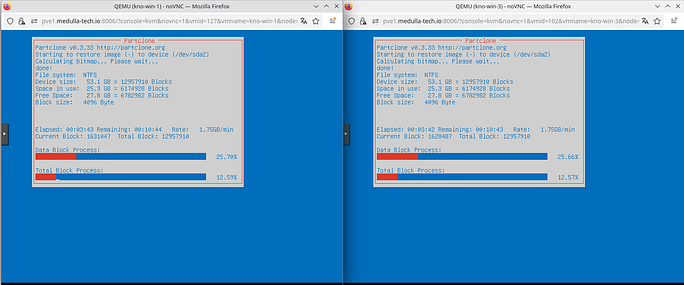
In the example below, the computers were not booted at exactly the same time. Nevertheless, they joined the same session and are synchronized for image deployment.
Note:
The computers do not need to be powered on at exactly the same time. However, they must join the session during the wait period specified by the multicast settings.
Additional information
During the initialization and launch of multicast, several files may be created or used on the relevant imaging server.
These files are useful for understanding how DRBL works and diagnosing any deployment issues.
/tmp/multicast.sh: script used to start the multicast./tmp/multicastdescription.txt: file containing the multicast session description information./var/lib/pulse2/imaging/bootmenus/default: Boot menu file required by DRBL to launchdrbl-ocs./var/lib/pulse2/imaging/bootmenus/default_skeleton: a copy of the default menu used by the imaging mechanism./tmp/udp-sender.log: log file for tracking the progress of the multicast transfer.
To verify the presence of these files:
ls -l /tmp/multicast.sh
ls -l /tmp/multicastdescription.txt
ls -l /tmp/udp-sender.log
ls -l /var/lib/pulse2/imaging/bootmenus/default*
To monitor the progress of the multicast in real time:
tail -f /tmp/udp-sender.logDRBL processes are also launched during deployment.
To verify their presence:
ps aux | grep '[d]rbl-ocs'Example of a DRBL command observed during a multicast deployment:
/bin/bash /usr/sbin/drbl-ocs \
-sc0 -b -g auto -e1 auto -e2 -x -j2 \
--clients-to-wait 2 \
--max-time-to-wait 600 \
-l en_US.UTF-8 \
-h 127.0.0.1 \
startdisk multicast_restore \
971e5909-a28f-11f0-932f-bc241183ccf7 sda
In this example:
--clients-to-wait 2: the server waits for 2 computers to join the multicast session.--max-time-to-wait 600: the maximum wait time is set to 600 seconds, or 10 minutes.multicast_restore: operation to restore an image via multicast.971e5909-a28f-11f0-932f-bc241183ccf7: ID of the master used in this example.sda: destination disk used in this example.
Caution:
The disk sda is the one used in this example. The name of the target disk may vary depending on the computers’ hardware configuration. It is essential to verify the destination disk before performing any restoration.
This information allows you to verify, in particular:
- that the multicast deployment process has started successfully;
- that the number of expected computers matches the configuration;
- that the applied timeout is correct;
- that the transfer is in progress or complete, based on the information available in the logs.
Troubleshooting:
If a problem occurs, first check /tmp/udp-sender.log and verify that the drbl-ocs processes are running.
Files generated by Medulla and DRBL must not be manually modified without prior analysis.
Expected result:
The computers in the group join the multicast session upon PXE boot. The imaging server transmits the master to the participating computers, which can then be restored simultaneously.